Lexmark X7550 User's Guide (Mac) - Page 39
Adjusting copy quality, Collating copies using the control panel
 |
View all Lexmark X7550 manuals
Add to My Manuals
Save this manual to your list of manuals |
Page 39 highlights
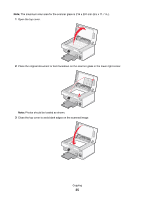
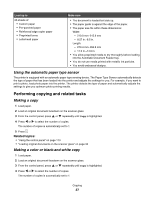
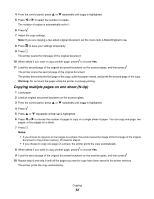
5 Press . 6 Adjust the copy settings as needed. To make a borderless copy, choose Borderless under Resize. For more information, see "Understanding Copy and the Copy Mode menu" on page 117. 7 After making your choices, press to save your settings temporarily. 8 Press . Note: To prevent smudging or scratching, avoid touching the printed surface with your fingers or sharp objects. For best results, remove each printed sheet individually from the paper exit tray, and allow the prints to dry at least 24 hours before stacking, displaying, or storing. Related topics: • "Using the control panel" on page 113 Adjusting copy quality 1 Load paper. 2 Load an original document facedown on the scanner glass. 3 From the control panel, press or repeatedly until Copy is highlighted. 4 Press or to select the number of copies. The number of copies is automatically set to 1. 5 Press . 6 Press repeatedly until Quality is highlighted. 7 Press or to choose among the following options: Normal, Photo, Auto, or Draft. 8 Press to preview the output. 9 Press to adjust the settings. 10 Repeat step 8 to step 9 as needed. 11 Press to save your settings temporarily. 12 Press . Related topics: • "Loading original documents on the scanner glass" on page 34 • "Using the control panel" on page 113 Collating copies using the control panel If you print multiple copies of a document, you can choose to print each copy as a set (collated) or to print the copies as groups of pages (not collated). Collated Not collated Copying 39
-
 1
1 -
2
-
3
-
4
-
5
-
6
-
7
-
8
-
9
-
10
-
11
-
12
-
13
-
14
-
15
-
16
-
17
-
18
-
19
-
20
-
21
-
22
-
23
-
24
-
25
-
26
-
27
-
28
-
29
-
30
-
31
-
32
-
33
-
 34
34 -
 35
35 -
 36
36 -
 37
37 -
 38
38 -
 39
39 -
 40
40 -
 41
41 -
 42
42 -
 43
43 -
 44
44 -
45
-
46
-
47
-
48
-
49
-
50
-
51
-
52
-
53
-
54
-
55
-
56
-
57
-
58
-
59
-
60
-
61
-
62
-
63
-
64
-
65
-
66
-
67
-
68
-
69
-
70
-
71
-
72
-
73
-
74
-
75
-
76
-
77
-
78
-
79
-
80
-
81
-
82
-
83
-
84
-
85
-
86
-
87
-
88
-
89
-
90
-
91
-
92
-
93
-
94
-
95
-
96
-
97
-
98
-
99
-
100
-
101
-
102
-
103
-
104
-
105
-
106
-
107
-
108
-
109
-
110
-
111
-
112
-
113
-
114
-
115
-
116
-
117
-
118
-
119
-
120
-
121
-
122
-
123
-
124
-
125
-
126
-
127
-
128
-
129
-
130
-
131
-
132
-
133
-
134
-
135
-
136
-
137
-
138
-
139
-
140
-
141
-
142
-
143
-
144
-
145
-
146
-
147
-
148
-
149
-
150
-
151
-
152
-
153
-
154
-
155
-
156
-
157
-
158
-
159
-
160
-
161
-
162
-
163
-
164
-
165
-
166
-
167
-
168
-
169
-
170
-
171
-
172
-
173
-
174
-
175
-
176
-
177
-
178
-
179
-
180
-
181
-
182
-
183
-
184
-
185
-
186
-
187
-
188
-
189
-
190
-
191
-
192
-
193
-
194
-
195
-
196
-
197
-
198
-
199
-
200
-
201
-
202
-
203
-
204
-
205
-
206
-
207
-
208
-
209
-
210
-
211
-
212
-
213
-
214
-
215
-
216
-
217
-
218
-
219
-
220
-
221
-
222
-
223
-
224
-
225
-
226
-
227
 |
 |