Lexmark X7550 User's Guide (Mac) - Page 87
Blocking unwanted changes to fax settings, Customizing settings using the Fax Setup Utility
 |
View all Lexmark X7550 manuals
Add to My Manuals
Save this manual to your list of manuals |
Page 87 highlights
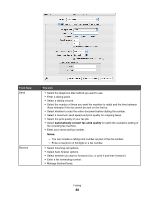
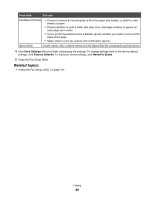
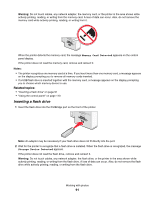
d Press . e Press or repeatedly until the Fax Blocking submenu is highlighted. f Press . g Press or h Press or repeatedly until you reach the Block No-ID menu item. repeatedly until On appears. i Press to save and exit. 4 If you want to print a list of blocked faxes: a From the control panel, press or repeatedly until Fax is highlighted. b Press . c Press or repeatedly until the Fax Setup submenu is highlighted. d Press . e Press or repeatedly until the Fax Blocking submenu is highlighted. f Press . g Press or repeatedly until you reach Print Blocked Fax List. h Press to print the list. Note: This feature is only available when blocked fax entries exist. Blocking unwanted changes to fax settings This feature blocks network users from changing fax settings through the Fax Setup Utility. 1 From the control panel, press or repeatedly until Setup is highlighted. 2 Press . 3 Press or repeatedly until the Change Printer Default Settings submenu is highlighted. 4 Press . 5 Press or repeatedly until you reach the Block Host Settings menu item. 6 Press or repeatedly until On appears. 7 Press to save and exit. Customizing settings using the Fax Setup Utility You can adjust the fax settings in the Fax Setup Utility. These settings apply to the faxes you send or receive. 1 From the Finder desktop, double-click the Lexmark 7500 Series folder. 2 Double-click the 7500 Series Fax Setup Utility icon. 3 From the Fax Setup Utility dialog, choose the printer from the Device pop-up menu. Note: If you are using a network printer to send a fax, the MAC address of your printer is shown on the Device pop-up menu. Otherwise, only the printer name is shown. Faxing 87
-
 1
1 -
2
-
3
-
4
-
5
-
6
-
7
-
8
-
9
-
10
-
11
-
12
-
13
-
14
-
15
-
16
-
17
-
18
-
19
-
20
-
21
-
22
-
23
-
24
-
25
-
26
-
27
-
28
-
29
-
30
-
31
-
32
-
33
-
34
-
35
-
36
-
37
-
38
-
39
-
40
-
41
-
42
-
43
-
44
-
45
-
46
-
47
-
48
-
49
-
50
-
51
-
52
-
53
-
54
-
55
-
56
-
57
-
58
-
59
-
60
-
61
-
62
-
63
-
64
-
65
-
66
-
67
-
68
-
69
-
70
-
71
-
72
-
73
-
74
-
75
-
76
-
77
-
78
-
79
-
80
-
81
-
 82
82 -
 83
83 -
 84
84 -
 85
85 -
 86
86 -
 87
87 -
 88
88 -
 89
89 -
 90
90 -
 91
91 -
 92
92 -
93
-
94
-
95
-
96
-
97
-
98
-
99
-
100
-
101
-
102
-
103
-
104
-
105
-
106
-
107
-
108
-
109
-
110
-
111
-
112
-
113
-
114
-
115
-
116
-
117
-
118
-
119
-
120
-
121
-
122
-
123
-
124
-
125
-
126
-
127
-
128
-
129
-
130
-
131
-
132
-
133
-
134
-
135
-
136
-
137
-
138
-
139
-
140
-
141
-
142
-
143
-
144
-
145
-
146
-
147
-
148
-
149
-
150
-
151
-
152
-
153
-
154
-
155
-
156
-
157
-
158
-
159
-
160
-
161
-
162
-
163
-
164
-
165
-
166
-
167
-
168
-
169
-
170
-
171
-
172
-
173
-
174
-
175
-
176
-
177
-
178
-
179
-
180
-
181
-
182
-
183
-
184
-
185
-
186
-
187
-
188
-
189
-
190
-
191
-
192
-
193
-
194
-
195
-
196
-
197
-
198
-
199
-
200
-
201
-
202
-
203
-
204
-
205
-
206
-
207
-
208
-
209
-
210
-
211
-
212
-
213
-
214
-
215
-
216
-
217
-
218
-
219
-
220
-
221
-
222
-
223
-
224
-
225
-
226
-
227
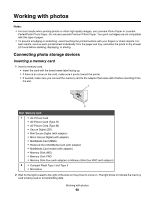
 |
 |