Lexmark X7550 User's Guide (Mac) - Page 185
Scanning takes too long or freezes the computer, Poor scanned image quality
 |
View all Lexmark X7550 manuals
Add to My Manuals
Save this manual to your list of manuals |
Page 185 highlights
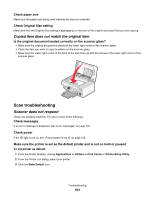
Scanning takes too long or freezes the computer These are possible causes and solutions. Try one or more of the following: Close all applications Close all programs not being used to speed up the performance of your computer. Change the resolution to a lower value 1 From the Image Capture dialog, click Scan Setup. 2 From the Resolution pop-up menu, select a lower resolution. 3 Click Scan. Poor scanned image quality These are possible solutions. Try one or more of the following: Check messages If an error message is displayed, see "Error messages" on page 197. Clean the scanner glass If the scanner glass is dirty, gently wipe it with a clean, lint-free cloth dampened with water. Change the resolution to a higher value 1 From the Finder desktop, double-click the Lexmark 7500 Series folder. 2 Double-click the Lexmark 7500 Series Center icon. 3 Click Preview/Edit to open the Scan dialog. 4 Click to open the Scan Settings drawer. 5 From the Resolution (DPI) pop-up menu on the Settings tab, choose a higher scanning resolution value. 6 Click . Are you scanning from a magazine or newspaper? If you are copying or scanning from a magazine or newspaper, see "Scanning clear images from magazines or newspapers" on page 56. Check quality of original document If the quality of the original document is not satisfactory, try using a clearer version of the document or image. Check document placement Make sure the document or photo is loaded facedown on the scanner glass in the lower right corner. Scanner unit does not close 1 Lift the scanner unit. 2 Remove any obstruction keeping the scanner unit open. 3 Lower the scanner unit. Troubleshooting 185
-
 1
1 -
2
-
3
-
4
-
5
-
6
-
7
-
8
-
9
-
10
-
11
-
12
-
13
-
14
-
15
-
16
-
17
-
18
-
19
-
20
-
21
-
22
-
23
-
24
-
25
-
26
-
27
-
28
-
29
-
30
-
31
-
32
-
33
-
34
-
35
-
36
-
37
-
38
-
39
-
40
-
41
-
42
-
43
-
44
-
45
-
46
-
47
-
48
-
49
-
50
-
51
-
52
-
53
-
54
-
55
-
56
-
57
-
58
-
59
-
60
-
61
-
62
-
63
-
64
-
65
-
66
-
67
-
68
-
69
-
70
-
71
-
72
-
73
-
74
-
75
-
76
-
77
-
78
-
79
-
80
-
81
-
82
-
83
-
84
-
85
-
86
-
87
-
88
-
89
-
90
-
91
-
92
-
93
-
94
-
95
-
96
-
97
-
98
-
99
-
100
-
101
-
102
-
103
-
104
-
105
-
106
-
107
-
108
-
109
-
110
-
111
-
112
-
113
-
114
-
115
-
116
-
117
-
118
-
119
-
120
-
121
-
122
-
123
-
124
-
125
-
126
-
127
-
128
-
129
-
130
-
131
-
132
-
133
-
134
-
135
-
136
-
137
-
138
-
139
-
140
-
141
-
142
-
143
-
144
-
145
-
146
-
147
-
148
-
149
-
150
-
151
-
152
-
153
-
154
-
155
-
156
-
157
-
158
-
159
-
160
-
161
-
162
-
163
-
164
-
165
-
166
-
167
-
168
-
169
-
170
-
171
-
172
-
173
-
174
-
175
-
176
-
177
-
178
-
179
-
 180
180 -
 181
181 -
 182
182 -
 183
183 -
 184
184 -
 185
185 -
 186
186 -
 187
187 -
 188
188 -
 189
189 -
 190
190 -
191
-
192
-
193
-
194
-
195
-
196
-
197
-
198
-
199
-
200
-
201
-
202
-
203
-
204
-
205
-
206
-
207
-
208
-
209
-
210
-
211
-
212
-
213
-
214
-
215
-
216
-
217
-
218
-
219
-
220
-
221
-
222
-
223
-
224
-
225
-
226
-
227
 |
 |