Netgear DGND3300v2 User Manual - Page 155
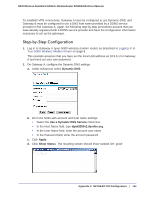
Step-by-Step Configuration, On Gateway A, con the Dynamic DNS settings.
 |
View all Netgear DGND3300v2 manuals
Add to My Manuals
Save this manual to your list of manuals |
Page 155 highlights
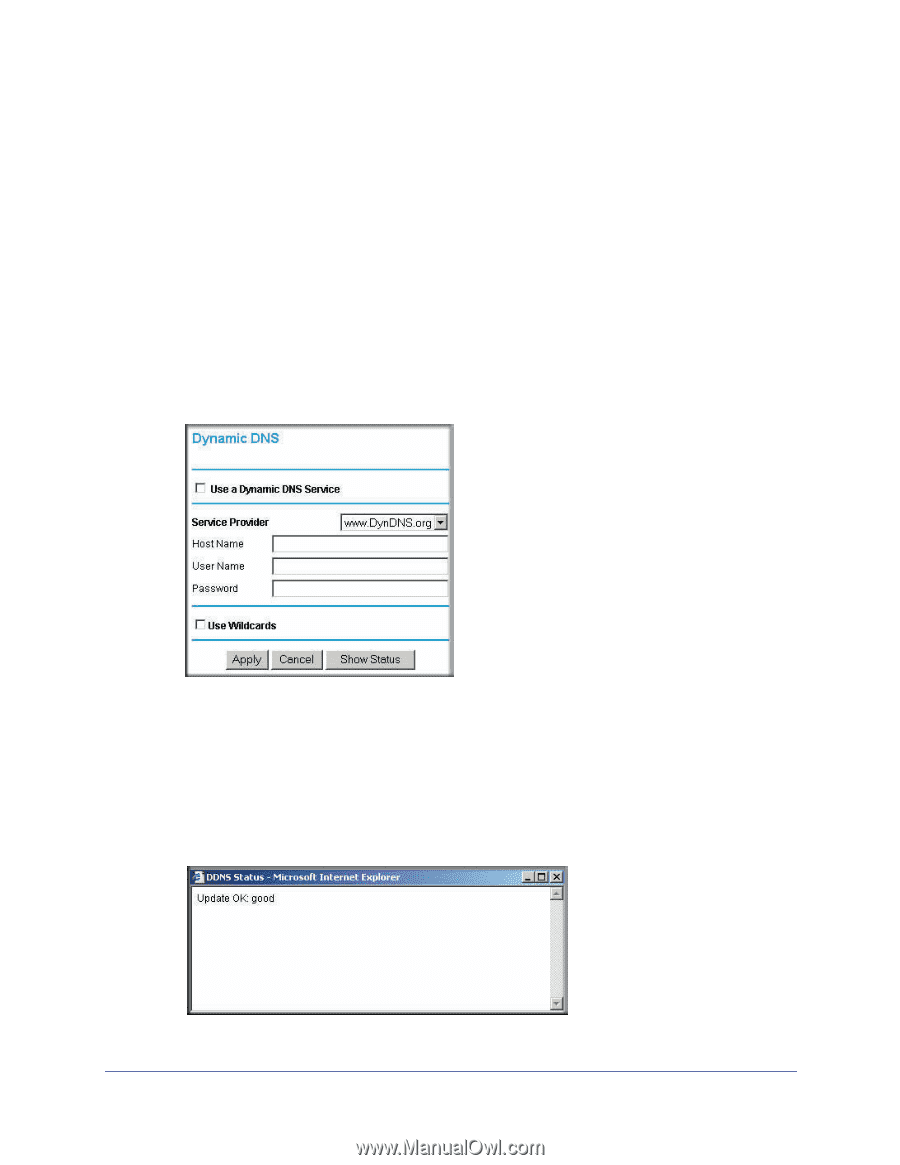
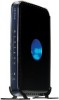
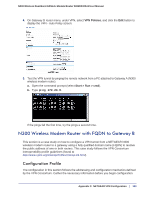
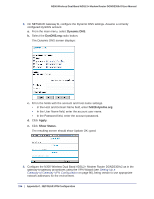
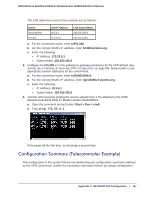
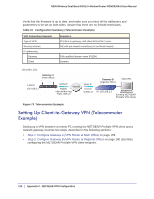
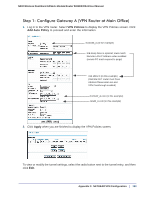
N300 Wireless Dual Band ADSL2+ Modem Router DGND3300v2 User Manual To establish VPN connectivity, Gateway A must be configured to use Dynamic DNS, and Gateway B must be configured to use a DNS host name provided by a DDNS service provider to find Gateway A. Again, the following step-by-step procedures assume that you have already registered with a DDNS service provider and have the configuration information necessary to set up the gateways. Step-by-Step Configuration 1. Log in to Gateway A (your N300 wireless modem router) as described in Logging In to Your N300 Wireless Modem Router on page 8. This example assumes that you have set the local LAN address as 10.5.6.1 for Gateway A and have set your own password. 2. On Gateway A, configure the Dynamic DNS settings. a. Under Advanced, select Dynamic DNS. b. Fill in the fields with account and host name settings. • Select the Use a Dynamic DNS Service check box. • In the Host Name field, type dgnd3300v2.dyndns.org. • In the User Name field, enter the account user name. • In the Password field, enter the account password. c. Click Apply. d. Click Show Status. The resulting screen should show Update OK: good: Appendix C. NETGEAR VPN Configuration | 155
-
 1
1 -
2
-
3
-
4
-
5
-
6
-
7
-
8
-
9
-
10
-
11
-
12
-
13
-
14
-
15
-
16
-
17
-
18
-
19
-
20
-
21
-
22
-
23
-
24
-
25
-
26
-
27
-
28
-
29
-
30
-
31
-
32
-
33
-
34
-
35
-
36
-
37
-
38
-
39
-
40
-
41
-
42
-
43
-
44
-
45
-
46
-
47
-
48
-
49
-
50
-
51
-
52
-
53
-
54
-
55
-
56
-
57
-
58
-
59
-
60
-
61
-
62
-
63
-
64
-
65
-
66
-
67
-
68
-
69
-
70
-
71
-
72
-
73
-
74
-
75
-
76
-
77
-
78
-
79
-
80
-
81
-
82
-
83
-
84
-
85
-
86
-
87
-
88
-
89
-
90
-
91
-
92
-
93
-
94
-
95
-
96
-
97
-
98
-
99
-
100
-
101
-
102
-
103
-
104
-
105
-
106
-
107
-
108
-
109
-
110
-
111
-
112
-
113
-
114
-
115
-
116
-
117
-
118
-
119
-
120
-
121
-
122
-
123
-
124
-
125
-
126
-
127
-
128
-
129
-
130
-
131
-
132
-
133
-
134
-
135
-
136
-
137
-
138
-
139
-
140
-
141
-
142
-
143
-
144
-
145
-
146
-
147
-
148
-
149
-
 150
150 -
 151
151 -
 152
152 -
 153
153 -
 154
154 -
 155
155 -
 156
156 -
 157
157 -
 158
158 -
 159
159 -
 160
160 -
161
-
162
-
163
-
164
-
165
-
166
-
167
-
168
-
169
-
170
-
171
-
172
-
173
-
174
-
175
-
176
-
177
 |
 |