Toshiba Qosmio G30 PQG31C-HD202EF Users Manual Canada; English - Page 191
Removing a PC card, ExpressCard, Inserting an ExpressCard
 |
View all Toshiba Qosmio G30 PQG31C-HD202EF manuals
Add to My Manuals
Save this manual to your list of manuals |
Page 191 highlights
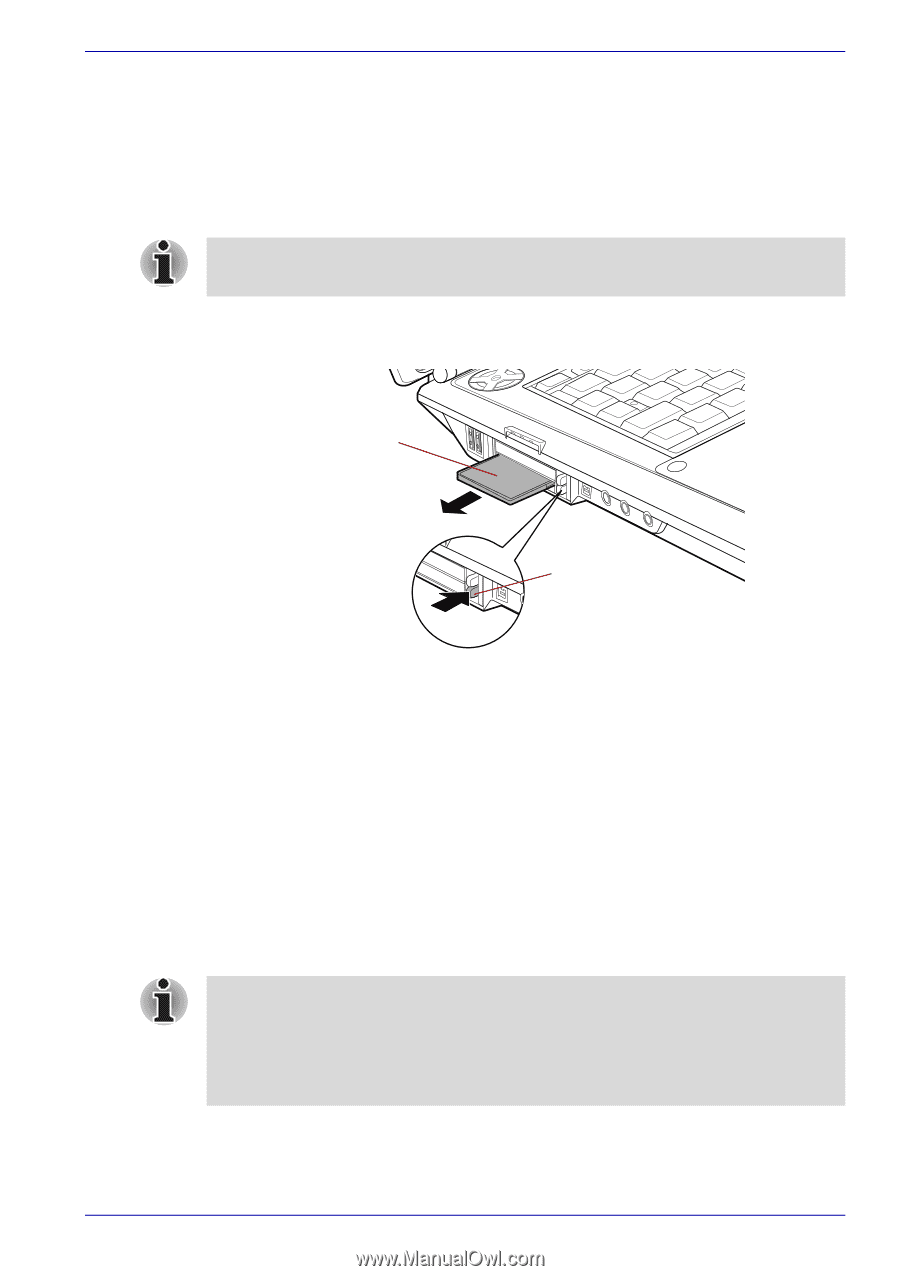
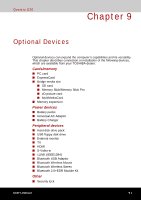
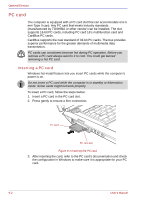
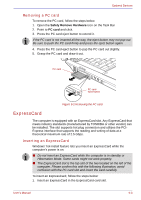
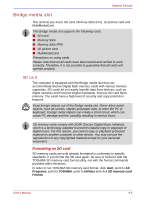
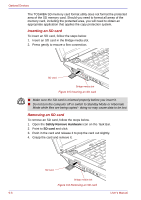
Optional Devices Removing a PC card To remove the PC card, follow the steps below. 1. Open the Safely Remove Hardware icon on the Task Bar. 2. Point to PC card and click. 3. Press the PC card eject button to extend it. If the PC card is not inserted all the way, the eject button may not pop out. Be sure to push the PC card firmly and press the eject button again. 4. Press the PC card eject button to pop the PC card out slightly. 5. Grasp the PC card and draw it out. PC card PC card eject button Figure 9-2 Removing the PC card ExpressCard The computer is equipped with an ExpressCard slot. Any ExpressCard that meets industry standards (manufactured by TOSHIBA or other vendor) can be installed. The slot supports hot plug connection and utilizes the PCIExpress interface that supports the reading and writing of data at a theoretical maximum rate of 2.5 Gbps. Inserting an ExpressCard Windows' hot-install feature lets you insert an ExpressCard while the computer's power is on. ■ Do not insert an ExpressCard while the computer is in standby or Hibernation Mode. Some cards might not work properly. ■ The ExpressCard slot is the top slot of the two located on the left of the computer. Please confirm this with the following illustration, avoid confusion with the PC card slot and insert the card carefully. To insert an ExpressCard, follow the steps below: 1. Insert an ExpressCard in the ExpressCard card slot. User's Manual 9-3
-
 1
1 -
2
-
3
-
4
-
5
-
6
-
7
-
8
-
9
-
10
-
11
-
12
-
13
-
14
-
15
-
16
-
17
-
18
-
19
-
20
-
21
-
22
-
23
-
24
-
25
-
26
-
27
-
28
-
29
-
30
-
31
-
32
-
33
-
34
-
35
-
36
-
37
-
38
-
39
-
40
-
41
-
42
-
43
-
44
-
45
-
46
-
47
-
48
-
49
-
50
-
51
-
52
-
53
-
54
-
55
-
56
-
57
-
58
-
59
-
60
-
61
-
62
-
63
-
64
-
65
-
66
-
67
-
68
-
69
-
70
-
71
-
72
-
73
-
74
-
75
-
76
-
77
-
78
-
79
-
80
-
81
-
82
-
83
-
84
-
85
-
86
-
87
-
88
-
89
-
90
-
91
-
92
-
93
-
94
-
95
-
96
-
97
-
98
-
99
-
100
-
101
-
102
-
103
-
104
-
105
-
106
-
107
-
108
-
109
-
110
-
111
-
112
-
113
-
114
-
115
-
116
-
117
-
118
-
119
-
120
-
121
-
122
-
123
-
124
-
125
-
126
-
127
-
128
-
129
-
130
-
131
-
132
-
133
-
134
-
135
-
136
-
137
-
138
-
139
-
140
-
141
-
142
-
143
-
144
-
145
-
146
-
147
-
148
-
149
-
150
-
151
-
152
-
153
-
154
-
155
-
156
-
157
-
158
-
159
-
160
-
161
-
162
-
163
-
164
-
165
-
166
-
167
-
168
-
169
-
170
-
171
-
172
-
173
-
174
-
175
-
176
-
177
-
178
-
179
-
180
-
181
-
182
-
183
-
184
-
185
-
 186
186 -
 187
187 -
 188
188 -
 189
189 -
 190
190 -
 191
191 -
 192
192 -
 193
193 -
 194
194 -
 195
195 -
 196
196 -
197
-
198
-
199
-
200
-
201
-
202
-
203
-
204
-
205
-
206
-
207
-
208
-
209
-
210
-
211
-
212
-
213
-
214
-
215
-
216
-
217
-
218
-
219
-
220
-
221
-
222
-
223
-
224
-
225
-
226
-
227
-
228
-
229
-
230
-
231
-
232
-
233
-
234
-
235
-
236
-
237
-
238
-
239
-
240
-
241
-
242
-
243
-
244
-
245
-
246
-
247
-
248
-
249
-
250
-
251
-
252
-
253
-
254
-
255
-
256
-
257
-
258
-
259
-
260
-
261
-
262
-
263
-
264
-
265
-
266
-
267
-
268
-
269
-
270
-
271
-
272
-
273
-
274
-
275
-
276
-
277
-
278
-
279
-
280
-
281
-
282
-
283
-
284
-
285
-
286
-
287
-
288
-
289
-
290
-
291
-
292
-
293
-
294
-
295
-
296
-
297
-
298
-
299
-
300
-
301
-
302
-
303
-
304
-
305
-
306
-
307
-
308
-
309
-
310
-
311
-
312
-
313
-
314
-
315
-
316
-
317
-
318
 |
 |