Toshiba Qosmio G30 PQG31C-HD202EF Users Manual Canada; English - Page 79
Hibernation Mode
 |
View all Toshiba Qosmio G30 PQG31C-HD202EF manuals
Add to My Manuals
Save this manual to your list of manuals |
Page 79 highlights
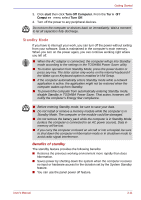
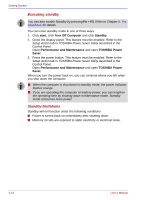
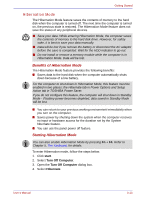
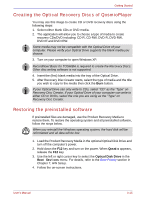
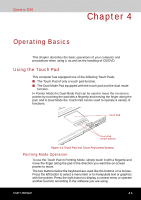
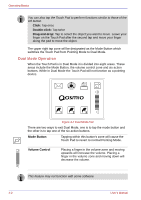
Getting Started Hibernation Mode The Hibernation Mode feature saves the contents of memory to the hard disk when the computer is turned off. The next time the computer is turned on, the previous state is restored. The Hibernation Mode feature does not save the status of any peripheral devices. ■ Save your data. While entering Hibernation Mode, the computer saves the contents of memory to the hard disk drive. However, for safety sake, it is best to save your data manually. ■ Data will be lost if you remove the battery or disconnect the AC adaptor before the save is completed. Wait for the HDD indicator to go out. ■ Do not install or remove a memory module while the computer is in Hibernation Mode. Data will be lost. Benefits of Hibernation Mode The Hibernation Mode feature provides the following benefits: ■ Saves data to the hard disk when the computer automatically shuts down because of a low battery. For the computer to shut down in Hibernation Mode, this feature must be enabled in two places: the Hibernate tab in Power Options and Setup Action tab in TOSHIBA Power Saver. If you do not configure this feature, the computer will shut down in Standby Mode - if battery power becomes depleted, data saved in Standby Mode will be lost. ■ You can return to your previous working environment immediately when you turn on the computer. ■ Saves power by shutting down the system when the computer receives no input or hardware access for the duration set by the System hibernate feature. ■ You can use the panel power off feature. Starting Hibernation Mode You can also enable Hibernation Mode by pressing Fn + F4. Refer to Chapter 5, The Keyboard, for details. To enter Hibernation mode, follow the steps below. 1. Click start. 2. Select Turn Off Computer. 3. Open the Turn Off Computer dialog box. 4. Select Hibernate. User's Manual 3-13
-
 1
1 -
2
-
3
-
4
-
5
-
6
-
7
-
8
-
9
-
10
-
11
-
12
-
13
-
14
-
15
-
16
-
17
-
18
-
19
-
20
-
21
-
22
-
23
-
24
-
25
-
26
-
27
-
28
-
29
-
30
-
31
-
32
-
33
-
34
-
35
-
36
-
37
-
38
-
39
-
40
-
41
-
42
-
43
-
44
-
45
-
46
-
47
-
48
-
49
-
50
-
51
-
52
-
53
-
54
-
55
-
56
-
57
-
58
-
59
-
60
-
61
-
62
-
63
-
64
-
65
-
66
-
67
-
68
-
69
-
70
-
71
-
72
-
73
-
 74
74 -
 75
75 -
 76
76 -
 77
77 -
 78
78 -
 79
79 -
 80
80 -
 81
81 -
 82
82 -
 83
83 -
 84
84 -
85
-
86
-
87
-
88
-
89
-
90
-
91
-
92
-
93
-
94
-
95
-
96
-
97
-
98
-
99
-
100
-
101
-
102
-
103
-
104
-
105
-
106
-
107
-
108
-
109
-
110
-
111
-
112
-
113
-
114
-
115
-
116
-
117
-
118
-
119
-
120
-
121
-
122
-
123
-
124
-
125
-
126
-
127
-
128
-
129
-
130
-
131
-
132
-
133
-
134
-
135
-
136
-
137
-
138
-
139
-
140
-
141
-
142
-
143
-
144
-
145
-
146
-
147
-
148
-
149
-
150
-
151
-
152
-
153
-
154
-
155
-
156
-
157
-
158
-
159
-
160
-
161
-
162
-
163
-
164
-
165
-
166
-
167
-
168
-
169
-
170
-
171
-
172
-
173
-
174
-
175
-
176
-
177
-
178
-
179
-
180
-
181
-
182
-
183
-
184
-
185
-
186
-
187
-
188
-
189
-
190
-
191
-
192
-
193
-
194
-
195
-
196
-
197
-
198
-
199
-
200
-
201
-
202
-
203
-
204
-
205
-
206
-
207
-
208
-
209
-
210
-
211
-
212
-
213
-
214
-
215
-
216
-
217
-
218
-
219
-
220
-
221
-
222
-
223
-
224
-
225
-
226
-
227
-
228
-
229
-
230
-
231
-
232
-
233
-
234
-
235
-
236
-
237
-
238
-
239
-
240
-
241
-
242
-
243
-
244
-
245
-
246
-
247
-
248
-
249
-
250
-
251
-
252
-
253
-
254
-
255
-
256
-
257
-
258
-
259
-
260
-
261
-
262
-
263
-
264
-
265
-
266
-
267
-
268
-
269
-
270
-
271
-
272
-
273
-
274
-
275
-
276
-
277
-
278
-
279
-
280
-
281
-
282
-
283
-
284
-
285
-
286
-
287
-
288
-
289
-
290
-
291
-
292
-
293
-
294
-
295
-
296
-
297
-
298
-
299
-
300
-
301
-
302
-
303
-
304
-
305
-
306
-
307
-
308
-
309
-
310
-
311
-
312
-
313
-
314
-
315
-
316
-
317
-
318
 |
 |