Yamaha AW2816 Owner's Manual - Page 219
Display, Function, SCENE RECALL NO.xx
 |
View all Yamaha AW2816 manuals
Add to My Manuals
Save this manual to your list of manuals |
Page 219 highlights
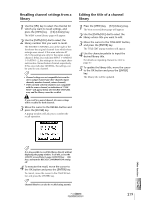
Chapter Other functions 14 The following functions can be assigned. Display Function NO ASSIGN No function assigned SHUT DOWN Display the SONG screen/Shut Down screen (shortcut to shutdown) (*) SONG SAVE Display the SONG screen/Song List page, and move the cursor to the SAVE button (shortcut to save the current song) (*) CD LOAD Close the tray of the CD-RW drive, and load the CD (*) CD UNLOAD Open the tray of the CD-RW drive (*) AUTOMIX [ENABLE/DISABLE] Turn automix on (Enable) or off (Disable) (*) MTC SYNC [MASTER/SLAVE] Switch the AW2816 between MTC master (Master) and MTC slave (Slave) (*) SCENE NAME Display the currently-recalled scene name in the upper right of the screen for a fixed interval SCENE RECALL NO.xx Recall scene number xx (use the [DATA/JOG] dial to select the number xx) DELAY [ON/OFF] Switch the delay on/off for the currently selected channel EQ [ON/OFF] Switch the EQ on/off for the currently selected channel DYN [ON/OFF] Switch the dynamics processor on/off for the selected channel PEAK HOLD [ON/OFF] Switch peak hold on/off OSCILLATOR [ON/OFF] Switch the test tone oscillator on/off * Depending on the operating mode of the AW2816 (e.g., when the transport is running), it may not be possible to execute the functions marked by an asterisk (*). In this case, an error message will appear at the bottom of the display. Tip! If you select SCENE NUMBER as the assigned function, an input field will appear at the right of the function list, allowing you to specify the scene number. Move the cursor to this field, and use the [DATA/JOG] dial to specify the scene number. 4 Move the cursor to the ASSIGN button at the left of the function list, and press the [ENTER] key. A popup window will ask you to confirm the assignment. 5 To confirm the assignment, move the cursor to the OK button and press the [ENTER] key. To cancel, move the cursor to the CANCEL button and press the [ENTER] key. 6 To execute an assigned function, hold down the [CTRL] key and press the appropriate function key. 216 Operation section
-
 1
1 -
2
-
3
-
4
-
5
-
6
-
7
-
8
-
9
-
10
-
11
-
12
-
13
-
14
-
15
-
16
-
17
-
18
-
19
-
20
-
21
-
22
-
23
-
24
-
25
-
26
-
27
-
28
-
29
-
30
-
31
-
32
-
33
-
34
-
35
-
36
-
37
-
38
-
39
-
40
-
41
-
42
-
43
-
44
-
45
-
46
-
47
-
48
-
49
-
50
-
51
-
52
-
53
-
54
-
55
-
56
-
57
-
58
-
59
-
60
-
61
-
62
-
63
-
64
-
65
-
66
-
67
-
68
-
69
-
70
-
71
-
72
-
73
-
74
-
75
-
76
-
77
-
78
-
79
-
80
-
81
-
82
-
83
-
84
-
85
-
86
-
87
-
88
-
89
-
90
-
91
-
92
-
93
-
94
-
95
-
96
-
97
-
98
-
99
-
100
-
101
-
102
-
103
-
104
-
105
-
106
-
107
-
108
-
109
-
110
-
111
-
112
-
113
-
114
-
115
-
116
-
117
-
118
-
119
-
120
-
121
-
122
-
123
-
124
-
125
-
126
-
127
-
128
-
129
-
130
-
131
-
132
-
133
-
134
-
135
-
136
-
137
-
138
-
139
-
140
-
141
-
142
-
143
-
144
-
145
-
146
-
147
-
148
-
149
-
150
-
151
-
152
-
153
-
154
-
155
-
156
-
157
-
158
-
159
-
160
-
161
-
162
-
163
-
164
-
165
-
166
-
167
-
168
-
169
-
170
-
171
-
172
-
173
-
174
-
175
-
176
-
177
-
178
-
179
-
180
-
181
-
182
-
183
-
184
-
185
-
186
-
187
-
188
-
189
-
190
-
191
-
192
-
193
-
194
-
195
-
196
-
197
-
198
-
199
-
200
-
201
-
202
-
203
-
204
-
205
-
206
-
207
-
208
-
209
-
210
-
211
-
212
-
213
-
 214
214 -
 215
215 -
 216
216 -
 217
217 -
 218
218 -
 219
219 -
 220
220 -
 221
221 -
 222
222 -
 223
223 -
 224
224 -
225
-
226
-
227
-
228
-
229
-
230
-
231
-
232
-
233
-
234
-
235
-
236
-
237
-
238
-
239
-
240
-
241
-
242
-
243
-
244
-
245
-
246
-
247
-
248
-
249
-
250
-
251
-
252
-
253
-
254
-
255
-
256
-
257
-
258
-
259
-
260
-
261
-
262
-
263
-
264
-
265
-
266
-
267
-
268
-
269
-
270
-
271
-
272
-
273
-
274
-
275
-
276
-
277
-
278
-
279
-
280
-
281
-
282
-
283
-
284
-
285
-
286
-
287
-
288
-
289
-
290
-
291
-
292
-
293
-
294
-
295
-
296
-
297
-
298
-
299
-
300
-
301
-
302
-
303
-
304
-
305
-
306
-
307
-
308
-
309
-
310
-
311
-
312
-
313
-
314
-
315
-
316
-
317
-
318
-
319
-
320
-
321
-
322
-
323
-
324
-
325
-
326
-
327
-
328
-
329
-
330
-
331
-
332
-
333
-
334
-
335
-
336
-
337
-
338
-
339
-
340
-
341
-
342
-
343
-
344
-
345
-
346
-
347
-
348
-
349
-
350
-
351
-
352
-
353
-
354
-
355
-
356
-
357
-
358
-
359
-
360
-
361
-
362
-
363
-
364
-
365
-
366
-
367
-
368
-
369
-
370
-
371
-
372
-
373
-
374
-
375
-
376
-
377
-
378
-
379
-
380
-
381
-
382
-
383
-
384
-
385
-
386
-
387
-
388
-
389
-
390
-
391
-
392
-
393
-
394
-
395
-
396
-
397
-
398
-
399
-
400
-
401
-
402
-
403
-
404
-
405
-
406
-
407
-
408
-
409
-
410
-
411
-
412
-
413
-
414
-
415
-
416
-
417
-
418
-
419
-
420
 |
 |
