Yamaha AW2816 Owner's Manual - Page 354

Additional functions in the Meter 1, HMUTE buttons IINPUT MONITOR JFINE button KPEAK HOLD button

Page 354 highlights

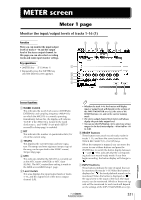
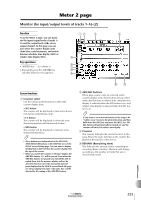
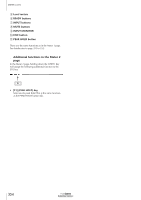
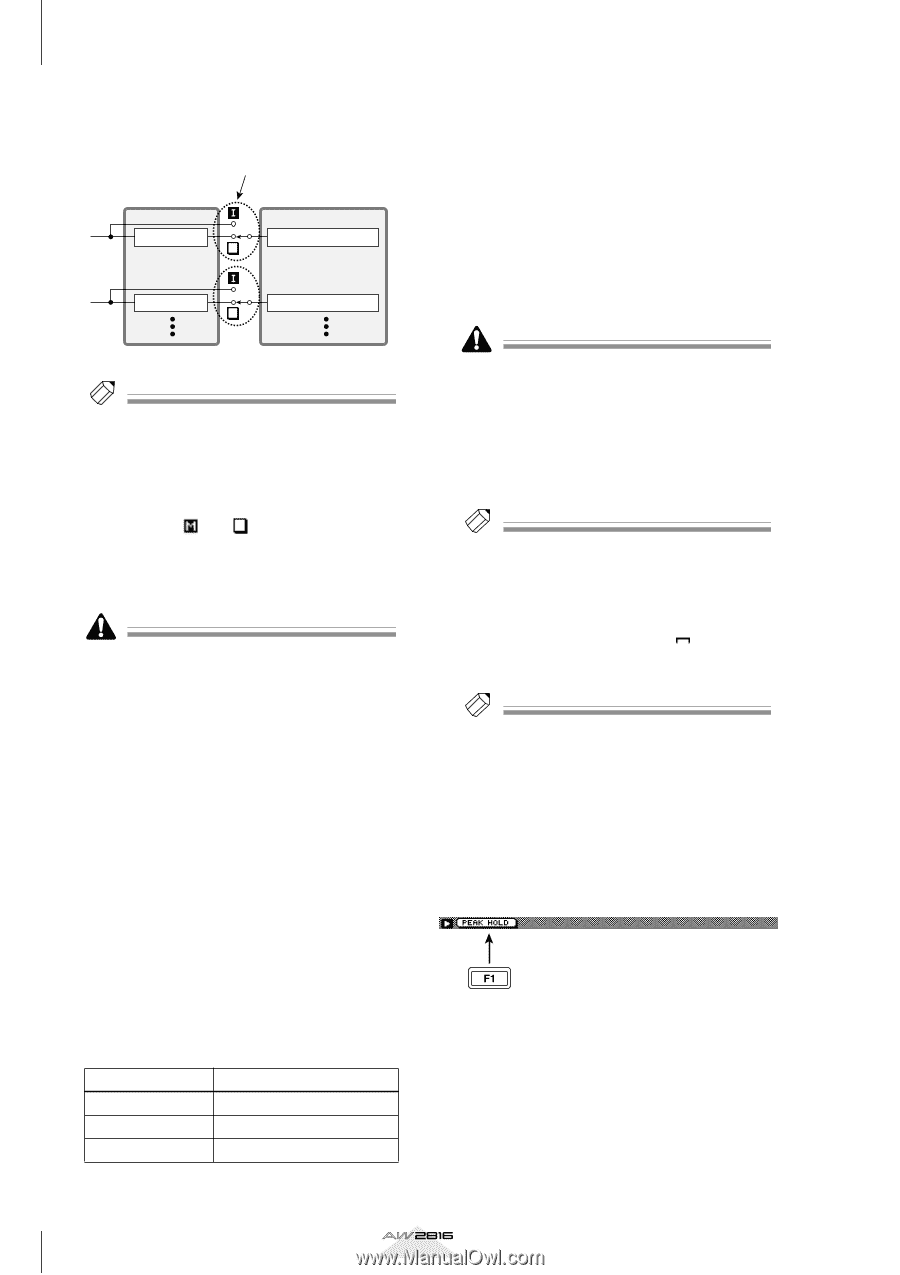
METER screen the state of the REC TRACK SELECT [1]-[16] keys and READY buttons (6), and on the current running mode. Input monitor Recorder section Mixer section Track 1 Monitor channel 1 Track 2 Monitor channel 2 • INDI. (Individual) button When this button is on, the input monitor setting can be changed for each track individually, regardless of the running mode or the record-ready state (Individual Input Monitor). Move the cursor to an INPUT button (7) and press the [ENTER] key to switch the input monitor setting of the corresponding track. • ALL button When this button is on, the input source will be monitored for all tracks, regardless of the running mode or the state of the REC TRACK SELECT [1]- [16] keys (All Input Monitor). Tip! When the INDI. button of the INPUT MONITOR area (9) is on, you can move the cursor to these buttons and press the [ENTER] key to select for each track the type of signal that will be monitored. H MUTE buttons These buttons indicate the mute on/off status of tracks 1-16 as " " or " " symbols respectively. You can move the cursor to this area and press the [ENTER] key to switch muting on/off. Track mute on/off settings do not affect the [ON] keys of the monitor channels. • On the AW2816, the number of tracks that can play back simultaneously may be limited depending on the number of tracks that are set to record-ready mode. In this case, muting will forcibly be turned on for tracks that cannot play back. • If you want to defeat muting for a track that was forcibly muted, you must first mute another track. If you attempt to defeat muting without increasing the number of muted tracks, a message of "CANNOT CHANGE MUTE" will appear, and the operation will not occur. • By pressing the [ALL SAFE] key, you can defeat record-ready mode and muting for all tracks. I INPUT MONITOR Use the following three buttons to select the input monitor mode (the way in which input monitoring will be switched for each track). • AUTO button When this button is on, the monitored signal for record-ready tracks will change automatically depending on the running mode, as shown in the following table (Auto Input Monitor). Use this method for normal recording or for punch-in/out recording. Running mode Stopped Playing Recording Monitored signal Track input source Track playback Track input source When the AUTO button/ALL button are on, it will not be possible to manually change the setting of the INPUT buttons. J FINE button When this button is on, the level meter (5) display range will switch from -48-0 dB to -18-0 dB. This setting is convenient when you want to make detailed level adjustments in the range near 0 dB. Tip! The FINE button setting affects only the level meters in the Meter 1/Meter 2 pages. K PEAK HOLD button This button sets/cancels the peak hold function of the level meters. When this button is turned on, peak hold will be enabled, and a " " symbol indicating the peak level will be maintained in the level meter. Tip! The peak hold setting affects the level meters displayed in pages other than the EQ/ATT/GRP screen and the DYN/DLY screen. s Additional functions in the Meter 1 page In the Meter 1 page, holding down the [SHIFT] key will assign the following additional function to the [F1] key. • [F1] (PEAK HOLD) key Sets/cancels peak hold. This is the same function as the PEAK HOLD button (K). 352 Reference section
  • 1
  • 2
  • 3
  • 4
  • 5
  • 6
  • 7
  • 8
  • 9
  • 10
  • 11
  • 12
  • 13
  • 14
  • 15
  • 16
  • 17
  • 18
  • 19
  • 20
  • 21
  • 22
  • 23
  • 24
  • 25
  • 26
  • 27
  • 28
  • 29
  • 30
  • 31
  • 32
  • 33
  • 34
  • 35
  • 36
  • 37
  • 38
  • 39
  • 40
  • 41
  • 42
  • 43
  • 44
  • 45
  • 46
  • 47
  • 48
  • 49
  • 50
  • 51
  • 52
  • 53
  • 54
  • 55
  • 56
  • 57
  • 58
  • 59
  • 60
  • 61
  • 62
  • 63
  • 64
  • 65
  • 66
  • 67
  • 68
  • 69
  • 70
  • 71
  • 72
  • 73
  • 74
  • 75
  • 76
  • 77
  • 78
  • 79
  • 80
  • 81
  • 82
  • 83
  • 84
  • 85
  • 86
  • 87
  • 88
  • 89
  • 90
  • 91
  • 92
  • 93
  • 94
  • 95
  • 96
  • 97
  • 98
  • 99
  • 100
  • 101
  • 102
  • 103
  • 104
  • 105
  • 106
  • 107
  • 108
  • 109
  • 110
  • 111
  • 112
  • 113
  • 114
  • 115
  • 116
  • 117
  • 118
  • 119
  • 120
  • 121
  • 122
  • 123
  • 124
  • 125
  • 126
  • 127
  • 128
  • 129
  • 130
  • 131
  • 132
  • 133
  • 134
  • 135
  • 136
  • 137
  • 138
  • 139
  • 140
  • 141
  • 142
  • 143
  • 144
  • 145
  • 146
  • 147
  • 148
  • 149
  • 150
  • 151
  • 152
  • 153
  • 154
  • 155
  • 156
  • 157
  • 158
  • 159
  • 160
  • 161
  • 162
  • 163
  • 164
  • 165
  • 166
  • 167
  • 168
  • 169
  • 170
  • 171
  • 172
  • 173
  • 174
  • 175
  • 176
  • 177
  • 178
  • 179
  • 180
  • 181
  • 182
  • 183
  • 184
  • 185
  • 186
  • 187
  • 188
  • 189
  • 190
  • 191
  • 192
  • 193
  • 194
  • 195
  • 196
  • 197
  • 198
  • 199
  • 200
  • 201
  • 202
  • 203
  • 204
  • 205
  • 206
  • 207
  • 208
  • 209
  • 210
  • 211
  • 212
  • 213
  • 214
  • 215
  • 216
  • 217
  • 218
  • 219
  • 220
  • 221
  • 222
  • 223
  • 224
  • 225
  • 226
  • 227
  • 228
  • 229
  • 230
  • 231
  • 232
  • 233
  • 234
  • 235
  • 236
  • 237
  • 238
  • 239
  • 240
  • 241
  • 242
  • 243
  • 244
  • 245
  • 246
  • 247
  • 248
  • 249
  • 250
  • 251
  • 252
  • 253
  • 254
  • 255
  • 256
  • 257
  • 258
  • 259
  • 260
  • 261
  • 262
  • 263
  • 264
  • 265
  • 266
  • 267
  • 268
  • 269
  • 270
  • 271
  • 272
  • 273
  • 274
  • 275
  • 276
  • 277
  • 278
  • 279
  • 280
  • 281
  • 282
  • 283
  • 284
  • 285
  • 286
  • 287
  • 288
  • 289
  • 290
  • 291
  • 292
  • 293
  • 294
  • 295
  • 296
  • 297
  • 298
  • 299
  • 300
  • 301
  • 302
  • 303
  • 304
  • 305
  • 306
  • 307
  • 308
  • 309
  • 310
  • 311
  • 312
  • 313
  • 314
  • 315
  • 316
  • 317
  • 318
  • 319
  • 320
  • 321
  • 322
  • 323
  • 324
  • 325
  • 326
  • 327
  • 328
  • 329
  • 330
  • 331
  • 332
  • 333
  • 334
  • 335
  • 336
  • 337
  • 338
  • 339
  • 340
  • 341
  • 342
  • 343
  • 344
  • 345
  • 346
  • 347
  • 348
  • 349
  • 350
  • 351
  • 352
  • 353
  • 354
  • 355
  • 356
  • 357
  • 358
  • 359
  • 360
  • 361
  • 362
  • 363
  • 364
  • 365
  • 366
  • 367
  • 368
  • 369
  • 370
  • 371
  • 372
  • 373
  • 374
  • 375
  • 376
  • 377
  • 378
  • 379
  • 380
  • 381
  • 382
  • 383
  • 384
  • 385
  • 386
  • 387
  • 388
  • 389
  • 390
  • 391
  • 392
  • 393
  • 394
  • 395
  • 396
  • 397
  • 398
  • 399
  • 400
  • 401
  • 402
  • 403
  • 404
  • 405
  • 406
  • 407
  • 408
  • 409
  • 410
  • 411
  • 412
  • 413
  • 414
  • 415
  • 416
  • 417
  • 418
  • 419
  • 420

METER screen
352
Reference section
the state of the REC TRACK SELECT [1]
[16] keys
and READY buttons (
6
), and on the current run-
ning mode.
Tip!
When the INDI. button of the INPUT MONITOR area
(
9
) is on, you can move the cursor to these buttons
and press the [ENTER] key to select for each track the
type of signal that will be monitored.
H
MUTE buttons
These buttons indicate the mute on/off status of
tracks 1
16 as
or
symbols respectively.
You can move the cursor to this area and press the
[ENTER] key to switch muting on/off. Track mute
on/off settings do not affect the [ON] keys of the
monitor channels.
On the AW2816, the number of tracks that can play
back simultaneously may be limited depending on
the number of tracks that are set to record-ready
mode. In this case, muting will forcibly be turned on
for tracks that cannot play back.
If you want to defeat muting for a track that was
forcibly muted, you must first mute another track. If
you attempt to defeat muting without increasing the
number of muted tracks, a message of “CANNOT
CHANGE MUTE” will appear, and the operation will
not occur.
By pressing the [ALL SAFE] key, you can defeat
record-ready mode and muting for all tracks.
I
INPUT MONITOR
Use the following three buttons to select the input
monitor mode (the way in which input monitoring
will be switched for each track).
AUTO button
When this button is on, the monitored signal for
record-ready tracks will change automatically
depending on the running mode, as shown in the
following table (Auto Input Monitor). Use this
method for normal recording or for punch-in/out
recording.
INDI. (Individual) button
When this button is on, the input monitor setting
can be changed for each track individually, regard-
less of the running mode or the record-ready state
(Individual Input Monitor). Move the cursor to an
INPUT button (
7
) and press the [ENTER] key to
switch the input monitor setting of the correspond-
ing track.
ALL button
When this button is on, the input source will be
monitored for all tracks, regardless of the running
mode or the state of the REC TRACK SELECT [1]
[16] keys (All Input Monitor).
When the AUTO button/ALL button are on, it will not
be possible to manually change the setting of the
INPUT buttons.
J
FINE button
When this button is on, the level meter (
5
) display
range will switch from
48
0 dB to
18
0 dB. This
setting is convenient when you want to make
detailed level adjustments in the range near 0 dB.
Tip!
The FINE button setting affects only the level meters in
the Meter 1/Meter 2 pages.
K
PEAK HOLD button
This button sets/cancels the peak hold function of
the level meters. When this button is turned on,
peak hold will be enabled, and a
symbol
indicating the peak level will be maintained in the
level meter.
Tip!
The peak hold setting affects the level meters displayed
in pages other than the EQ/ATT/GRP screen and the
DYN/DLY screen.
Additional functions in the Meter 1
page
In the Meter 1 page, holding down the [SHIFT] key
will assign the following additional function to the
[F1] key.
[F1] (PEAK HOLD) key
Sets/cancels peak hold. This is the same function
as the PEAK HOLD button (
K
).
Running mode
Monitored signal
Stopped
Track input source
Playing
Track playback
Recording
Track input source
Input monitor
Recorder section
Mixer section
Track 1
Monitor channel 1
Track 2
Monitor channel 2