Yamaha AW2816 Owner's Manual - Page 6
Table of contents - cd
 |
View all Yamaha AW2816 manuals
Add to My Manuals
Save this manual to your list of manuals |
Page 6 highlights
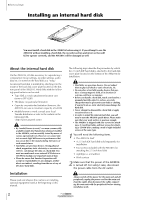
Table of contents Table of contents -Operation section- Before you begin 1 Checking the included items 1 Installing an internal hard disk 2 About the internal hard disk 2 Installation 2 Installing a CD-RW drive 4 About the CD-RW drives 4 CD-RW drive settings 4 Installation procedure 5 Removing the transport protection pad...7 Manual eject (emergency disc removal) .......7 Attaching an external SCSI device...........8 About external SCSI devices 8 Connection procedure 8 Installing I/O card 10 About I/O cards 10 Installation procedure 10 Please observe the following points.......11 Turning the power on 11 Setting the internal clock 11 Turning the power off 12 Chapter1 Parts and their functions13 Top panel 13 Analog input/output section 13 WORK NAVIGATE section 14 UNIT section 14 MIXER section 14 FADER MODE section 15 MIXING LAYER section 15 Fader section 16 Display section 17 REC TRACK SELECT section 18 RECORDER section 18 AUTOMATION section 19 SCENE MEMORY section 19 CURSOR/JOG&SHUTTLE section 19 LOCATE section 20 Transport section 21 Rear panel 22 Front panel 24 Chapter2 Welcome to the world of the AW2816 ..........25 Features of the AW2816 25 Mixer section 25 Recorder section 25 CD-RW drive (option 26 Other features 26 Signal flow within the AW2816 27 Input patch 27 Input channels 1-8 28 Return channels 1/2 29 Recorder input patch 29 Monitor channels 1-16 30 Digital cascade connection 30 Oscillator 30 Stereo output channel 31 Buses 1-8 31 AUX buses 1-6 31 Output patch 32 Internal effects 1/2 32 Monitor output/headphone output 32 The track structure of the AW2816.......33 Audio tracks 33 Virtual tracks 33 The stereo track 33 About the display 34 Cursor 34 Buttons 35 Knobs/faders/numerical boxes 35 Tabs 35 Basic operation of the AW2816 36 Accessing screens and pages 36 Switching a button on/off 36 Editing the value of a fader/knob/numerical box 36 Using the additional function buttons .........37 Inputting text 37 Selecting a channel 38 Chapter3 Let's record on the AW2816 41 Connections and setup 41 Making connections 41 Creating a new song 42 Word clock settings 44 Recording the first track 46 Setting the input level 46 Pairing two channels 47 Patching input signals to recorder inputs ....48 Adjusting the monitor level 50 Recording 51 Recording additional tracks (Overdubbing 52 Setting the input level 52 Patching the input signal to the recorder input 52 Adjusting the monitor level 54 Applying the equalizer to the input signal...54 Applying the dynamics processor to the input signal 55 Recording 57 Mixing to the stereo track (Mixdown) ...58 Adjusting the mix balance 58 Using the internal effects 59 Recording on the stereo track 60 Saving your song 62 Advanced techniques on the AW2816 ..63 Manually re-recording only a specific area (Manual Punch-in/out 63 Automatically re-recording only a specific area (Auto Punch-in/out 64 Switching virtual tracks 66 Operating multiple faders together (Fader Groups 67 Operating multiple [ON] keys together (Mute Groups 68 Using the Solo function 69 Chapter4 Input/output patching71 Assigning signals to input channels/return channels (Input Patch 71 Assigning signals to the recorder inputs (Recorder Input Patch 73 Assigning signals to output jacks/output channels (Output Patch 74 Using the patch library 76 Storing the patching settings to the library ..76 Recalling patching settings from the library 77 Inserting an external effect into a channel 78 Quickly assigning input signals to tracks (Quick Rec 80 Chapter5 Using the internal effects 83 About the internal effects 83 Using AUX send/return to apply an effect 84 Check the patching 84 Recalling an effect program from the library84 Switching between pre-fader/post-fader......86 Adjusting the return level 87 Adjusting the send level 87 Inserting an effect into a specific channel 88 Change the patching 88 Inserting the effect into a channel 88 Recalling an effect program 89 Applying effects while you record ........ 90 Change the patching 90 Insert the effect into a channel 90 Start recording 91 Adjusting the effect parameters 92 Saving an effect program 93 Chapter6 Transport/Locate operations 95 Transport key functions 95 Fast forward-play/Fast reverse-play (the Shuttle function 95 Searching for a point while you listen (the Nudge function 96 Searching for a point while viewing the waveform 97 Rewinding for a specific distance (Rollback 98 Repeatedly playing a specified region (A-B Repeat 99 Locating to a specified point 100 Locating to the zero location of the counter 101 Setting the relative time zero location...... 101 Using various locate points to locate.. 102 Using markers to locate 103 Editing the location of a locate point or marker 104 The relation between the Start point and time code 105 Deleting a locate point/marker........... 106 Deleting from within the screen 106 Deleting by using key operations 106 Chapter7 Editing tracks and virtual tracks........... 107 Editing tracks and virtual tracks.......... 107 Tracks, parts, and regions 108 Naming a track or region 109 Editing a virtual track name 109 Editing a region name 110 Editing the audio data of tracks 1-16 . 111 Editing entire Tracks 111 Editing by Part 113 Editing by Region 114 Editing the audio data of virtual tracks 1-8 116 Editing commands 118 Commands and parameters of the TRACK menu 118 Commands and parameters of the PART menu 121 Commands and parameters of the REGION menu 125 Chapter8 Scene memory operations 127 About scene memories 127 Parameters included in a scene 127 About scene numbers 127 Storing a scene 128 Storing a scene by operations in the screen 128 Storing a scene by key operations 128 Recalling a scene 129 Recalling a scene by operations in the screen 129 Recalling a scene by key operations ........ 129 vi Table of contents
-
 1
1 -
 2
2 -
 3
3 -
 4
4 -
 5
5 -
 6
6 -
 7
7 -
 8
8 -
 9
9 -
 10
10 -
 11
11 -
 12
12 -
13
-
14
-
15
-
16
-
17
-
18
-
19
-
20
-
21
-
22
-
23
-
24
-
25
-
26
-
27
-
28
-
29
-
30
-
31
-
32
-
33
-
34
-
35
-
36
-
37
-
38
-
39
-
40
-
41
-
42
-
43
-
44
-
45
-
46
-
47
-
48
-
49
-
50
-
51
-
52
-
53
-
54
-
55
-
56
-
57
-
58
-
59
-
60
-
61
-
62
-
63
-
64
-
65
-
66
-
67
-
68
-
69
-
70
-
71
-
72
-
73
-
74
-
75
-
76
-
77
-
78
-
79
-
80
-
81
-
82
-
83
-
84
-
85
-
86
-
87
-
88
-
89
-
90
-
91
-
92
-
93
-
94
-
95
-
96
-
97
-
98
-
99
-
100
-
101
-
102
-
103
-
104
-
105
-
106
-
107
-
108
-
109
-
110
-
111
-
112
-
113
-
114
-
115
-
116
-
117
-
118
-
119
-
120
-
121
-
122
-
123
-
124
-
125
-
126
-
127
-
128
-
129
-
130
-
131
-
132
-
133
-
134
-
135
-
136
-
137
-
138
-
139
-
140
-
141
-
142
-
143
-
144
-
145
-
146
-
147
-
148
-
149
-
150
-
151
-
152
-
153
-
154
-
155
-
156
-
157
-
158
-
159
-
160
-
161
-
162
-
163
-
164
-
165
-
166
-
167
-
168
-
169
-
170
-
171
-
172
-
173
-
174
-
175
-
176
-
177
-
178
-
179
-
180
-
181
-
182
-
183
-
184
-
185
-
186
-
187
-
188
-
189
-
190
-
191
-
192
-
193
-
194
-
195
-
196
-
197
-
198
-
199
-
200
-
201
-
202
-
203
-
204
-
205
-
206
-
207
-
208
-
209
-
210
-
211
-
212
-
213
-
214
-
215
-
216
-
217
-
218
-
219
-
220
-
221
-
222
-
223
-
224
-
225
-
226
-
227
-
228
-
229
-
230
-
231
-
232
-
233
-
234
-
235
-
236
-
237
-
238
-
239
-
240
-
241
-
242
-
243
-
244
-
245
-
246
-
247
-
248
-
249
-
250
-
251
-
252
-
253
-
254
-
255
-
256
-
257
-
258
-
259
-
260
-
261
-
262
-
263
-
264
-
265
-
266
-
267
-
268
-
269
-
270
-
271
-
272
-
273
-
274
-
275
-
276
-
277
-
278
-
279
-
280
-
281
-
282
-
283
-
284
-
285
-
286
-
287
-
288
-
289
-
290
-
291
-
292
-
293
-
294
-
295
-
296
-
297
-
298
-
299
-
300
-
301
-
302
-
303
-
304
-
305
-
306
-
307
-
308
-
309
-
310
-
311
-
312
-
313
-
314
-
315
-
316
-
317
-
318
-
319
-
320
-
321
-
322
-
323
-
324
-
325
-
326
-
327
-
328
-
329
-
330
-
331
-
332
-
333
-
334
-
335
-
336
-
337
-
338
-
339
-
340
-
341
-
342
-
343
-
344
-
345
-
346
-
347
-
348
-
349
-
350
-
351
-
352
-
353
-
354
-
355
-
356
-
357
-
358
-
359
-
360
-
361
-
362
-
363
-
364
-
365
-
366
-
367
-
368
-
369
-
370
-
371
-
372
-
373
-
374
-
375
-
376
-
377
-
378
-
379
-
380
-
381
-
382
-
383
-
384
-
385
-
386
-
387
-
388
-
389
-
390
-
391
-
392
-
393
-
394
-
395
-
396
-
397
-
398
-
399
-
400
-
401
-
402
-
403
-
404
-
405
-
406
-
407
-
408
-
409
-
410
-
411
-
412
-
413
-
414
-
415
-
416
-
417
-
418
-
419
-
420
 |
 |