Yamaha AW2816 Owner's Manual - Page 50
Creating a new song, Recbit
 |
View all Yamaha AW2816 manuals
Add to My Manuals
Save this manual to your list of manuals |
Page 50 highlights
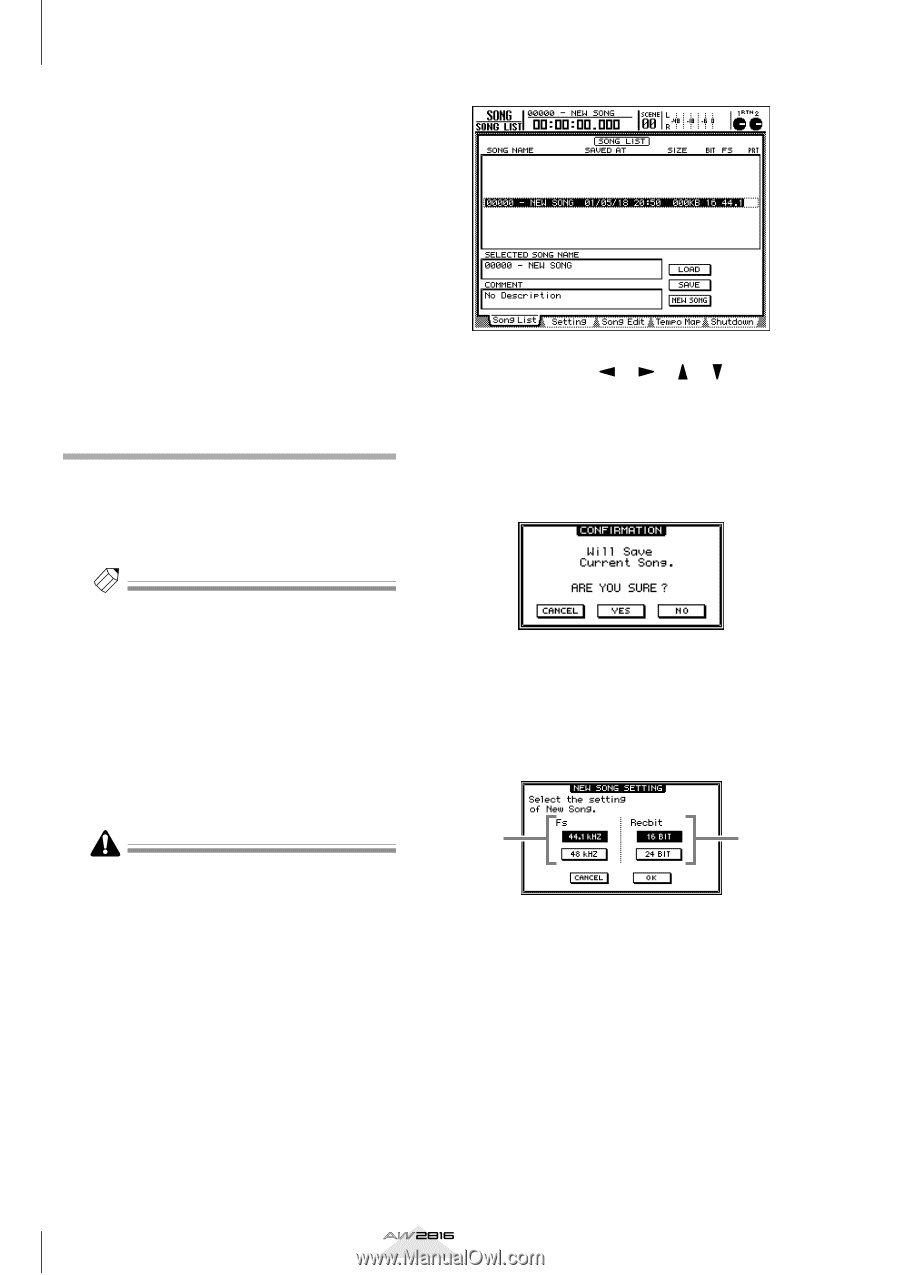
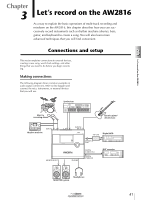
Chapter Let's record on the AW2816 3 • Connect line-level instruments (rhythm machines and synthesizers) to the INPUT 1-8 (phone) jacks. • If you use mics, connect them to the INPUT 1-8 (phone) jacks or the INPUT 1/2 (XLR) jacks. • If you use condenser mics that require phantom power, connect them to the INPUT 1/2 (XLR) jacks, and turn the rear panel [PHANTOM +48V ON/OFF] switch on. • If you are connecting an electric guitar or electric bass via a direct box or pre-amp, connect it to an INPUT 1/2 (XLR) jack or INPUT 1-8 (phone) jack, depending on the type of output connector. • If you are directly connecting a high impedance instrument such as an electric guitar or electric bass with passive pickups, connect it to the INPUT 8 (HI-Z) jack. Creating a new song On the AW2816, all information needed to reproduce a song (mixer settings, recorder settings, audio data, etc.) is managed as a "song." When you want to begin a new recording, you must start by creating a new song. Tip! When you format the internal hard disk, a new 44.1 kHz/16 bit song will be created, and will be loaded the next time the AW2816 is powered-on. If you want to use this song, the following procedure is not necessary. 1 Turn on the power in the following order: external devices connected to the AW2816 ¡ the AW2816 itself ¡ your monitor system. When you turn on the power of the AW2816, the song that was used most recently will be loaded automatically. If SCSI devices are connected to the AW2816, the AW2816 may not start up correctly if its power is turned on when the connected SCSI devices are still powered-off. SCSI devices must be turned on before the AW2816. 2 Press the [SONG] key ¡ [F1] key. The SONG screen Song List page will appear. In this page you can create a new song, and save/ load existing songs. 3 Use the CURSOR keys to move the cursor to the NEW SONG button in the lower right of the screen, and press the [ENTER] key. A popup window will appear, asking you whether you want to save the song currently being operated (referred to as the "current song"). 4 Move the cursor to the YES button if you want to save the current song, or to the NO button if you do not want to save it, and press the [ENTER] key. The NEW SONG SETTING popup window will appear. 1 2 In this popup window you can specify the attributes of the new song. 1 Fs This selects the sampling frequency (44.1 kHz/ 48 kHz) of the audio data that will be recorded on the hard disk. Move the cursor to either the 44.1 kHz button or the 48 kHz button, and press the [ENTER] key. B Recbit This selects the number of quantization bits (16 bit/24 bit) of the audio data that will be recorded on the hard disk. Move the cursor to the 16 BIT button or the 24 BIT button, and press the [ENTER] key. 42 Operation section
-
 1
1 -
2
-
3
-
4
-
5
-
6
-
7
-
8
-
9
-
10
-
11
-
12
-
13
-
14
-
15
-
16
-
17
-
18
-
19
-
20
-
21
-
22
-
23
-
24
-
25
-
26
-
27
-
28
-
29
-
30
-
31
-
32
-
33
-
34
-
35
-
36
-
37
-
38
-
39
-
40
-
41
-
42
-
43
-
44
-
 45
45 -
 46
46 -
 47
47 -
 48
48 -
 49
49 -
 50
50 -
 51
51 -
 52
52 -
 53
53 -
 54
54 -
 55
55 -
56
-
57
-
58
-
59
-
60
-
61
-
62
-
63
-
64
-
65
-
66
-
67
-
68
-
69
-
70
-
71
-
72
-
73
-
74
-
75
-
76
-
77
-
78
-
79
-
80
-
81
-
82
-
83
-
84
-
85
-
86
-
87
-
88
-
89
-
90
-
91
-
92
-
93
-
94
-
95
-
96
-
97
-
98
-
99
-
100
-
101
-
102
-
103
-
104
-
105
-
106
-
107
-
108
-
109
-
110
-
111
-
112
-
113
-
114
-
115
-
116
-
117
-
118
-
119
-
120
-
121
-
122
-
123
-
124
-
125
-
126
-
127
-
128
-
129
-
130
-
131
-
132
-
133
-
134
-
135
-
136
-
137
-
138
-
139
-
140
-
141
-
142
-
143
-
144
-
145
-
146
-
147
-
148
-
149
-
150
-
151
-
152
-
153
-
154
-
155
-
156
-
157
-
158
-
159
-
160
-
161
-
162
-
163
-
164
-
165
-
166
-
167
-
168
-
169
-
170
-
171
-
172
-
173
-
174
-
175
-
176
-
177
-
178
-
179
-
180
-
181
-
182
-
183
-
184
-
185
-
186
-
187
-
188
-
189
-
190
-
191
-
192
-
193
-
194
-
195
-
196
-
197
-
198
-
199
-
200
-
201
-
202
-
203
-
204
-
205
-
206
-
207
-
208
-
209
-
210
-
211
-
212
-
213
-
214
-
215
-
216
-
217
-
218
-
219
-
220
-
221
-
222
-
223
-
224
-
225
-
226
-
227
-
228
-
229
-
230
-
231
-
232
-
233
-
234
-
235
-
236
-
237
-
238
-
239
-
240
-
241
-
242
-
243
-
244
-
245
-
246
-
247
-
248
-
249
-
250
-
251
-
252
-
253
-
254
-
255
-
256
-
257
-
258
-
259
-
260
-
261
-
262
-
263
-
264
-
265
-
266
-
267
-
268
-
269
-
270
-
271
-
272
-
273
-
274
-
275
-
276
-
277
-
278
-
279
-
280
-
281
-
282
-
283
-
284
-
285
-
286
-
287
-
288
-
289
-
290
-
291
-
292
-
293
-
294
-
295
-
296
-
297
-
298
-
299
-
300
-
301
-
302
-
303
-
304
-
305
-
306
-
307
-
308
-
309
-
310
-
311
-
312
-
313
-
314
-
315
-
316
-
317
-
318
-
319
-
320
-
321
-
322
-
323
-
324
-
325
-
326
-
327
-
328
-
329
-
330
-
331
-
332
-
333
-
334
-
335
-
336
-
337
-
338
-
339
-
340
-
341
-
342
-
343
-
344
-
345
-
346
-
347
-
348
-
349
-
350
-
351
-
352
-
353
-
354
-
355
-
356
-
357
-
358
-
359
-
360
-
361
-
362
-
363
-
364
-
365
-
366
-
367
-
368
-
369
-
370
-
371
-
372
-
373
-
374
-
375
-
376
-
377
-
378
-
379
-
380
-
381
-
382
-
383
-
384
-
385
-
386
-
387
-
388
-
389
-
390
-
391
-
392
-
393
-
394
-
395
-
396
-
397
-
398
-
399
-
400
-
401
-
402
-
403
-
404
-
405
-
406
-
407
-
408
-
409
-
410
-
411
-
412
-
413
-
414
-
415
-
416
-
417
-
418
-
419
-
420
 |
 |