Canon EOS Rebel T1i Digital Photo Professional 3.6 for Windows Instruction Man - Page 12
Enlarge and View an Image in the Edit Window, Enlarging and Viewing a Specific Area
 |
View all Canon EOS Rebel T1i manuals
Add to My Manuals
Save this manual to your list of manuals |
Page 12 highlights
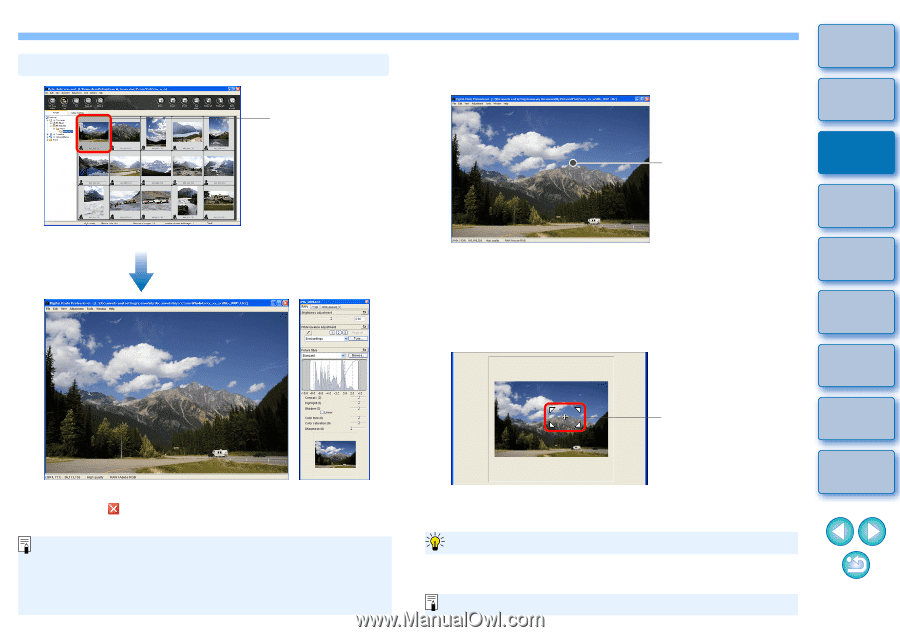
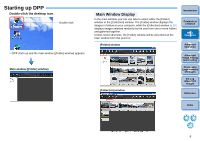
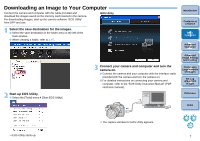
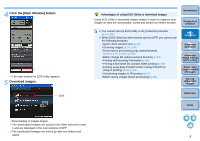
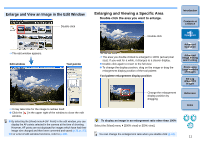
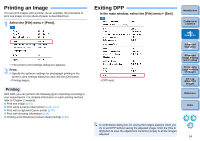
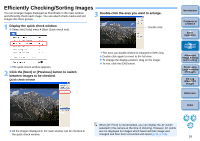
Enlarge and View an Image in the Edit Window Double-click ¿ The edit window appears. Edit window Tool palette Enlarging and Viewing a Specific Area Double-click the area you want to enlarge. Double-click ¿ The area you double-clicked is enlarged to 100% (actual pixel size). If you wait for a while, it changes to a clearer display. O Double-click again to revert to the full view. O To change the display position, drag on the image or drag the enlargement display position of the tool palette. Tool palette enlargement display position Introduction Contents at a Glance 1Basic Operation 2Advanced Operation 3Advanced Image Editing and Printing 4 Processing Large Numbers of Images 5Editing JPEG/TIFF Images Change the enlargement display position by dragging ¿ It may take time for the image to redraw itself. O Click the [ ] in the upper right of the window to close the edit window. O By selecting the [View] menu ` [AF Point] in the edit window, you can display the AF points selected in the camera at the time of shooting. However, AF points are not displayed for images which have had their image size changed and then been converted and saved (p.38, p.113). O For a list of edit window functions, refer to p.108. To display an image in an enlargement ratio other than 100% Select the [View] menu ` [200% view] or [50% view]. You can change the enlargement ratio when you double-click (p.74). Reference Index 11
-
 1
1 -
2
-
3
-
4
-
5
-
6
-
 7
7 -
 8
8 -
 9
9 -
 10
10 -
 11
11 -
 12
12 -
 13
13 -
 14
14 -
 15
15 -
 16
16 -
 17
17 -
18
-
19
-
20
-
21
-
22
-
23
-
24
-
25
-
26
-
27
-
28
-
29
-
30
-
31
-
32
-
33
-
34
-
35
-
36
-
37
-
38
-
39
-
40
-
41
-
42
-
43
-
44
-
45
-
46
-
47
-
48
-
49
-
50
-
51
-
52
-
53
-
54
-
55
-
56
-
57
-
58
-
59
-
60
-
61
-
62
-
63
-
64
-
65
-
66
-
67
-
68
-
69
-
70
-
71
-
72
-
73
-
74
-
75
-
76
-
77
-
78
-
79
-
80
-
81
-
82
-
83
-
84
-
85
-
86
-
87
-
88
-
89
-
90
-
91
-
92
-
93
-
94
-
95
-
96
-
97
-
98
-
99
-
100
-
101
-
102
-
103
-
104
-
105
-
106
-
107
-
108
-
109
-
110
-
111
-
112
-
113
-
114
-
115
-
116
-
117
-
118
-
119
-
120
-
121
-
122
-
123
-
124
-
125
-
126
 |
 |