Canon EOS Rebel T1i Digital Photo Professional 3.6 for Windows Instruction Man - Page 68

Transferring a RAW Image to Photoshop, Setting Work Color Space

Page 68 highlights

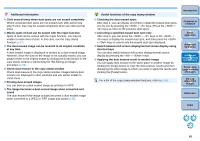
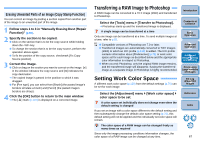
Erasing Unwanted Parts of an Image (Copy Stamp Function) You can correct an image by pasting a section copied from another part of the image to an unwanted part of the image. 1 Follow steps 1 to 3 in "Manually Erasing Dust (Repair Function)" (p.65). 2 Specify the section to be copied. O Click on the section that is to be the copy source while holding down the key. O To change the section that is to be the copy source, perform the operation above again. O To fix the position of the copy source, checkmark [Fix Copy Source position]. 3 Correct the image. O Click or drag on the section you want to correct on the image. [+] in the window indicates the copy source and [ ] indicates the copy destination. ¿ The copied image is pasted in the position to which it was dragged. O For [Pen type], you can select from [Brush] (the pasted image's borders simulate a brush) and [Pencil] (the pasted image's borders are sharp). 4 Click the [OK] button to return to the main window. ¿ The [ ] mark (p.107) is displayed on a corrected image. Transferring a RAW Image to Photoshop A RAW image can be converted to a TIFF image (16bit) and transferred to Photoshop. Select the [Tools] menu ` [Transfer to Photoshop]. ¿ Photoshop starts up and the transferred image is displayed. A single image can be transferred at a time Only one image can be transferred at a time. To send multiple images at a time, refer to p.83. O Compatible versions of Photoshop are 7.0 or later. O Transferred images are automatically converted to TIFF images (16bit) to which an ICC profile (p.119) is added. The ICC profile contains information about [Preferences] (p.76) or work color space set for each image as described below and the appropriate color information is relayed to Photoshop. O When you exit Photoshop, only the original RAW image remains, and the transferred image will disappear. Saving the transferred image as a separate image in Photoshop is highly recommended. Setting Work Color Space A different work color space (p.120) from the default settings (p.76) can be set for each image. Select the [Adjustment] menu ` [Work color space] ` color space to be set. A color space set individually does not change even when the default setting is changed If you set an image with a color space different to the default setting and then subsequently change the default color space setting (p.76), this default setting will not be applied and the individually set color space will remain. The color space of a RAW image can be changed freely as many times as required Since only the image processing conditions information changes, the color space of a RAW image can be changed at any time. Introduction Contents at a Glance 1Basic Operation 2Advanced Operation 3Advanced Image Editing and Printing 4 Processing Large Numbers of Images 5Editing JPEG/TIFF Images Reference Index 67

  • 1
  • 2
  • 3
  • 4
  • 5
  • 6
  • 7
  • 8
  • 9
  • 10
  • 11
  • 12
  • 13
  • 14
  • 15
  • 16
  • 17
  • 18
  • 19
  • 20
  • 21
  • 22
  • 23
  • 24
  • 25
  • 26
  • 27
  • 28
  • 29
  • 30
  • 31
  • 32
  • 33
  • 34
  • 35
  • 36
  • 37
  • 38
  • 39
  • 40
  • 41
  • 42
  • 43
  • 44
  • 45
  • 46
  • 47
  • 48
  • 49
  • 50
  • 51
  • 52
  • 53
  • 54
  • 55
  • 56
  • 57
  • 58
  • 59
  • 60
  • 61
  • 62
  • 63
  • 64
  • 65
  • 66
  • 67
  • 68
  • 69
  • 70
  • 71
  • 72
  • 73
  • 74
  • 75
  • 76
  • 77
  • 78
  • 79
  • 80
  • 81
  • 82
  • 83
  • 84
  • 85
  • 86
  • 87
  • 88
  • 89
  • 90
  • 91
  • 92
  • 93
  • 94
  • 95
  • 96
  • 97
  • 98
  • 99
  • 100
  • 101
  • 102
  • 103
  • 104
  • 105
  • 106
  • 107
  • 108
  • 109
  • 110
  • 111
  • 112
  • 113
  • 114
  • 115
  • 116
  • 117
  • 118
  • 119
  • 120
  • 121
  • 122
  • 123
  • 124
  • 125
  • 126

67
1
2
3
4
5
Introduction
Contents at
a Glance
Basic
Operation
Advanced
Operation
Advanced
Image Editing
and Printing
Editing
JPEG/TIFF
Images
Index
Processing
Large Numbers
of Images
Reference
Transferring a RAW Image to Photoshop
A RAW image can be converted to a TIFF image (16bit) and transferred
to Photoshop.
Only one image can be transferred at a time. To send multiple images at
a time, refer to
p.83
.
Setting Work Color Space
A different work color space
(p.120)
from the default settings
(p.76)
can
be set for each image.
If you set an image with a color space different to the default setting and
then subsequently change the default color space setting
(p.76)
, this
default setting will not be applied and the individually set color space will
remain.
Since only the image processing conditions information changes, the
color space of a RAW image can be changed at any time.
Select the [Tools] menu
`
[Transfer to Photoshop].
¿
Photoshop starts up and the transferred image is displayed.
A single image can be transferred at a time
O
Compatible versions of Photoshop are 7.0 or later.
O
Transferred images are automatically converted to TIFF images
(16bit) to which an ICC profile
(p.119)
is added. The ICC profile
contains information about [Preferences]
(p.76)
or work color
space set for each image as described below and the appropriate
color information is relayed to Photoshop.
O
When you exit Photoshop, only the original RAW image remains,
and the transferred image will disappear. Saving the transferred
image as a separate image in Photoshop is highly recommended.
Select the [Adjustment] menu
`
[Work color space]
`
color space to be set.
A color space set individually does not change even when the
default setting is changed
The color space of a RAW image can be changed freely as
many times as required
You can correct an image by pasting a section copied from another part
of the image to an unwanted part of the image.
1
Follow steps 1 to 3 in “Manually Erasing Dust (Repair
Function)”
(p.65)
.
2
Specify the section to be copied.
O
Click on the section that is to be the copy source while holding
down the <Alt> key.
O
To change the section that is to be the copy source, perform the
operation above again.
O
To fix the position of the copy source, checkmark [Fix Copy
Source position].
3
Correct the image.
O
Click or drag on the section you want to correct on the image. [
+
]
in the window indicates the copy source and [
] indicates the
copy destination.
¿
The copied image is pasted in the position to which it was
dragged.
O
For [Pen type], you can select from [Brush] (the pasted image’s
borders simulate a brush) and [Pencil] (the pasted image’s
borders are sharp).
4
Click the [OK] button to return to the main window.
¿
The [
] mark
(p.107)
is displayed on a corrected image.
Erasing Unwanted Parts of an Image (Copy Stamp Function)