Dell PowerEdge 2321DS Dell 1082DS/2162DS/4322DS Remote Console Switch Softw - Page 18
Web Interface Port Configuration Menu, Web Interface Ports
 |
View all Dell PowerEdge 2321DS manuals
Add to My Manuals
Save this manual to your list of manuals |
Page 18 highlights
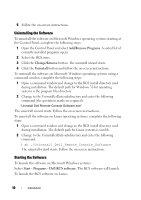
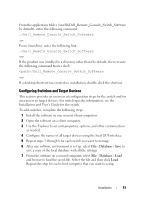
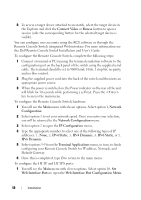
8 To access a target device attached to an switch, select the target device in the Explorer and click the Connect Video or Browse button to open a session (only the corresponding button for the selected target device is visible). You can configure user accounts using the RCS software or through the Remote Console Switch integrated Web interface. For more information see the Dell Remote Console Switch Installation and User's Guide. To configure the Remote Console Switch, complete the following steps: 1 Connect a terminal or PC running the terminal emulation software to the configuration port on the back panel of the switch using the supplied serial cable. The terminal should be set to 9600 baud, 8 bits, 1 stop bit, no parity, and no flow control. 2 Plug the supplied power cord into the back of the switch and then into an appropriate power source. 3 When the power is switched on, the Power indicator on the rear of the unit will blink for 30 seconds while performing a self-test. Press the key to access the main menu. To configure the Remote Console Switch hardware: 1 You will see the Main menu with eleven options. Select option 1, Network Configuration. 2 Select option 1 to set your network speed. Once you enter your selection, you will be returned to the Network Configuration menu. 3 Select option 2 to open the IP Configuration menu. 4 Type the appropriate number to select one of the following types of IP addresses: 1: None, 2: IPv4 Static, 3: IPv4 Dynamic, 4: IPv6 Static, or 5: IPv6 Dynamic. 5 Select options 3-5 from the Terminal Applications menu, in turn, to finish configuring your Remote Console Switch for IP address, Netmask, and Default Gateway. 6 Once this is completed, type Ø to return to the main menu. To configure the HTTP and HTTPS ports: 1 You will see the Main menu with eleven options. Select option 10, Set Web Interface Ports to open the Web Interface Port Configuration Menu. 12 Installation
-
 1
1 -
2
-
3
-
4
-
5
-
6
-
7
-
8
-
9
-
10
-
11
-
12
-
 13
13 -
 14
14 -
 15
15 -
 16
16 -
 17
17 -
 18
18 -
 19
19 -
 20
20 -
 21
21 -
 22
22 -
 23
23 -
24
-
25
-
26
-
27
-
28
-
29
-
30
-
31
-
32
-
33
-
34
-
35
-
36
-
37
-
38
-
39
-
40
-
41
-
42
-
43
-
44
-
45
-
46
-
47
-
48
-
49
-
50
-
51
-
52
-
53
-
54
-
55
-
56
-
57
-
58
-
59
-
60
-
61
-
62
-
63
-
64
-
65
-
66
-
67
-
68
-
69
-
70
-
71
-
72
-
73
-
74
-
75
-
76
-
77
-
78
-
79
-
80
-
81
-
82
-
83
-
84
-
85
-
86
-
87
-
88
-
89
-
90
-
91
-
92
-
93
-
94
-
95
-
96
-
97
-
98
-
99
-
100
-
101
-
102
-
103
-
104
-
105
-
106
 |
 |