Dell PowerEdge 2321DS Dell 1082DS/2162DS/4322DS Remote Console Switch Softw - Page 19
Web Interface Installation and Setup, Mouse Acceleration, Supported Browsers
 |
View all Dell PowerEdge 2321DS manuals
Add to My Manuals
Save this manual to your list of manuals |
Page 19 highlights
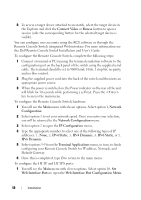
2 Select option 1 to set the port numbers. Type the port numbers you wish to use for the HTTP port and the HTTPS port. 3 If the values are correct for your network, type and press the key. 4 At the local user station, input the target device names. Mouse Acceleration If you are experiencing slow mouse response during a remote video session, deactivate mouse acceleration in the operating system of the target device and adjust mouse acceleration on each target device to Slow or None. Web Interface Installation and Setup Once you have installed a new appliance, you can use the web interface to configure unit parameters and launch video sessions. Supported Browsers The web interface supports the following browsers: • Microsoft Internet Explorer® version 6.x SP1 or later • Firefox version 2.0 or later Launching the On-board Web Interface To launch the web interface: 1 Open a web browser and type the IP address of the appliance using the local Web interface. NOTE: If you changed the default HTTP/HTTPS ports in the serial console and are using an IPv4 address, use IP address format: https://:, where "port#" is the number you specified in the serial console. If you are using an IPv6 address, use format: https://[]:, where "port#" is the number you specified in the serial console. If you are using an IPv6 address, you must enclose the address in square brackets. 2 The log in window opens. Type your username and password and click OK. 3 The web interface opens and displays the Connections tab. Installation 13
-
 1
1 -
2
-
3
-
4
-
5
-
6
-
7
-
8
-
9
-
10
-
11
-
12
-
13
-
 14
14 -
 15
15 -
 16
16 -
 17
17 -
 18
18 -
 19
19 -
 20
20 -
 21
21 -
 22
22 -
 23
23 -
 24
24 -
25
-
26
-
27
-
28
-
29
-
30
-
31
-
32
-
33
-
34
-
35
-
36
-
37
-
38
-
39
-
40
-
41
-
42
-
43
-
44
-
45
-
46
-
47
-
48
-
49
-
50
-
51
-
52
-
53
-
54
-
55
-
56
-
57
-
58
-
59
-
60
-
61
-
62
-
63
-
64
-
65
-
66
-
67
-
68
-
69
-
70
-
71
-
72
-
73
-
74
-
75
-
76
-
77
-
78
-
79
-
80
-
81
-
82
-
83
-
84
-
85
-
86
-
87
-
88
-
89
-
90
-
91
-
92
-
93
-
94
-
95
-
96
-
97
-
98
-
99
-
100
-
101
-
102
-
103
-
104
-
105
-
106
 |
 |
