Garmin GPSMAP 6012 Owner's Manual - Page 103
Charts, Radar Overlay, Other Vessels, Display, Setup, Display Range, Details, Proj. Heading, Trails
 |
View all Garmin GPSMAP 6012 manuals
Add to My Manuals
Save this manual to your list of manuals |
Page 103 highlights
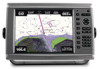
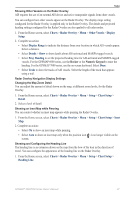
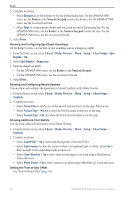
Radar Showing Other Vessels on the Radar Overlay AIS requires the use of an external AIS device and active transponder signals from other vessels. You can configure how other vessels appear on the Radar Overlay. The display range setting configured for the Radar Overlay is applied only to the Radar Overlay. The details and projected heading settings configured for the Radar Overlay are also applied to all radar modes. 1. From the Home screen, select Charts > Radar Overlay > Menu > Other Vessels > Display Setup. 2. Complete an action: • Select Display Range to indicate the distance from your location in which AIS vessels appear. Select a distance. • Select Details > Show to show details about AIS-activated and MARPA-tagged vessels. • Select Proj. Heading to set the projected heading time for AIS-activated and MARPA-tagged vessels. For the GPSMAP 6000 series, use the Rocker or the Numeric Keypad to enter the heading. For the GPSMAP 7000 series, use the on-screen keyboard. Select Done. • Select Trails to show the tracks of AIS vessels. Select the length of the track that appears using a trail. Radar Overlay Navigation Display Settings Changing the Map Zoom Detail You can adjust the amount of detail shown on the map, at different zoom levels, for the Radar Overlay. 1. From the Home screen, select Charts > Radar Overlay > Menu > Setup > Chart Setup > Detail. 2. Select a level of detail. Showing an Inset Map while Panning You can control whether an inset map appears while panning the Radar Overlay. 1. From the Home screen, select Charts > Radar Overlay > Menu > Setup > Chart Setup > Inset Map. 2. Complete an action: • Select On to show an inset map while panning. • Select Auto to show an inset map only when the position icon ( ) is no longer visible on the screen. Showing and Configuring the Heading Line The heading line is an extension drawn on the map from the bow of the boat in the direction of travel. You can configure the appearance of the heading line on the Radar Overlay. 1. From the Home screen, select Charts > Radar Overlay > Menu > Setup > Chart Setup > Heading Line. GPSMAP® 6000/7000 Series Owner's Manual 97
-
 1
1 -
2
-
3
-
4
-
5
-
6
-
7
-
8
-
9
-
10
-
11
-
12
-
13
-
14
-
15
-
16
-
17
-
18
-
19
-
20
-
21
-
22
-
23
-
24
-
25
-
26
-
27
-
28
-
29
-
30
-
31
-
32
-
33
-
34
-
35
-
36
-
37
-
38
-
39
-
40
-
41
-
42
-
43
-
44
-
45
-
46
-
47
-
48
-
49
-
50
-
51
-
52
-
53
-
54
-
55
-
56
-
57
-
58
-
59
-
60
-
61
-
62
-
63
-
64
-
65
-
66
-
67
-
68
-
69
-
70
-
71
-
72
-
73
-
74
-
75
-
76
-
77
-
78
-
79
-
80
-
81
-
82
-
83
-
84
-
85
-
86
-
87
-
88
-
89
-
90
-
91
-
92
-
93
-
94
-
95
-
96
-
97
-
 98
98 -
 99
99 -
 100
100 -
 101
101 -
 102
102 -
 103
103 -
 104
104 -
 105
105 -
 106
106 -
 107
107 -
 108
108 -
109
-
110
-
111
-
112
-
113
-
114
-
115
-
116
-
117
-
118
-
119
-
120
-
121
-
122
-
123
-
124
-
125
-
126
-
127
-
128
-
129
-
130
-
131
-
132
 |
 |
