Garmin GPSMAP 6012 Owner's Manual - Page 97
Radar Display Appearance, Data Bar Settings
 |
View all Garmin GPSMAP 6012 manuals
Add to My Manuals
Save this manual to your list of manuals |
Page 97 highlights
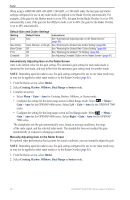
Radar Adjusting Crosstalk Clutter on the Radar Screen You can reduce the appearance of clutter caused by interference from another nearby radar source. On is the default value for the crosstalk setting. Note: Depending upon the radar in use, the crosstalk setting configured for use in one radar mode may or may not be applied to other radar modes or to the Radar Overlay (page 85). 1. From the Home screen, select Radar. 2. Select Cruising, Harbor, Offshore, Dual Range or Sentry mode. 3. Complete an action: • Select Menu > Noise Rejection > Crosstalk > On for Cruising, Harbor, Offshore, or Sentry mode. • Configure the setting for both screens in Dual Range mode. Select > Menu > Noise Rejection > Crosstalk > On for the GPSMAP 6000 series. Select Left > Noise Rejection > Crosstalk > On for the GPSMAP 7000 series. Radar Display Appearance Data Bar Settings Data bars can appear in all Radar modes, and they provide real-time, at-a-glance information. All data bars configured for use in one radar mode appear in every other radar mode. All data bars configured for use on the Radar Overlay appear only on the Radar Overlay, and must be configured separately. Showing the Cruising Data Bar on the Radar Screen The cruising data bar shows GPS speed, GPS heading, depth, and GPS position data. 1. From the Home screen, select Radar. 2. Select Cruising, Harbor, or Offshore mode. 3. Select Menu > Radar Setup > Data Bars > Cruising > On. Configuring the Cruising Data Bar on the Radar Screen You should show the cruising data bar before you configure it (page 91). The cruising data bar is divided into four sections, and each section appears in a different corner of the Radar screen. You can select the type of data that appears in each section of the data bar. 1. From the Home screen, select Radar. 2. Select Cruising, Harbor, or Offshore mode. 3. Select Menu > Radar Setup > Data Bars > Cruising > Data Bar Setup. 4. Select Top Left. 5. Select the type of data to appear in the top left section of the data bar. 6. Repeat steps 4 and 5 for the Top Right, Bottom Left, and Bottom Right sections of the data bar. GPSMAP® 6000/7000 Series Owner's Manual 91
-
 1
1 -
2
-
3
-
4
-
5
-
6
-
7
-
8
-
9
-
10
-
11
-
12
-
13
-
14
-
15
-
16
-
17
-
18
-
19
-
20
-
21
-
22
-
23
-
24
-
25
-
26
-
27
-
28
-
29
-
30
-
31
-
32
-
33
-
34
-
35
-
36
-
37
-
38
-
39
-
40
-
41
-
42
-
43
-
44
-
45
-
46
-
47
-
48
-
49
-
50
-
51
-
52
-
53
-
54
-
55
-
56
-
57
-
58
-
59
-
60
-
61
-
62
-
63
-
64
-
65
-
66
-
67
-
68
-
69
-
70
-
71
-
72
-
73
-
74
-
75
-
76
-
77
-
78
-
79
-
80
-
81
-
82
-
83
-
84
-
85
-
86
-
87
-
88
-
89
-
90
-
91
-
 92
92 -
 93
93 -
 94
94 -
 95
95 -
 96
96 -
 97
97 -
 98
98 -
 99
99 -
 100
100 -
 101
101 -
 102
102 -
103
-
104
-
105
-
106
-
107
-
108
-
109
-
110
-
111
-
112
-
113
-
114
-
115
-
116
-
117
-
118
-
119
-
120
-
121
-
122
-
123
-
124
-
125
-
126
-
127
-
128
-
129
-
130
-
131
-
132
 |
 |