Garmin GPSMAP 6012 Owner's Manual - Page 40
Waypoints, Creating a Waypoint at a Different Location
 |
View all Garmin GPSMAP 6012 manuals
Add to My Manuals
Save this manual to your list of manuals |
Page 40 highlights
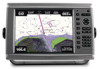
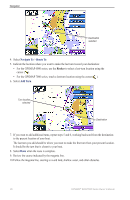
Navigation 3. Review the course indicated by the magenta Auto Guidance line. Note: A gray line within any part of the magenta line indicates that Auto Guidance cannot calculate part of the Auto Guidance line. This is due to the minimum safe water depth and the minimum safe obstacle height settings (page 59). 4 Follow the magenta line, steering to avoid land, shallow water, and other obstacles. Waypoints You can store up to 5000 waypoints with a user-defined name, symbol, depth, water temperature, and comment for each waypoint. Marking Your Present Location as a Waypoint From the Home screen, select Mark. Creating a Waypoint at a Different Location 1. From the Home screen, select Information > User Data > Waypoints > New Waypoint > Move. 2. Indicate the location of the waypoint: • Select Use Chart to move the waypoint while viewing a chart. For the GPSMAP 6000 series, use the Rocker to select a new location on the chart. For the GPSMAP 7000 series, touch a new location on the chart. Select Move Waypoint. • Select Enter Position to move the waypoint using coordinates. For the GPSMAP 6000 series, use the Rocker to enter the coordinates of the new location. For the GPSMAP 7000 series, use the on-screen keyboard. Select Done. Marking and Navigating to an MOB Location When you mark a waypoint, you can designate it as a man overboard (MOB) location. From any screen, select Mark > Man Overboard. An international MOB symbol marks the active MOB point and the chartplotter sets a course back to the marked location using the Go To feature. Viewing a List of all Waypoints From the Home screen, select Information > User Data > Waypoints. Editing a Saved Waypoint 1. From the Home screen, select Information > User Data > Waypoints. 2. Select a waypoint. 3. Select Review > Edit. 4. Complete an action: • Select Name. For the GPSMAP 6000 series, use the Rocker to change the name. For the GPSMAP 7000 series, use the on-screen keyboard. Select Done. • Select Symbol. Select a new symbol. • Select Depth. For the GPSMAP 6000 series, use the Rocker or the Numeric Keypad to change the depth. For the GPSMAP 7000 series, use the on-screen keyboard. Select Done. 34 GPSMAP® 6000/7000 Series Owner's Manual
-
 1
1 -
2
-
3
-
4
-
5
-
6
-
7
-
8
-
9
-
10
-
11
-
12
-
13
-
14
-
15
-
16
-
17
-
18
-
19
-
20
-
21
-
22
-
23
-
24
-
25
-
26
-
27
-
28
-
29
-
30
-
31
-
32
-
33
-
34
-
 35
35 -
 36
36 -
 37
37 -
 38
38 -
 39
39 -
 40
40 -
 41
41 -
 42
42 -
 43
43 -
 44
44 -
 45
45 -
46
-
47
-
48
-
49
-
50
-
51
-
52
-
53
-
54
-
55
-
56
-
57
-
58
-
59
-
60
-
61
-
62
-
63
-
64
-
65
-
66
-
67
-
68
-
69
-
70
-
71
-
72
-
73
-
74
-
75
-
76
-
77
-
78
-
79
-
80
-
81
-
82
-
83
-
84
-
85
-
86
-
87
-
88
-
89
-
90
-
91
-
92
-
93
-
94
-
95
-
96
-
97
-
98
-
99
-
100
-
101
-
102
-
103
-
104
-
105
-
106
-
107
-
108
-
109
-
110
-
111
-
112
-
113
-
114
-
115
-
116
-
117
-
118
-
119
-
120
-
121
-
122
-
123
-
124
-
125
-
126
-
127
-
128
-
129
-
130
-
131
-
132
 |
 |