Garmin GPSMAP 6012 Owner's Manual - Page 18
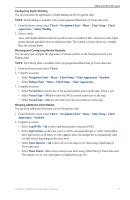
Charts, Navigation Chart, Fishing Chart, Chart Setup, Appearance, Heading Line, Distance, Spot Depths
 |
View all Garmin GPSMAP 6012 manuals
Add to My Manuals
Save this manual to your list of manuals |
Page 18 highlights
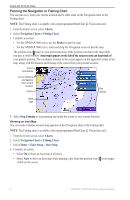
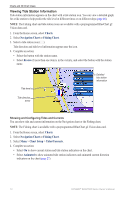
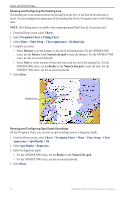
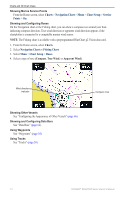
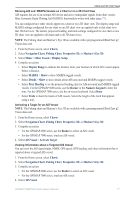
Charts and 3D Chart Views Showing and Configuring the Heading Line The heading line is an extension drawn on the map from the bow of the boat in the direction of travel. You can configure the appearance of the heading line for the Navigation chart or the Fishing chart. Note: The Fishing chart is available with a preprogrammed BlueChart g2 Vision data card. 1. From the Home screen, select Charts. 2. Select Navigation Chart or Fishing Chart. 3. Select Menu > Chart Setup > Chart Appearance > Heading Line. 4. Complete an action: • Select Distance to set the distance to the end of the heading line. For the GPSMAP 6000 series, use the Rocker or the Numeric Keypad to enter the distance. For the GPSMAP 7000 series, use the on-screen keyboard. • Select Time to set the amount of time until you reach the end of the heading line. For the GPSMAP 6000 series, use the Rocker or the Numeric Keypad to enter the time. For the GPSMAP 7000 series, use the on-screen keyboard. 5. Select Done. Heading line Showing and Configuring Spot Depth Soundings On the Navigation Chart, you can turn on spot soundings and set a dangerous depth. 1. From the Home screen, select Charts > Navigation Chart > Menu > Chart Setup > Chart Appearance > Spot Depths > On. 2. Select Spot Depths > Dangerous. 3. Enter the dangerous depth: • For the GPSMAP 6000 series, use the Rocker or the Numeric Keypad. • For the GPSMAP 7000 series, use the on-screen keyboard. 4. Select Done. 12 GPSMAP® 6000/7000 Series Owner's Manual
-
 1
1 -
2
-
3
-
4
-
5
-
6
-
7
-
8
-
9
-
10
-
11
-
12
-
 13
13 -
 14
14 -
 15
15 -
 16
16 -
 17
17 -
 18
18 -
 19
19 -
 20
20 -
 21
21 -
 22
22 -
 23
23 -
24
-
25
-
26
-
27
-
28
-
29
-
30
-
31
-
32
-
33
-
34
-
35
-
36
-
37
-
38
-
39
-
40
-
41
-
42
-
43
-
44
-
45
-
46
-
47
-
48
-
49
-
50
-
51
-
52
-
53
-
54
-
55
-
56
-
57
-
58
-
59
-
60
-
61
-
62
-
63
-
64
-
65
-
66
-
67
-
68
-
69
-
70
-
71
-
72
-
73
-
74
-
75
-
76
-
77
-
78
-
79
-
80
-
81
-
82
-
83
-
84
-
85
-
86
-
87
-
88
-
89
-
90
-
91
-
92
-
93
-
94
-
95
-
96
-
97
-
98
-
99
-
100
-
101
-
102
-
103
-
104
-
105
-
106
-
107
-
108
-
109
-
110
-
111
-
112
-
113
-
114
-
115
-
116
-
117
-
118
-
119
-
120
-
121
-
122
-
123
-
124
-
125
-
126
-
127
-
128
-
129
-
130
-
131
-
132
 |
 |