Samsung SPH-M320 User Manual (user Manual) (ver.f6) (English) - Page 68
Call History Options, Making a Call From Call History, Saving a Number From Call History
 |
View all Samsung SPH-M320 manuals
Add to My Manuals
Save this manual to your list of manuals |
Page 68 highlights
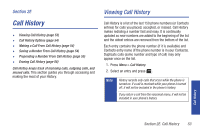
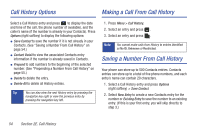
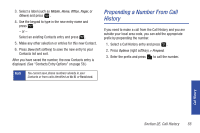
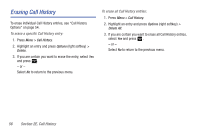
Call History Options Making a Call From Call History Select a Call History entry and press to display the date and time of the call, the phone number (if available), and the caller's name (if the number is already in your Contacts). Press Options (right softkey) to display the following options: ⅷ Save Contact to save the number if it is not already in your Contacts. (See "Saving a Number From Call History" on page 54.) ⅷ Contact Detail to view the associated Contacts entry information if the number is already saved in Contacts. ⅷ Prepend to add numbers to the beginning of the selected number. (See "Prepending a Number From Call History" on page 55.) ⅷ Delete to delete the entry. ⅷ Delete All to delete all History entries. Tip You can also view the next History entry by pressing the navigation key right or view the previous entry by pressing the navigation key left. 1. Press Menu > Call History. 2. Select an entry and press . 3. Select an entry and press . Note You cannot make calls from History to entries identified as No ID, Unknown or Restricted. Saving a Number From Call History Your phone can store up to 500 Contacts entries. Contacts entries can store up to a total of five phone numbers, and each entry's name can contain 20 characters. 1. Select a Call History entry and press Options (right softkey) > Save Contact. 2. Select New Entry to create a new Contacts entry for the number or Existing Entry to save the number to an existing entry. (If this is your first entry, you will skip directly to step 3.) 54 Section 2E. Call History
-
 1
1 -
2
-
3
-
4
-
5
-
6
-
7
-
8
-
9
-
10
-
11
-
12
-
13
-
14
-
15
-
16
-
17
-
18
-
19
-
20
-
21
-
22
-
23
-
24
-
25
-
26
-
27
-
28
-
29
-
30
-
31
-
32
-
33
-
34
-
35
-
36
-
37
-
38
-
39
-
40
-
41
-
42
-
43
-
44
-
45
-
46
-
47
-
48
-
49
-
50
-
51
-
52
-
53
-
54
-
55
-
56
-
57
-
58
-
59
-
60
-
61
-
62
-
 63
63 -
 64
64 -
 65
65 -
 66
66 -
 67
67 -
 68
68 -
 69
69 -
 70
70 -
 71
71 -
 72
72 -
 73
73 -
74
-
75
-
76
-
77
-
78
-
79
-
80
-
81
-
82
-
83
-
84
-
85
-
86
-
87
-
88
-
89
-
90
-
91
-
92
-
93
-
94
-
95
-
96
-
97
-
98
-
99
-
100
-
101
-
102
-
103
-
104
-
105
-
106
-
107
-
108
-
109
-
110
-
111
-
112
-
113
-
114
-
115
-
116
-
117
-
118
-
119
-
120
-
121
-
122
-
123
-
124
-
125
-
126
-
127
-
128
-
129
-
130
-
131
-
132
-
133
-
134
-
135
-
136
-
137
-
138
-
139
-
140
-
141
-
142
-
143
-
144
-
145
-
146
-
147
 |
 |