Samsung SPH-M320 User Manual (user Manual) (ver.f6) (English) - Page 98
Sending Pictures, Sending Pictures From the In Camera Folder
 |
View all Samsung SPH-M320 manuals
Add to My Manuals
Save this manual to your list of manuals |
Page 98 highlights
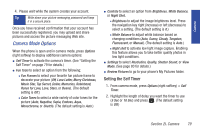
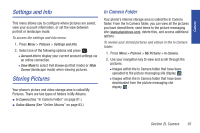
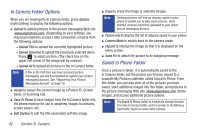
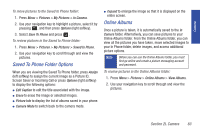
Sending Pictures Once you have taken a picture, you can use the messaging capabilities of your phone to instantly share it with family and friends. You can send a picture to up to 10 people at a time using their email addresses or their phone numbers. Sending Pictures From the In Camera Folder 1. Press Menu > Pictures > My Pictures > In Camera. 2. Select a picture to send and press . (The check box in the upper left corner will be marked. You can select multiple pictures and videos.) 3. Press Send Pic (left softkey). (You will see a message.) Note The first time you send a picture, you will be prompted to register your picture messaging account. (See "Registering Your Picture Messaging Account" on page 78.) 4. Select an option and press : Ⅲ Phone # to enter a mobile phone number directly and press . Ⅲ Email to enter an email address directly and press . Ⅲ Contacts to select recipients from your Contacts. Select a recipient and press . Ⅲ Other SVC. to choose from a list of other services such as Help, Retail Pickup, or CEIVA. Select a service and press . This option is dependant on service support. Ⅲ Update List to query the server and update the contents of the Send To list. 5. Press Next (left softkey) when you are finished adding recipients. (You may include up to 10 recipients per message.) 6. To include a subject, scroll to Subject and select Add (right softkey). Enter your subject using the keypad and press Save (left softkey) to save and exit. 7. To include a text message, scroll to the Text field and press Add (right softkey). Enter your message using your keypad (or press Options [right softkey] to select from Preset Messages or Recent Messages) and press . (See "Entering Text" on page 27.) 84 Section 2I. Camera
-
 1
1 -
2
-
3
-
4
-
5
-
6
-
7
-
8
-
9
-
10
-
11
-
12
-
13
-
14
-
15
-
16
-
17
-
18
-
19
-
20
-
21
-
22
-
23
-
24
-
25
-
26
-
27
-
28
-
29
-
30
-
31
-
32
-
33
-
34
-
35
-
36
-
37
-
38
-
39
-
40
-
41
-
42
-
43
-
44
-
45
-
46
-
47
-
48
-
49
-
50
-
51
-
52
-
53
-
54
-
55
-
56
-
57
-
58
-
59
-
60
-
61
-
62
-
63
-
64
-
65
-
66
-
67
-
68
-
69
-
70
-
71
-
72
-
73
-
74
-
75
-
76
-
77
-
78
-
79
-
80
-
81
-
82
-
83
-
84
-
85
-
86
-
87
-
88
-
89
-
90
-
91
-
92
-
 93
93 -
 94
94 -
 95
95 -
 96
96 -
 97
97 -
 98
98 -
 99
99 -
 100
100 -
 101
101 -
 102
102 -
 103
103 -
104
-
105
-
106
-
107
-
108
-
109
-
110
-
111
-
112
-
113
-
114
-
115
-
116
-
117
-
118
-
119
-
120
-
121
-
122
-
123
-
124
-
125
-
126
-
127
-
128
-
129
-
130
-
131
-
132
-
133
-
134
-
135
-
136
-
137
-
138
-
139
-
140
-
141
-
142
-
143
-
144
-
145
-
146
-
147
 |
 |