Samsung SPH-M320 User Manual (user Manual) (ver.f6) (English) - Page 93
Camera Mode Options, Setting the Self Timer
 |
View all Samsung SPH-M320 manuals
Add to My Manuals
Save this manual to your list of manuals |
Page 93 highlights
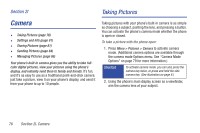
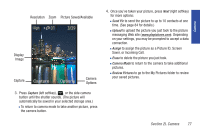
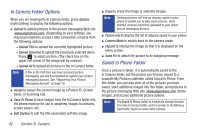
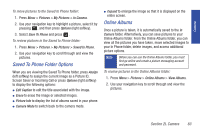
Camera 4. Please wait while the system creates your account. Tip Write down your picture messaging password and keep it in a secure place. Once you have received confirmation that your account has been successfully registered, you may upload and share pictures and access the picture messaging Web site. Camera Mode Options When the phone is open and in camera mode, press Options (right softkey) to display additional camera options: ⅷ Self Timer to activate the camera's timer. (See "Setting the Self Timer" on page 79 for details.) ⅷ Fun Tools to select an option from the following: Ⅲ Fun Frames to select your favorite fun picture frame to decorate your picture (Off, Love Letter, Merry Christmas, Movie Star, Top Secret, Dollar, Memories, Robinhood, Roses for Love, Love, Stars, or Beans). (The default setting is Off.) Ⅲ Color Tones to select a wide variety of color tones for the picture (Auto, Negative, Sepia, Emboss, Aqua, Monochrome, or Sketch). (The default setting is Auto.) ⅷ Controls to select an option from Brightness, White Balance, or Night Shot. Ⅲ Brightness to adjust the image brightness level. Press the navigation key right (increase) or left (decrease) to select a setting. (The default setting is 0.) Ⅲ White Balance to adjust white balance based on changing conditions (Auto, Sunny, Cloudy, Tungsten, Fluorescent, or Manual). (The default setting is Auto.) Ⅲ Night shot to activate low light image capture. Enabling this feature allows you to take better quality photos in low light conditions. ⅷ Settings to select Resolution, Quality, Shutter Sound, or View Mode. (See page 80 for details.) ⅷ Review Pictures to go to your phone's My Pictures folder. Setting the Self Timer 1. From camera mode, press Options (right softkey) > Self Timer. 2. Highlight the length of delay you want the timer to use (5 Sec or 10 Sec) and press . (The default setting is Off.) Section 2I. Camera 79
-
 1
1 -
2
-
3
-
4
-
5
-
6
-
7
-
8
-
9
-
10
-
11
-
12
-
13
-
14
-
15
-
16
-
17
-
18
-
19
-
20
-
21
-
22
-
23
-
24
-
25
-
26
-
27
-
28
-
29
-
30
-
31
-
32
-
33
-
34
-
35
-
36
-
37
-
38
-
39
-
40
-
41
-
42
-
43
-
44
-
45
-
46
-
47
-
48
-
49
-
50
-
51
-
52
-
53
-
54
-
55
-
56
-
57
-
58
-
59
-
60
-
61
-
62
-
63
-
64
-
65
-
66
-
67
-
68
-
69
-
70
-
71
-
72
-
73
-
74
-
75
-
76
-
77
-
78
-
79
-
80
-
81
-
82
-
83
-
84
-
85
-
86
-
87
-
 88
88 -
 89
89 -
 90
90 -
 91
91 -
 92
92 -
 93
93 -
 94
94 -
 95
95 -
 96
96 -
 97
97 -
 98
98 -
99
-
100
-
101
-
102
-
103
-
104
-
105
-
106
-
107
-
108
-
109
-
110
-
111
-
112
-
113
-
114
-
115
-
116
-
117
-
118
-
119
-
120
-
121
-
122
-
123
-
124
-
125
-
126
-
127
-
128
-
129
-
130
-
131
-
132
-
133
-
134
-
135
-
136
-
137
-
138
-
139
-
140
-
141
-
142
-
143
-
144
-
145
-
146
-
147
 |
 |