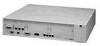
3Com 3C63311 Reference Guide - Page 4
ETTING, TARTED, ONFIGURING, UILDER, ODULES, PPLICATIONS, Configuring the Local Host IP Address
 |
View all 3Com 3C63311 manuals
Add to My Manuals
Save this manual to your list of manuals |
Page 4 highlights
Step 4: Connect I/O Cabling 40 Connecting to the T1/E1 UNI Interface 42 Connecting to the Serial Port 42 Connecting to the Ethernet Port 51 Connecting to the OC3/STM-1 Port 52 Connecting to the CBR Module 53 Connecting to the Voice Compression Module 55 Connecting to the DS3/E3 Module 56 Step 5: Connect the Management Terminal 57 3 GETTING STARTED Using the Menus 61 Navigating through the Menus 61 Understanding the Menu Hierarchy 61 Using the Menus to Change Settings 62 Alarm Indicator 62 Performing Initial System Configuration 63 Configuring the System Clock 63 Setting up Communication Parameters 64 Configuring the Local Host IP Address 65 Configuring Trap Clients 67 Configuring the Default Gateway 68 Setting the Time and Date 69 Setting up Passwords 69 Performing Additional Super User Functions 71 Taking over a Read-Write Session 71 Erasing the System Database 71 Configuring In-band Management 72 4 CONFIGURING PATHBUILDER S330/S310 MODULES, PORTS, AND A PPLICATIONS Specifying General System Information 76 Viewing RS-232 Port Configuration Information 77 Viewing the Firmware Version 77 Downloading New Management Processor Firmware 78 Downloading via the Ethernet Port 79 Downloading via the Serial Port 79 Updating the Flash File System 80 Resetting the Interface Card 80 Viewing an Equipment List 80 Using the Configuration Management Menu 81 Using the List Card Menu 82 Configuring the Management CPU 82 Viewing MCPU Configuration Information 83 Configuring MCPU Shapers 83 Configuring the CTX 85 Configuring CTX Shapers 85
-
 1
1 -
 2
2 -
 3
3 -
 4
4 -
 5
5 -
 6
6 -
 7
7 -
 8
8 -
 9
9 -
 10
10 -
11
-
12
-
13
-
14
-
15
-
16
-
17
-
18
-
19
-
20
-
21
-
22
-
23
-
24
-
25
-
26
-
27
-
28
-
29
-
30
-
31
-
32
-
33
-
34
-
35
-
36
-
37
-
38
-
39
-
40
-
41
-
42
-
43
-
44
-
45
-
46
-
47
-
48
-
49
-
50
-
51
-
52
-
53
-
54
-
55
-
56
-
57
-
58
-
59
-
60
-
61
-
62
-
63
-
64
-
65
-
66
-
67
-
68
-
69
-
70
-
71
-
72
-
73
-
74
-
75
-
76
-
77
-
78
-
79
-
80
-
81
-
82
-
83
-
84
-
85
-
86
-
87
-
88
-
89
-
90
-
91
-
92
-
93
-
94
-
95
-
96
-
97
-
98
-
99
-
100
-
101
-
102
-
103
-
104
-
105
-
106
-
107
-
108
-
109
-
110
-
111
-
112
-
113
-
114
-
115
-
116
-
117
-
118
-
119
-
120
-
121
-
122
-
123
-
124
-
125
-
126
-
127
-
128
-
129
-
130
-
131
-
132
-
133
-
134
-
135
-
136
-
137
-
138
-
139
-
140
-
141
-
142
-
143
-
144
-
145
-
146
-
147
-
148
-
149
-
150
-
151
-
152
-
153
-
154
-
155
-
156
-
157
-
158
-
159
-
160
-
161
-
162
-
163
-
164
-
165
-
166
-
167
-
168
-
169
-
170
-
171
-
172
-
173
-
174
-
175
-
176
-
177
-
178
-
179
-
180
-
181
-
182
-
183
-
184
-
185
-
186
-
187
-
188
-
189
-
190
-
191
-
192
-
193
-
194
-
195
-
196
-
197
-
198
-
199
-
200
-
201
-
202
-
203
-
204
-
205
-
206
-
207
-
208
-
209
-
210
-
211
-
212
-
213
-
214
-
215
-
216
-
217
-
218
-
219
-
220
-
221
-
222
-
223
-
224
-
225
-
226
-
227
-
228
-
229
-
230
-
231
-
232
-
233
-
234
-
235
-
236
-
237
-
238
-
239
-
240
-
241
-
242
-
243
-
244
-
245
-
246
-
247
-
248
-
249
-
250
-
251
-
252
-
253
-
254
-
255
-
256
-
257
-
258
-
259
-
260
-
261
-
262
 |
 |
