Dell 1815dn User's Guide - Page 102
Deleting a Overlay - printer download
 |
UPC - 000061100008
View all Dell 1815dn manuals
Add to My Manuals
Save this manual to your list of manuals |
Page 102 highlights
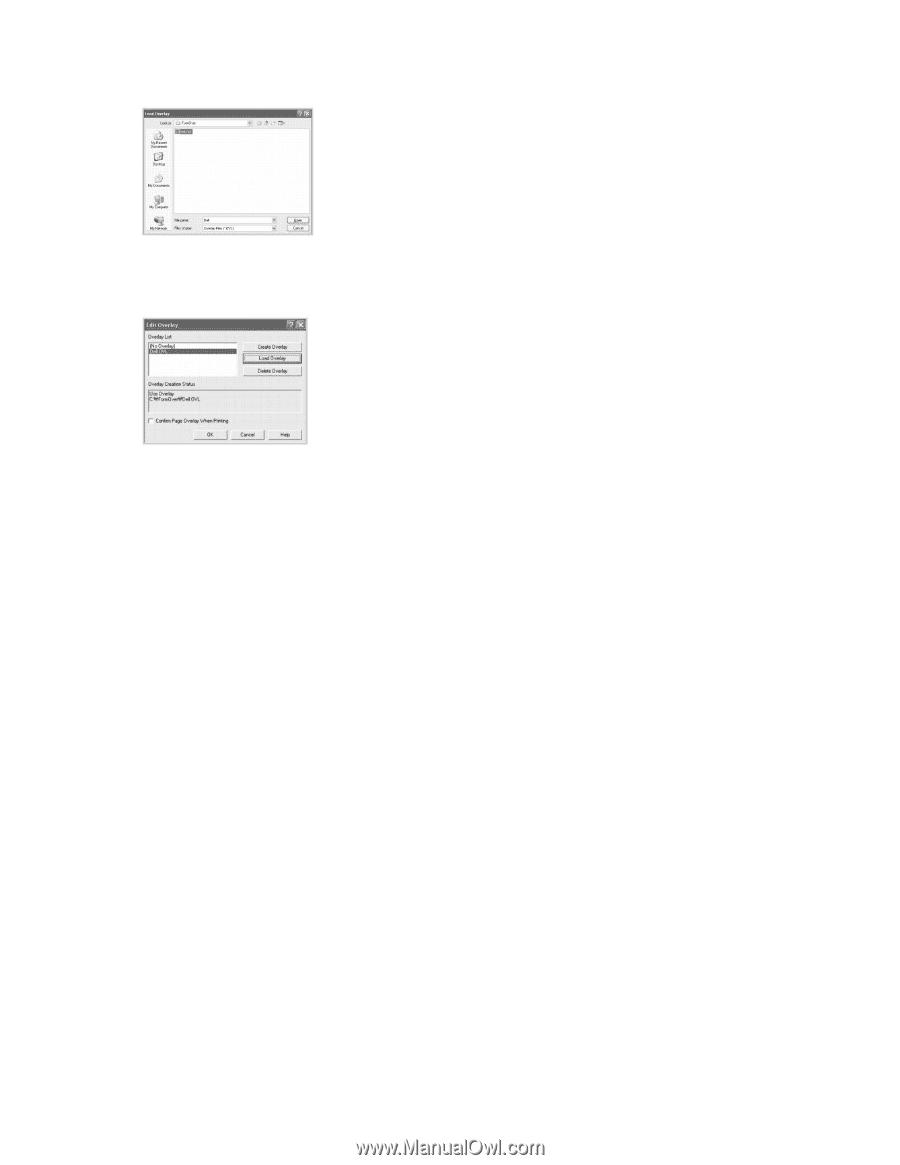
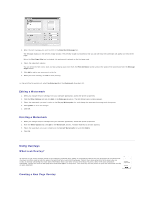
If you have stored the overlay file you want to use on an external source, such as a CD or floppy disk, you can also load the file when you access this Load Overlay window. After you select the file, click Open. The file is now shown in the Overlay List box and is available for printing. Select the overlay from the Overlay List box. 6. If necessary, click Confirm Page Overlay When Printing. When this box is checked, a message window appears each time you submit a document for printing, asking you to confirm that you want to print an overlay on your document. Answering Yes to the window means that the selected overlay will be printed with your document. Answering No to the window cancels the use of the overlay page. If this box is empty and an overlay has been selected, the overlay will be automatically printed with your document. 7. Click OK or Yes until the printing starts. The overlay is downloaded with your print job and printed on your document. Deleting a Page Overlay You can delete page overlays that are no longer used. 1. In the printer properties window, click the Other Options tab. 2. Click Edit in the Overlay section. 3. Select the overlay you want to delete from the Overlay List box. 4. Click Delete Overlay. 5. When a confirming message window appears, click Yes. 6. Click OK until you exit the Print window.
-
 1
1 -
2
-
3
-
4
-
5
-
6
-
7
-
8
-
9
-
10
-
11
-
12
-
13
-
14
-
15
-
16
-
17
-
18
-
19
-
20
-
21
-
22
-
23
-
24
-
25
-
26
-
27
-
28
-
29
-
30
-
31
-
32
-
33
-
34
-
35
-
36
-
37
-
38
-
39
-
40
-
41
-
42
-
43
-
44
-
45
-
46
-
47
-
48
-
49
-
50
-
51
-
52
-
53
-
54
-
55
-
56
-
57
-
58
-
59
-
60
-
61
-
62
-
63
-
64
-
65
-
66
-
67
-
68
-
69
-
70
-
71
-
72
-
73
-
74
-
75
-
76
-
77
-
78
-
79
-
80
-
81
-
82
-
83
-
84
-
85
-
86
-
87
-
88
-
89
-
90
-
91
-
92
-
93
-
94
-
95
-
96
-
 97
97 -
 98
98 -
 99
99 -
 100
100 -
 101
101 -
 102
102 -
 103
103 -
 104
104 -
 105
105 -
 106
106 -
 107
107 -
108
-
109
-
110
-
111
-
112
-
113
-
114
-
115
-
116
-
117
-
118
-
119
-
120
-
121
-
122
-
123
-
124
-
125
-
126
-
127
-
128
-
129
-
130
-
131
-
132
-
133
-
134
-
135
-
136
-
137
-
138
-
139
-
140
-
141
-
142
-
143
-
144
-
145
-
146
-
147
-
148
 |
 |