Dell 1815dn User's Guide - Page 28
Automatic Dialing - printer error no paper
 |
UPC - 000061100008
View all Dell 1815dn manuals
Add to My Manuals
Save this manual to your list of manuals |
Page 28 highlights
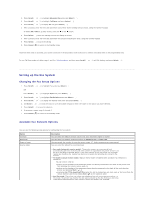
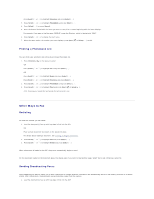
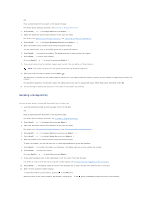
4. Press Scroll ( or ) to highlight Set and press Select ( ). The LCD displays Waiting Ring. 5. Call your fax number from another telephone. It is not necessary to place the call from a fax machine. 6. When your printer begins to ring, do not answer the call. The printer requires several rings to learn the pattern. 7. When the printer completes learning, the displays shows End DRPD [Set up]. If the DRPD setup fails, DRPD Ring Error appears. Press Select ( ) when DRPD Mode displays and retry from step 5. 8. Press Cancel ( ) to return to the Standby mode. When the DRPD feature is set up, the DRPD option is available in the Receive Mode menu. To receive faxes in the DRPD mode, you need to set the menu to DRPD; see "Available Fax Defaults Options". NOTE: DRPD must be set up again if you re-assign your fax number, or connect the printer to another telephone line. NOTE: After DRPD has been set up, call your fax number to verify that the printer answers with a fax tone. Then call a different number assigned to that same line to ensure the call is forwarded to the extension telephone or answering machine plugged into the extension telephone socket ( ) on the back of the printer. Receiving Faxes in the Memory Since your printer is a multi-tasking device, it can receive faxes while performing other tasks. If you receive a fax while you are copying, printing, or run out of paper or toner, your printer stores incoming faxes in the memory. As soon as you finish copying, printing, or resupply the consumables, the printer automatically prints the fax. Automatic Dialing Speed Dialing You can store up to 400 frequently dialed numbers in one, two or three-digit speed dial locations (0-399). Storing a Number for Speed Dialing 1. Press Directory ( ) on the operator panel. OR Press Scroll ( or ) to highlight Fax and press Select ( ). OR Press Scroll ( or ) to highlight Menu and press Select ( ). Press Scroll ( or ) to highlight Directory and press Select ( ). 2. Press Scroll ( or ) to highlight PhoneBook and press Select ( ). 3. Press Scroll ( or ) to highlight Add Person and press Select ( ). 4. Enter a name and press Select ( ). For details about how to enter names, see "Using the Number Keypad to Enter Characters". 5. Enter a one, two or three-digit speed dial number between 0-399, using the number keypad and press Select ( ). Or select the location by pressing Scroll ( or ) and then press Select ( ). 6. Enter the fax number you want to store using the number keypad and press Select ( ). To insert a pause between numbers, press Pause ( ) and a "," appears on the display. 7. To store more fax numbers, repeat steps 3 through 6. OR To return to Standby mode, press Cancel ( ).
-
 1
1 -
2
-
3
-
4
-
5
-
6
-
7
-
8
-
9
-
10
-
11
-
12
-
13
-
14
-
15
-
16
-
17
-
18
-
19
-
20
-
21
-
22
-
 23
23 -
 24
24 -
 25
25 -
 26
26 -
 27
27 -
 28
28 -
 29
29 -
 30
30 -
 31
31 -
 32
32 -
 33
33 -
34
-
35
-
36
-
37
-
38
-
39
-
40
-
41
-
42
-
43
-
44
-
45
-
46
-
47
-
48
-
49
-
50
-
51
-
52
-
53
-
54
-
55
-
56
-
57
-
58
-
59
-
60
-
61
-
62
-
63
-
64
-
65
-
66
-
67
-
68
-
69
-
70
-
71
-
72
-
73
-
74
-
75
-
76
-
77
-
78
-
79
-
80
-
81
-
82
-
83
-
84
-
85
-
86
-
87
-
88
-
89
-
90
-
91
-
92
-
93
-
94
-
95
-
96
-
97
-
98
-
99
-
100
-
101
-
102
-
103
-
104
-
105
-
106
-
107
-
108
-
109
-
110
-
111
-
112
-
113
-
114
-
115
-
116
-
117
-
118
-
119
-
120
-
121
-
122
-
123
-
124
-
125
-
126
-
127
-
128
-
129
-
130
-
131
-
132
-
133
-
134
-
135
-
136
-
137
-
138
-
139
-
140
-
141
-
142
-
143
-
144
-
145
-
146
-
147
-
148
 |
 |
