Dell 1815dn User's Guide - Page 134
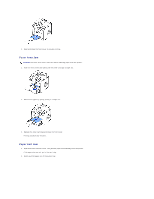
Clearing Jams in the Paper Paths - close fuser door
 |
UPC - 000061100008
View all Dell 1815dn manuals
Add to My Manuals
Save this manual to your list of manuals |
Page 134 highlights
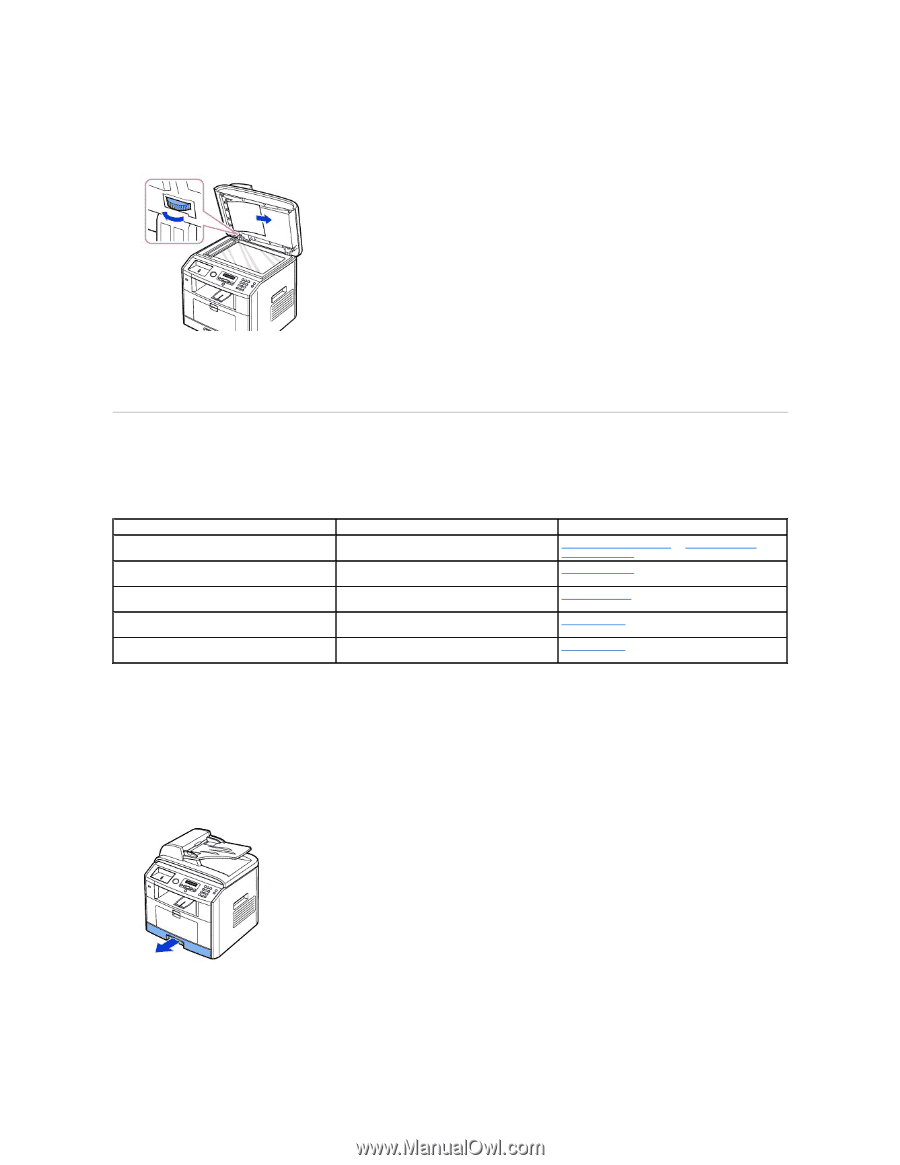
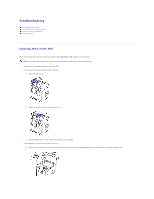
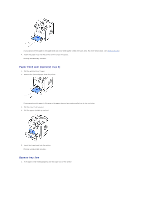
b. Close the document cover. Then load the documents back into the ADF. 2. If you cannot see the paper or the paper does not move when you pulled, open the document cover. 3. Turn the release knob so that you can easily seize the misfed document, and remove the document from the roller or the feed area by carefully pulling it gently to the right. 4. Close the document cover. Then load the documents back into the ADF. Clearing Jams in the Paper Paths When a paper jam occurs, Paper Jam appears on the display. Refer to the table below to locate and clear the paper jam. Operator Panel Message Paper Jam 0 Open Front Door Paper Jam 1 Cartridge Area JAM 2 OPEN REAR & FRONT DOOR Duplex Jam 0 Check Inside Duplex Jam 1 Check Inside Location of Jam Paper Feed Jam (tray 1) Paper Feed Jam (optional tray 2) Fuser Area Jam Paper Exit Jam in the duplex unit between the duplex unit and fuser area Go to "Paper Feed Jam (tray 1)" or "Paper Feed Jam (optional tray 2)". "Fuser Area Jam". "Paper Exit Jam". "Duplex Jam 1". "Duplex Jam 0". To avoid tearing the paper, pull the jammed paper out gently and slowly. Follow the steps below to clear the jam. Paper Feed Jam (tray 1) 1. Open and close the front cover. The jammed paper automatically exits the printer. If the paper does not exit, go to the next step. 2. Pull the paper tray open. 3. Remove the paper by gently pulling it straight out.
-
 1
1 -
2
-
3
-
4
-
5
-
6
-
7
-
8
-
9
-
10
-
11
-
12
-
13
-
14
-
15
-
16
-
17
-
18
-
19
-
20
-
21
-
22
-
23
-
24
-
25
-
26
-
27
-
28
-
29
-
30
-
31
-
32
-
33
-
34
-
35
-
36
-
37
-
38
-
39
-
40
-
41
-
42
-
43
-
44
-
45
-
46
-
47
-
48
-
49
-
50
-
51
-
52
-
53
-
54
-
55
-
56
-
57
-
58
-
59
-
60
-
61
-
62
-
63
-
64
-
65
-
66
-
67
-
68
-
69
-
70
-
71
-
72
-
73
-
74
-
75
-
76
-
77
-
78
-
79
-
80
-
81
-
82
-
83
-
84
-
85
-
86
-
87
-
88
-
89
-
90
-
91
-
92
-
93
-
94
-
95
-
96
-
97
-
98
-
99
-
100
-
101
-
102
-
103
-
104
-
105
-
106
-
107
-
108
-
109
-
110
-
111
-
112
-
113
-
114
-
115
-
116
-
117
-
118
-
119
-
120
-
121
-
122
-
123
-
124
-
125
-
126
-
127
-
128
-
 129
129 -
 130
130 -
 131
131 -
 132
132 -
 133
133 -
 134
134 -
 135
135 -
 136
136 -
 137
137 -
 138
138 -
 139
139 -
140
-
141
-
142
-
143
-
144
-
145
-
146
-
147
-
148
 |
 |