Dell 1815dn User's Guide - Page 7
Making Connections - paper tray
 |
UPC - 000061100008
View all Dell 1815dn manuals
Add to My Manuals
Save this manual to your list of manuals |
Page 7 highlights
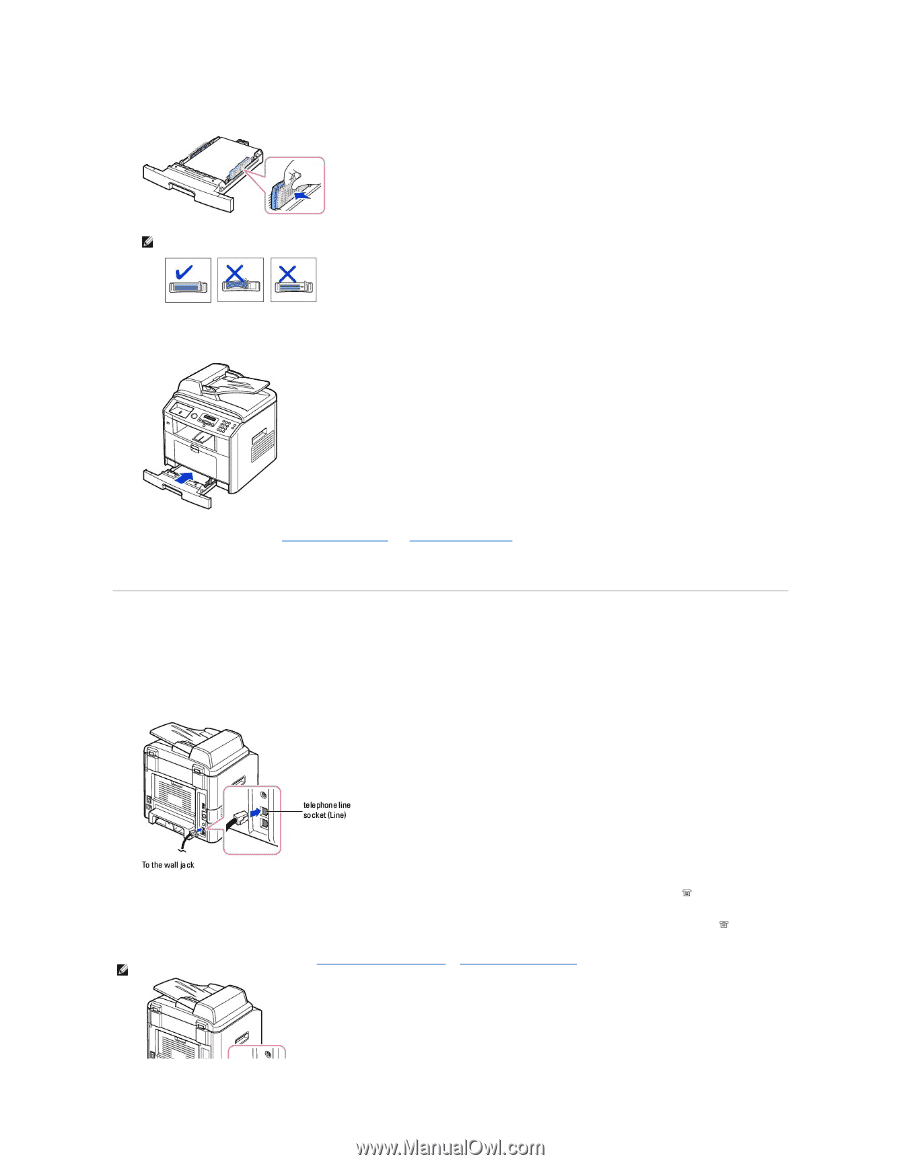
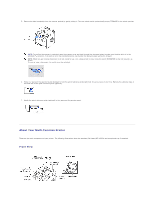
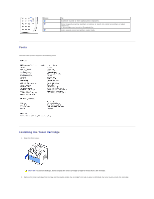
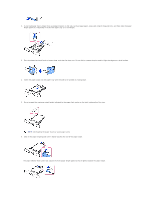
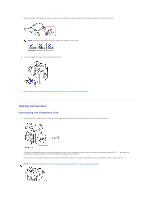
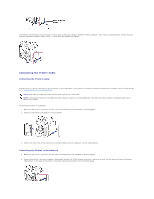
7. Pinch the paper width guide, as shown, and move it towards the stack of paper until it lightly touches the side of the stack. NOTE: Improper adjustment of paper guides can result in paper jams. 8. Insert and slide the paper tray back into the printer. 9. Set the paper type and size. See "Setting the Paper Type" and "Setting the Paper Size". Making Connections Connecting the Telephone Line 1. Plug one end of a telephone line cord into the telephone line socket (Line) and the other end into an active wall jack. To connect a telephone and/or answering machine to your printer, remove the plug from the extension telephone socket (EXT) ( ) and plug the telephone or answering machine into the extension telephone socket (EXT). If your printer is not blocked with the plug, directly plug the telephone or answering machine into the extension telephone socket (EXT) ( ). NOTE: For additional information, refer to "Using an Answering Machine" or "Using a Computer Modem".
-
 1
1 -
 2
2 -
 3
3 -
 4
4 -
 5
5 -
 6
6 -
 7
7 -
 8
8 -
 9
9 -
 10
10 -
 11
11 -
 12
12 -
13
-
14
-
15
-
16
-
17
-
18
-
19
-
20
-
21
-
22
-
23
-
24
-
25
-
26
-
27
-
28
-
29
-
30
-
31
-
32
-
33
-
34
-
35
-
36
-
37
-
38
-
39
-
40
-
41
-
42
-
43
-
44
-
45
-
46
-
47
-
48
-
49
-
50
-
51
-
52
-
53
-
54
-
55
-
56
-
57
-
58
-
59
-
60
-
61
-
62
-
63
-
64
-
65
-
66
-
67
-
68
-
69
-
70
-
71
-
72
-
73
-
74
-
75
-
76
-
77
-
78
-
79
-
80
-
81
-
82
-
83
-
84
-
85
-
86
-
87
-
88
-
89
-
90
-
91
-
92
-
93
-
94
-
95
-
96
-
97
-
98
-
99
-
100
-
101
-
102
-
103
-
104
-
105
-
106
-
107
-
108
-
109
-
110
-
111
-
112
-
113
-
114
-
115
-
116
-
117
-
118
-
119
-
120
-
121
-
122
-
123
-
124
-
125
-
126
-
127
-
128
-
129
-
130
-
131
-
132
-
133
-
134
-
135
-
136
-
137
-
138
-
139
-
140
-
141
-
142
-
143
-
144
-
145
-
146
-
147
-
148
 |
 |