Dell 1815dn User's Guide - Page 111
Formatting the USB Memory Key, Printing from the USB Memory Key, Viewing the USB Memory Key Status
 |
UPC - 000061100008
View all Dell 1815dn manuals
Add to My Manuals
Save this manual to your list of manuals |
Page 111 highlights
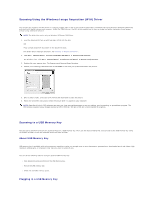
If you see "\" in the front of a folder name, there are one or more folders in the selected folder. 7. If you selected a file in step 6, the display shows the size of the file for about 2 seconds. Go to the next step. If you selected a folder, press Scroll ( or ) to select the file you want to delete and press Select ( ). 8. Press Select ( ) when Yes appears to confirm your selection. 9. The display asks if you want to delete another file. Select Yes or No. 10. Press Cancel ( ) to return to Standby mode. Formatting the USB Memory Key 1. Insert the USB memory key into the USB memory port on your printer. 2. Press Scroll ( or ) to highlight Scan and press Select ( ). 3. Press Select ( ) to access USB key. 4. Press Scroll ( or ) to highlight File Manage and press Select ( ). 5. Press Scroll ( or ) to highlight Format and press Select ( ). 6. Press Select ( ) when Yes appears to confirm your selection. 7. Press Cancel ( ) to return to Standby mode. Printing from the USB Memory Key You can print files stored in the USB memory key. TIFF, BMP, TXT, PDF, and PRN file formats are supported. NOTE: Only English TXT files, PDF files generated by this printer, and TIFF 6.0 files are available. 1. Insert the USB memory key into the USB memory port on your printer. 2. Press Scroll ( or ) to highlight Scan and press Select ( ). 3. Press Select ( ) to access USB key. 4. Press Scroll ( or ) to highlight PRINT from and press Select ( ). 5. Press Scroll ( or ) to select the folder or file you want and press Select ( ). 6. If you selected a file in step 5, go to the next step. If you selected a folder, press Scroll ( or ) to select the file you want to print and press Select ( ). 7. Enter the number of prints and press Select ( ). Printing is started. If the selected file format is not supported, File Format Not Supported appears. 8. The display asks if you want to print another file. Select Yes or No. 9. Press Cancel ( ) to return to Standby mode. Viewing the USB Memory Key Status You can check the amount of memory space available for scanning and saving documents. 1. Insert the USB memory key into the USB memory port on your printer. 2. Press Scroll ( or ) to highlight Scan and press Select ( ). 3. Press Select ( ) to access USB key. 4. Press Scroll ( or ) to highlight Show Space and press Select ( ). The available memory space appears on the display. 5. Press Cancel ( ) to return to the Standby mode.
-
 1
1 -
2
-
3
-
4
-
5
-
6
-
7
-
8
-
9
-
10
-
11
-
12
-
13
-
14
-
15
-
16
-
17
-
18
-
19
-
20
-
21
-
22
-
23
-
24
-
25
-
26
-
27
-
28
-
29
-
30
-
31
-
32
-
33
-
34
-
35
-
36
-
37
-
38
-
39
-
40
-
41
-
42
-
43
-
44
-
45
-
46
-
47
-
48
-
49
-
50
-
51
-
52
-
53
-
54
-
55
-
56
-
57
-
58
-
59
-
60
-
61
-
62
-
63
-
64
-
65
-
66
-
67
-
68
-
69
-
70
-
71
-
72
-
73
-
74
-
75
-
76
-
77
-
78
-
79
-
80
-
81
-
82
-
83
-
84
-
85
-
86
-
87
-
88
-
89
-
90
-
91
-
92
-
93
-
94
-
95
-
96
-
97
-
98
-
99
-
100
-
101
-
102
-
103
-
104
-
105
-
 106
106 -
 107
107 -
 108
108 -
 109
109 -
 110
110 -
 111
111 -
 112
112 -
 113
113 -
 114
114 -
 115
115 -
 116
116 -
117
-
118
-
119
-
120
-
121
-
122
-
123
-
124
-
125
-
126
-
127
-
128
-
129
-
130
-
131
-
132
-
133
-
134
-
135
-
136
-
137
-
138
-
139
-
140
-
141
-
142
-
143
-
144
-
145
-
146
-
147
-
148
 |
 |