Dell 1815dn User's Guide - Page 26

Receiving a Fax - laser mfp
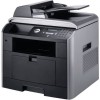
Page 26 highlights

If something goes wrong while sending your fax, an error message appears on the display. For a listing of error messages and their meaning, see "Clearing LCD Error Messages". If you receive an error message, press Cancel ( ) to clear the message and try to send the document again. You can set your printer to print a confirmation report automatically after each fax transmission. For further details, see the MSG Confirm item in "Available Fax Defaults Options". Automatic Redialing When the number you have dialed is busy or there is no answer when you send a fax, the printer automatically redials the number every three minutes, up to seven times. When the display shows Waiting Redial press Select ( ) to redial the number without waiting. To cancel the automatic redialing, press Cancel ( ). To change the time interval between redials and the number of redial attempts, see "Available Fax Defaults Options". Receiving a Fax NOTE: The Dell Laser MFP 1815dn cannot receive color faxes. About Receiving Modes NOTE: To use the Ans/Fax mode, attach an answering machine to the extension telephone socket ( ) on the back of your printer. When the memory is full, the printer can no longer receive any incoming fax. Secure free memory to resume by removing data stored in the memory. Loading Paper for Receiving Faxes The instructions for loading paper in the paper tray are the same whether you are printing, faxing, or copying, except that faxes can only be printed on Letter-, A4-, or Legal-sized paper. For details about loading paper, see "Loading Paper". For details about setting the paper type and size in the tray, see "Setting the Paper Type" and "Setting the Paper Size". Receiving Automatically in the Fax Mode Your printer is preset to the fax mode at the factory. When you receive a fax, the printer answers the call on a specified number of rings and automatically receives the fax. To change the number of rings, see "Available Fax Defaults Options". If you want to adjust the ringer volume, see "Setting Sounds". Receiving Manually in the Tel Mode

  • 1
  • 2
  • 3
  • 4
  • 5
  • 6
  • 7
  • 8
  • 9
  • 10
  • 11
  • 12
  • 13
  • 14
  • 15
  • 16
  • 17
  • 18
  • 19
  • 20
  • 21
  • 22
  • 23
  • 24
  • 25
  • 26
  • 27
  • 28
  • 29
  • 30
  • 31
  • 32
  • 33
  • 34
  • 35
  • 36
  • 37
  • 38
  • 39
  • 40
  • 41
  • 42
  • 43
  • 44
  • 45
  • 46
  • 47
  • 48
  • 49
  • 50
  • 51
  • 52
  • 53
  • 54
  • 55
  • 56
  • 57
  • 58
  • 59
  • 60
  • 61
  • 62
  • 63
  • 64
  • 65
  • 66
  • 67
  • 68
  • 69
  • 70
  • 71
  • 72
  • 73
  • 74
  • 75
  • 76
  • 77
  • 78
  • 79
  • 80
  • 81
  • 82
  • 83
  • 84
  • 85
  • 86
  • 87
  • 88
  • 89
  • 90
  • 91
  • 92
  • 93
  • 94
  • 95
  • 96
  • 97
  • 98
  • 99
  • 100
  • 101
  • 102
  • 103
  • 104
  • 105
  • 106
  • 107
  • 108
  • 109
  • 110
  • 111
  • 112
  • 113
  • 114
  • 115
  • 116
  • 117
  • 118
  • 119
  • 120
  • 121
  • 122
  • 123
  • 124
  • 125
  • 126
  • 127
  • 128
  • 129
  • 130
  • 131
  • 132
  • 133
  • 134
  • 135
  • 136
  • 137
  • 138
  • 139
  • 140
  • 141
  • 142
  • 143
  • 144
  • 145
  • 146
  • 147
  • 148

If something goes wrong while sending your fax
, an error message appears on the display. For a listing of error messages and their meaning, see
"Clearing LCD
Error Messages"
.
If you receive an error message,
press
Cancel
(
) to clear the message and try to send the document again.
You can set your printer to print a confirmation report automatically after each fax transmission. For further details, see the
MSG Confirm
item in
"Available Fax
Defaults Options"
.
Automatic Redialing
When the number you have dialed is busy or there is no answer when you send a fax, the printer automatically redials the number every three minutes, up to
seven times.
When the display shows
Waiting Redial
press
Select
(
) to redial the number without waiting. To cancel the automatic redialing, press
Cancel
(
).
To change the time interval between redials and the number of redial attempts, see
"Available Fax Defaults Options"
.
Receiving a Fax
About Receiving Modes
When the memory is full, the printer can no longer receive any incoming fax. Secure free memory to resume by removing data stored in the memory
.
Loading Paper for Receiving Faxes
The instructions for loading paper in the paper tray are the same whether you are printing, faxing, or copying, except that faxes can only be printed on Letter-,
A4-, or Legal-sized paper. For details about loading paper, see
"Loading Paper"
. For details about setting the paper type and size in the tray, see
"Setting the
Paper Type"
and
"Setting the Paper Size"
.
Receiving Automatically in the Fax Mode
Your printer is preset to the fax mode at the factory.
When you receive a fax, the printer answers the call on a specified number of rings and automatically receives the fax.
To change the number of rings, see
"Available Fax Defaults Options"
.
If you want to adjust the ringer volume,
see
"Setting Sounds"
.
Receiving Manually in the Tel Mode
NOTE:
The Dell Laser MFP 1815dn cannot receive color faxes.
NOTE:
To use the Ans/Fax mode, attach an answering machine to the extension telephone socket (
) on the back of your printer.