Dell 1815dn User's Guide - Page 105
Adding a Scanner - default password
 |
UPC - 000061100008
View all Dell 1815dn manuals
Add to My Manuals
Save this manual to your list of manuals |
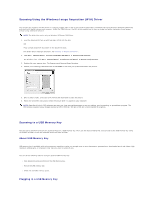
Page 105 highlights
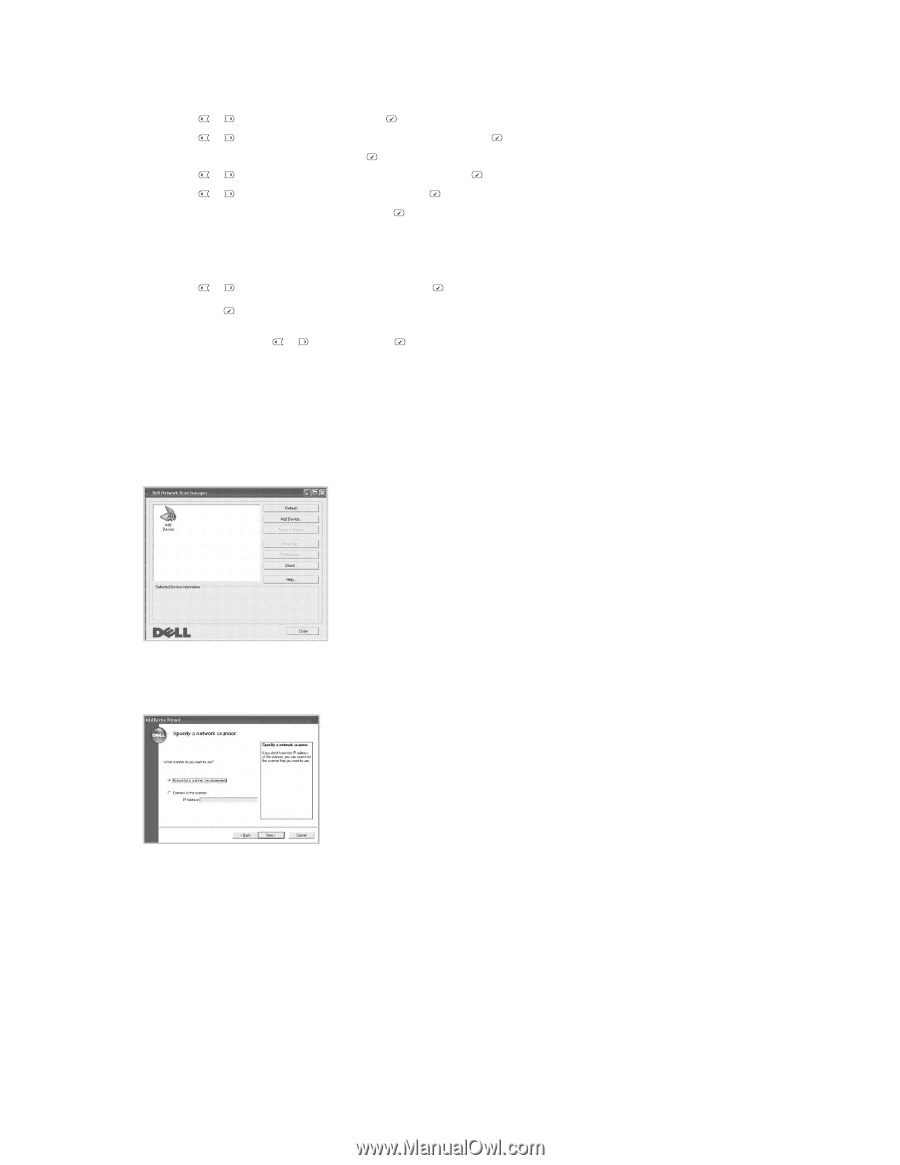
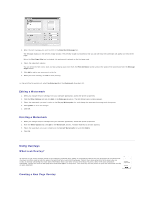
4. Press Scroll ( or ) to highlight PC and press Select ( ). 5. Press Scroll ( or ) to select the registered name you want and press Select ( ). 6. Enter the PIN you have registered and press Select ( ). 7. Press Scroll ( or ) to display the program you will use and press Select ( ). 8. Press Scroll ( or ) to highlight Scan Setting and press Select ( ). 9. Choose the file type and resolution and then press Select ( ). l Black & White: If you select this option, select file type PDF or TIFF. l Color JPEG-200: If you select this option, 200 dpi resolution and JPEG file type may be automatically selected. l Resolution: Select resolution 100 dpi, 200 dpi or 300 dpi. 10. Press Scroll ( or ) to display Start Scanning and press Select ( ). If you press Select ( ) when the display shows Logout, your printer will be logged off. 11. The document may be scanned to computer when Network Scan is running. If your file type is TIFF or PDF, the display asks if you want to scan another page. Select Yes using Scroll ( or ) and press Select ( ). The next page is scanned and stored as the second page of the document. Repeat this until all pages are scanned, then select No. Adding a Scanner To register your scanner as an authorized network scanner, use the Dell Network Scan Manager window. 1. In the Dell Network Scan Manager window, click the Add Device button, or double-click the Add Device icon. 2. Click Next. 3. Select Browse for a scanner. (Recommended), or Connect to this scanner. If you select Connect to this scanner, enter an IP address and then click Next. 4. A list of scanners on your network appears. Select your printer from the list and enter your printer name, the ID and Personal Identification Number (PIN). Click Next. l You can enter an ID of up to 8 characters. The first character must be a letter. l The PIN must be 4 digits. This is optional. You can select the default password option.
-
 1
1 -
2
-
3
-
4
-
5
-
6
-
7
-
8
-
9
-
10
-
11
-
12
-
13
-
14
-
15
-
16
-
17
-
18
-
19
-
20
-
21
-
22
-
23
-
24
-
25
-
26
-
27
-
28
-
29
-
30
-
31
-
32
-
33
-
34
-
35
-
36
-
37
-
38
-
39
-
40
-
41
-
42
-
43
-
44
-
45
-
46
-
47
-
48
-
49
-
50
-
51
-
52
-
53
-
54
-
55
-
56
-
57
-
58
-
59
-
60
-
61
-
62
-
63
-
64
-
65
-
66
-
67
-
68
-
69
-
70
-
71
-
72
-
73
-
74
-
75
-
76
-
77
-
78
-
79
-
80
-
81
-
82
-
83
-
84
-
85
-
86
-
87
-
88
-
89
-
90
-
91
-
92
-
93
-
94
-
95
-
96
-
97
-
98
-
99
-
 100
100 -
 101
101 -
 102
102 -
 103
103 -
 104
104 -
 105
105 -
 106
106 -
 107
107 -
 108
108 -
 109
109 -
 110
110 -
111
-
112
-
113
-
114
-
115
-
116
-
117
-
118
-
119
-
120
-
121
-
122
-
123
-
124
-
125
-
126
-
127
-
128
-
129
-
130
-
131
-
132
-
133
-
134
-
135
-
136
-
137
-
138
-
139
-
140
-
141
-
142
-
143
-
144
-
145
-
146
-
147
-
148
 |
 |