Dell OptiPlex GX260 User Guide - Page 139
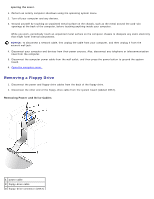
Attaching Cables, second hard drive.
 |
View all Dell OptiPlex GX260 manuals
Add to My Manuals
Save this manual to your list of manuals |
Page 139 highlights
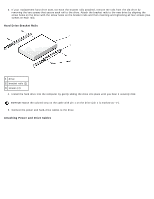
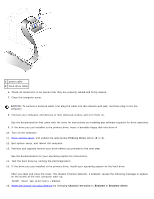
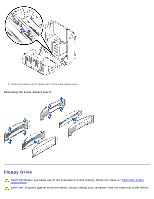
1 rail tabs (2) 2 second hard drive in upper bay 3 first hard drive in lower bay 4 hard-drive bay 12. Connect a power cable to the drive. NOTICE: Match the colored strip on the cable with pin 1 on the drive. 13. Locate the extra connector on the drive cable that is attached to your first hard drive and attach the connector to the second hard drive. Your computer uses cable-select drive cables. This means that the device connected to the end connector of the drive cable is the master device and the device connected to the middle connector is the slave device. Be sure that the jumper setting on the new device is set for "cable select" (see the documentation that came with the drive for information). Attaching Cables
-
 1
1 -
2
-
3
-
4
-
5
-
6
-
7
-
8
-
9
-
10
-
11
-
12
-
13
-
14
-
15
-
16
-
17
-
18
-
19
-
20
-
21
-
22
-
23
-
24
-
25
-
26
-
27
-
28
-
29
-
30
-
31
-
32
-
33
-
34
-
35
-
36
-
37
-
38
-
39
-
40
-
41
-
42
-
43
-
44
-
45
-
46
-
47
-
48
-
49
-
50
-
51
-
52
-
53
-
54
-
55
-
56
-
57
-
58
-
59
-
60
-
61
-
62
-
63
-
64
-
65
-
66
-
67
-
68
-
69
-
70
-
71
-
72
-
73
-
74
-
75
-
76
-
77
-
78
-
79
-
80
-
81
-
82
-
83
-
84
-
85
-
86
-
87
-
88
-
89
-
90
-
91
-
92
-
93
-
94
-
95
-
96
-
97
-
98
-
99
-
100
-
101
-
102
-
103
-
104
-
105
-
106
-
107
-
108
-
109
-
110
-
111
-
112
-
113
-
114
-
115
-
116
-
117
-
118
-
119
-
120
-
121
-
122
-
123
-
124
-
125
-
126
-
127
-
128
-
129
-
130
-
131
-
132
-
133
-
 134
134 -
 135
135 -
 136
136 -
 137
137 -
 138
138 -
 139
139 -
 140
140 -
 141
141 -
 142
142 -
 143
143 -
 144
144 -
145
-
146
-
147
-
148
-
149
-
150
-
151
-
152
-
153
-
154
-
155
-
156
-
157
-
158
-
159
-
160
-
161
-
162
-
163
-
164
-
165
-
166
-
167
-
168
-
169
-
170
-
171
-
172
-
173
-
174
-
175
-
176
-
177
-
178
-
179
-
180
-
181
-
182
-
183
-
184
-
185
-
186
-
187
-
188
-
189
-
190
-
191
-
192
-
193
-
194
-
195
-
196
-
197
-
198
-
199
-
200
-
201
-
202
-
203
-
204
-
205
-
206
-
207
-
208
-
209
-
210
-
211
-
212
-
213
-
214
-
215
-
216
-
217
-
218
-
219
-
220
-
221
-
222
-
223
-
224
-
225
-
226
-
227
-
228
-
229
-
230
-
231
-
232
-
233
-
234
-
235
 |
 |
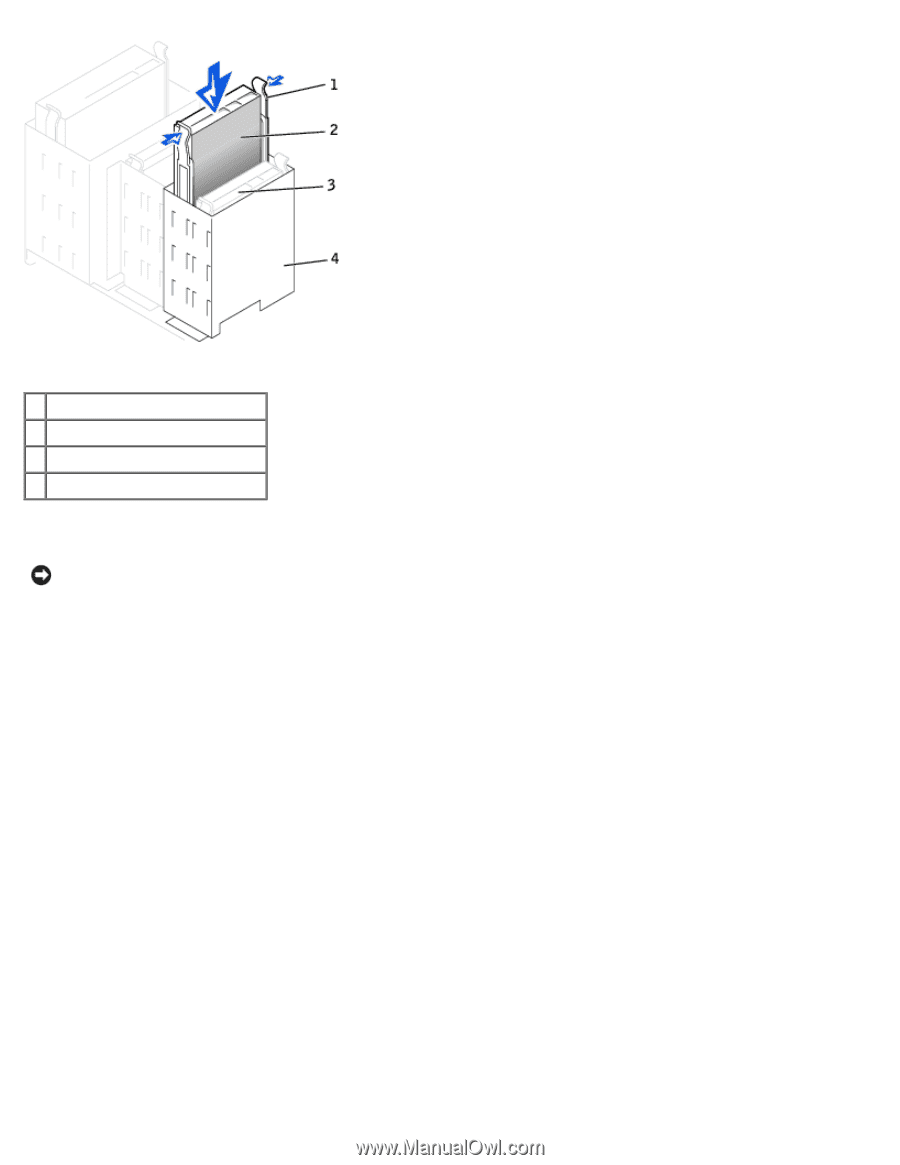
1
rail tabs (2)
2
second hard drive in upper bay
3
first hard drive in lower bay
4
hard-drive bay
12. Connect a power cable to the drive.
NOTICE:
Match the colored strip on the cable with pin 1 on the drive.
13. Locate the extra connector on the drive cable that is attached to your first hard drive and attach the connector to the
second hard drive.
Your computer uses cable-select drive cables. This means that the device connected to the end connector of the drive
cable is the master device and the device connected to the middle connector is the slave device. Be sure that the
jumper setting on the new device is set for "cable select" (see the documentation that came with the drive for
information).
Attaching Cables