Dell OptiPlex GX260 User Guide - Page 202
Switching to Classic View, Clean Desktop Wizard, Run Desktop Cleanup Wizard every 60 days
 |
View all Dell OptiPlex GX260 manuals
Add to My Manuals
Save this manual to your list of manuals |
Page 202 highlights
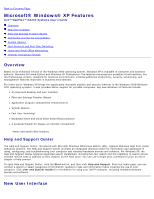
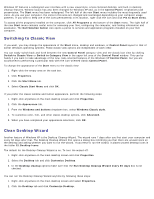
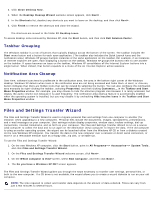
Windows XP features a redesigned user interface with a new visual style, a less cluttered desktop, and built-in desktop cleanup features. Window layout has also been changed for Windows XP and, as in the Control Panel, emphasizes task presentation. The Start menu has been redesigned. The left half of the new Start menu includes the most frequently used icons. As you use your computer, the icons in this area are changed and rearranged depending on your computer usage patterns. If you wish to keep one of the icons permanently in its location, right-click the icon and click Pin to Start menu. To access all the programs installed on the computer, click All Programs at the bottom of the Start menu. The right half of the new Start menu contains useful icons for accessing your files, configuring the computer, and finding information and assistance. The Dell Solution Center icon opens a portal to services and application programs installed on your Dell computer. Switching to Classic View If you want, you may change the appearance of the Start menu, desktop and windows, or Control Panel layout to that of earlier Windows operating systems. These classic view options are independent of each other. You can easily switch back and forth between the new Control Panel category view and the classic icon view by clicking Switch to Classic View or Switch to Category View in the upper left area of the Control Panel window. This can be handy if you want to take advantage of the new, task-oriented features of the Windows XP Control Panel, but you are accustomed to performing a particular task with the icon-oriented classic Control Panel. To change the appearance of the Start menu to the classic view: 1. Right-click the empty area on the task bar. 2. Click Properties. 3. Click the Start Menu tab. 4. Select Classic Start Menu and click OK. If you prefer the classic window and button appearance, perform the following steps: 1. Right-click anywhere on the main desktop screen and click Properties. 2. Click the Appearance tab. 3. From the Windows and buttons dropdown box, select Windows Classic style. 4. To customize color, font, and other classic desktop options, click Advanced. 5. When you have completed your appearance selections, click OK. Clean Desktop Wizard Another feature of Windows XP is the Desktop Cleanup Wizard. The wizard runs 7 days after you first start your computer and every 60 days after that. The Desktop Cleanup Wizard first opens a dialog box informing you that there are unused icons on the desktop and asking whether you want to run the wizard. If you elect to run the wizard, it places unused desktop icons in the folder C:\Desktop Icons. The default for the Desktop Cleanup Wizard is on. To turn the wizard off: 1. Right-click anywhere on the main desktop screen and click Properties. 2. Select the Desktop tab and click Customize Desktop. 3. In the Desktop cleanup options make sure that the Run Desktop Cleanup Wizard every 60 days box is not checked. You can run the Desktop Cleanup Wizard anytime by following these steps: 1. Right-click anywhere on the main desktop screen and select Properties. 2. Click the Desktop tab and click Customize Desktop.
-
 1
1 -
2
-
3
-
4
-
5
-
6
-
7
-
8
-
9
-
10
-
11
-
12
-
13
-
14
-
15
-
16
-
17
-
18
-
19
-
20
-
21
-
22
-
23
-
24
-
25
-
26
-
27
-
28
-
29
-
30
-
31
-
32
-
33
-
34
-
35
-
36
-
37
-
38
-
39
-
40
-
41
-
42
-
43
-
44
-
45
-
46
-
47
-
48
-
49
-
50
-
51
-
52
-
53
-
54
-
55
-
56
-
57
-
58
-
59
-
60
-
61
-
62
-
63
-
64
-
65
-
66
-
67
-
68
-
69
-
70
-
71
-
72
-
73
-
74
-
75
-
76
-
77
-
78
-
79
-
80
-
81
-
82
-
83
-
84
-
85
-
86
-
87
-
88
-
89
-
90
-
91
-
92
-
93
-
94
-
95
-
96
-
97
-
98
-
99
-
100
-
101
-
102
-
103
-
104
-
105
-
106
-
107
-
108
-
109
-
110
-
111
-
112
-
113
-
114
-
115
-
116
-
117
-
118
-
119
-
120
-
121
-
122
-
123
-
124
-
125
-
126
-
127
-
128
-
129
-
130
-
131
-
132
-
133
-
134
-
135
-
136
-
137
-
138
-
139
-
140
-
141
-
142
-
143
-
144
-
145
-
146
-
147
-
148
-
149
-
150
-
151
-
152
-
153
-
154
-
155
-
156
-
157
-
158
-
159
-
160
-
161
-
162
-
163
-
164
-
165
-
166
-
167
-
168
-
169
-
170
-
171
-
172
-
173
-
174
-
175
-
176
-
177
-
178
-
179
-
180
-
181
-
182
-
183
-
184
-
185
-
186
-
187
-
188
-
189
-
190
-
191
-
192
-
193
-
194
-
195
-
196
-
 197
197 -
 198
198 -
 199
199 -
 200
200 -
 201
201 -
 202
202 -
 203
203 -
 204
204 -
 205
205 -
 206
206 -
 207
207 -
208
-
209
-
210
-
211
-
212
-
213
-
214
-
215
-
216
-
217
-
218
-
219
-
220
-
221
-
222
-
223
-
224
-
225
-
226
-
227
-
228
-
229
-
230
-
231
-
232
-
233
-
234
-
235
 |
 |