Dell PowerConnect B-DCX4S Hardware Reference Guide - Page 74
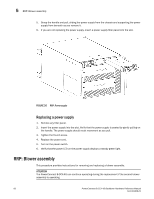
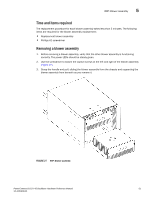
Replacing a power supply, RRP: Blower assembly
 |
View all Dell PowerConnect B-DCX4S manuals
Add to My Manuals
Save this manual to your list of manuals |
Page 74 highlights
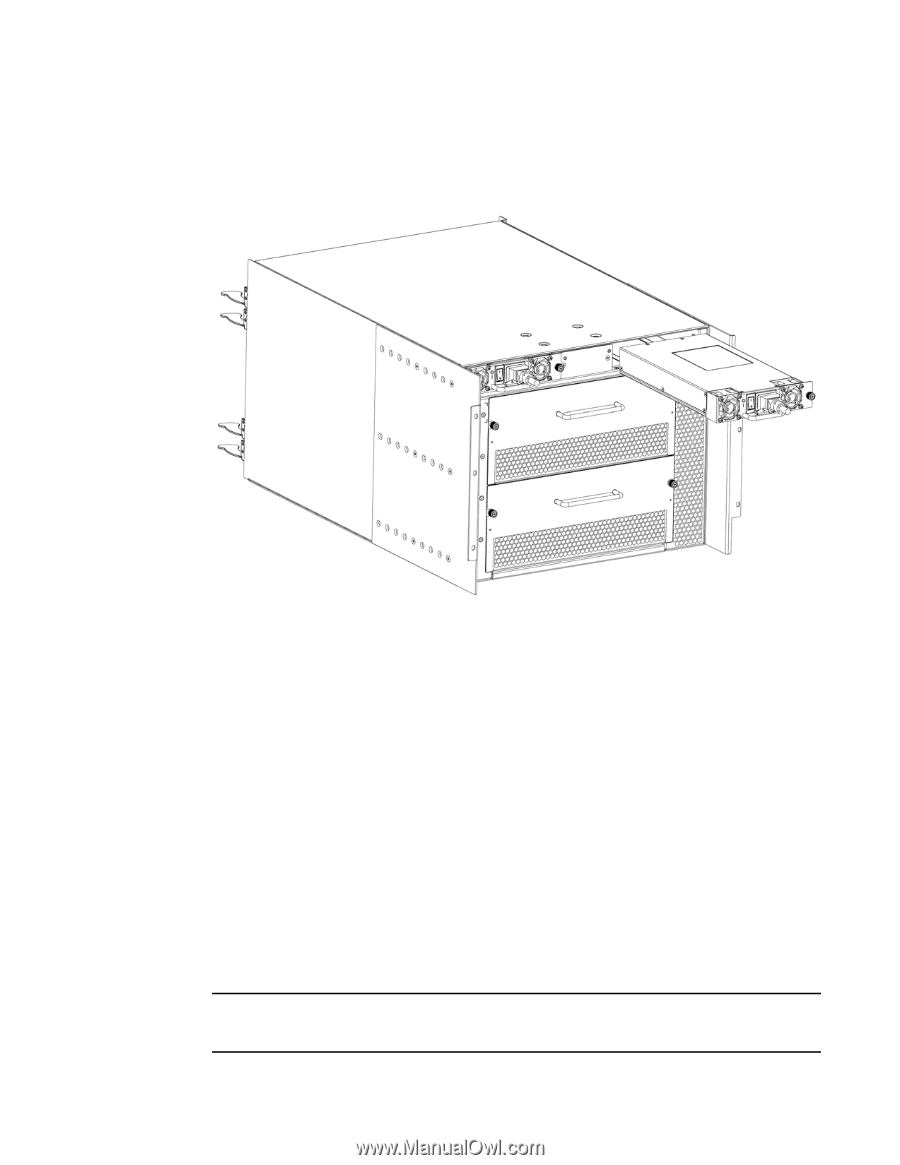
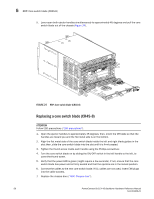
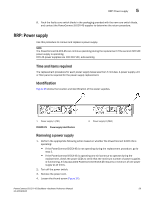
5 RRP: Blower assembly 5. Grasp the handle and pull, sliding the power supply from the chassis and supporting the power supply from beneath as you remove it. 6. If you are not replacing the power supply, insert a power supply filler panel into the slot. FIGURE 26 RRP: Power supply Replacing a power supply 1. Remove any filler panel. 2. Insert the power supply into the slot. Verify that the power supply is seated by gently pulling on the handle. The power supply should resist movement as you pull. 3. Tighten the thumb screw. 4. Replace the power cord. 5. Turn on the power switch. 6. Verify that the power LED on the power supply displays a steady green light. RRP: Blower assembly This procedure provides instructions for removing and replacing a blower assembly. ATTENTION The PowerConnect B-DCX-4S can continue operating during the replacement if the second blower assembly is operating, 60 PowerConnect B-DCX-4S Backbone Hardware Reference Manual 53-1001808-01
-
 1
1 -
2
-
3
-
4
-
5
-
6
-
7
-
8
-
9
-
10
-
11
-
12
-
13
-
14
-
15
-
16
-
17
-
18
-
19
-
20
-
21
-
22
-
23
-
24
-
25
-
26
-
27
-
28
-
29
-
30
-
31
-
32
-
33
-
34
-
35
-
36
-
37
-
38
-
39
-
40
-
41
-
42
-
43
-
44
-
45
-
46
-
47
-
48
-
49
-
50
-
51
-
52
-
53
-
54
-
55
-
56
-
57
-
58
-
59
-
60
-
61
-
62
-
63
-
64
-
65
-
66
-
67
-
68
-
 69
69 -
 70
70 -
 71
71 -
 72
72 -
 73
73 -
 74
74 -
 75
75 -
 76
76 -
 77
77 -
 78
78 -
 79
79 -
80
-
81
-
82
-
83
-
84
-
85
-
86
-
87
-
88
-
89
-
90
-
91
-
92
-
93
-
94
-
95
-
96
-
97
-
98
-
99
-
100
-
101
-
102
-
103
-
104
-
105
-
106
-
107
-
108
-
109
-
110
-
111
-
112
-
113
-
114
-
115
-
116
-
117
-
118
-
119
-
120
-
121
-
122
-
123
-
124
-
125
-
126
-
127
-
128
-
129
-
130
-
131
-
132
-
133
-
134
 |
 |