Dell PowerConnect B-DCX4S Hardware Reference Guide - Page 86
RRP: PowerConnect B-DCX-4S chassis, Time required
 |
View all Dell PowerConnect B-DCX4S manuals
Add to My Manuals
Save this manual to your list of manuals |
Page 86 highlights
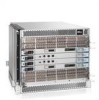
5 RRP: PowerConnect B-DCX-4S chassis NOTE For clarity, the two "sets" of cables are drawn differently in Figure 33 and Figure 34. Also note that one set is connected to only the blades in the "low order" slots (slot 3 in the DCX-4S and slot 5 in the DCX) and the other set is connected to the blades in the "high order" slots (slot 5 in the DCX-4S and slot 8 in the DCX). Keeping the sets apart in this manner minimizes the cable confusion. RRP: PowerConnect B-DCX-4S chassis This section describes how to remove and replace the PowerConnect B-DCX-4S chassis (with its backplane). The basic steps are: 1. Verifying need for replacement 2. Recording critical PowerConnect B-DCX-4S and SAN information 3. Disconnecting from the network and fabric 4. Removing components from the chassis 5. Installing the replacement chassis 6. Installing components into the new chassis 7. Verifying correct operation of system 8. Reconnecting the system to the network and fabric 9. Verifying correct configuration of the fabric NOTE The PowerConnect B-DCX-4S must be removed from the fabric and powered off to perform this procedure. Contact your support provider if you have any questions about whether the chassis requires replacement. Time required The chassis replacement takes approximately 3 hours. Items required The following items are required for the chassis replacement: • Electrostatic discharge (ESD) grounding strap • ESD grounding pads for protecting all blades and WWN cards • Serial cable and workstation computer with a terminal emulator application (such as HyperTerminal for Windows systems or TIP for Solaris systems), required only if serial console session used • Pallet jack or hydraulic or assisted lift that raises a minimum of 55 in. (140 cm) and carries a minimum of 250 lb (113 kg) • A surface to place the old chassis on, such as a second lift or the pallet originally provided with the old chassis • #2 Phillips screwdriver 72 PowerConnect B-DCX-4S Backbone Hardware Reference Manual 53-1001808-01
-
 1
1 -
2
-
3
-
4
-
5
-
6
-
7
-
8
-
9
-
10
-
11
-
12
-
13
-
14
-
15
-
16
-
17
-
18
-
19
-
20
-
21
-
22
-
23
-
24
-
25
-
26
-
27
-
28
-
29
-
30
-
31
-
32
-
33
-
34
-
35
-
36
-
37
-
38
-
39
-
40
-
41
-
42
-
43
-
44
-
45
-
46
-
47
-
48
-
49
-
50
-
51
-
52
-
53
-
54
-
55
-
56
-
57
-
58
-
59
-
60
-
61
-
62
-
63
-
64
-
65
-
66
-
67
-
68
-
69
-
70
-
71
-
72
-
73
-
74
-
75
-
76
-
77
-
78
-
79
-
80
-
 81
81 -
 82
82 -
 83
83 -
 84
84 -
 85
85 -
 86
86 -
 87
87 -
 88
88 -
 89
89 -
 90
90 -
 91
91 -
92
-
93
-
94
-
95
-
96
-
97
-
98
-
99
-
100
-
101
-
102
-
103
-
104
-
105
-
106
-
107
-
108
-
109
-
110
-
111
-
112
-
113
-
114
-
115
-
116
-
117
-
118
-
119
-
120
-
121
-
122
-
123
-
124
-
125
-
126
-
127
-
128
-
129
-
130
-
131
-
132
-
133
-
134
 |
 |
