Dell PowerConnect B-DCX4S Hardware Reference Guide - Page 91
Removing components from the chassis, Installing the replacement chassis
 |
View all Dell PowerConnect B-DCX4S manuals
Add to My Manuals
Save this manual to your list of manuals |
Page 91 highlights
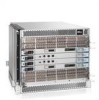
RRP: PowerConnect B-DCX-4S chassis 5 Stopping blade 8 Shutting down the blade.... Broadcast message from root (pts/1) Tue Jul 18 14:23:06 2008... The system is going down for system halt NOW !! DANGER Turn off the power switches and disconnect the power cords (D006) 2. Power off the chassis by flipping all AC power switches to "0". (Power supply Status LED should turn off.) 3. Remove the power cords from the power supplies and the power outlets. 4. Label the cables connected to all blades and record the connections in Table 14. 5. Remove the chassis door ("RRP: Chassis door"). 6. Disconnect the cables from the port blades and set them aside. The SFP or XFP transceivers can be left in the port blades or removed. 7. Disconnect all cables from the CP8 and CR4S-8 blades. 8. Disconnect any ICL cables. Removing components from the chassis ATTENTION Follow ESD precautions ("ESD precautions"). 1. Remove the cable management fingers ("RRP: Vertical cable management fingers"). 2. Remove the port, application, and encryption blades or filler panels ("RRP: Port, application, and encryption blades" and "RRP: Blade filler panel"). 3. Remove the core switch blades (CR4S-8) ("RRP: Core switch blade (CR4S-8)"). 4. Remove the control processor blades (CP8) ("RRP: Control processor blade (CP8)"). 5. Remove the power supplies or filler panels ("RRP: Power supply"). 6. Remove the blower assemblies ("RRP: Blower assembly"). 7. Remove the WWN bezel (logo plate) and WWN cards ("RRP: WWN card"). Installing the replacement chassis CAUTION Use safe lifting practices when moving the product. (C015) PowerConnect B-DCX-4S Backbone Hardware Reference Manual 77 53-1001808-01
-
 1
1 -
2
-
3
-
4
-
5
-
6
-
7
-
8
-
9
-
10
-
11
-
12
-
13
-
14
-
15
-
16
-
17
-
18
-
19
-
20
-
21
-
22
-
23
-
24
-
25
-
26
-
27
-
28
-
29
-
30
-
31
-
32
-
33
-
34
-
35
-
36
-
37
-
38
-
39
-
40
-
41
-
42
-
43
-
44
-
45
-
46
-
47
-
48
-
49
-
50
-
51
-
52
-
53
-
54
-
55
-
56
-
57
-
58
-
59
-
60
-
61
-
62
-
63
-
64
-
65
-
66
-
67
-
68
-
69
-
70
-
71
-
72
-
73
-
74
-
75
-
76
-
77
-
78
-
79
-
80
-
81
-
82
-
83
-
84
-
85
-
 86
86 -
 87
87 -
 88
88 -
 89
89 -
 90
90 -
 91
91 -
 92
92 -
 93
93 -
 94
94 -
 95
95 -
 96
96 -
97
-
98
-
99
-
100
-
101
-
102
-
103
-
104
-
105
-
106
-
107
-
108
-
109
-
110
-
111
-
112
-
113
-
114
-
115
-
116
-
117
-
118
-
119
-
120
-
121
-
122
-
123
-
124
-
125
-
126
-
127
-
128
-
129
-
130
-
131
-
132
-
133
-
134
 |
 |
