Dell PowerEdge 1950 Hardware Owner's Manual (PDF) - Page 51
Removing the System Board Cooling Shroud - motherboard
 |
View all Dell PowerEdge 1950 manuals
Add to My Manuals
Save this manual to your list of manuals |
Page 51 highlights
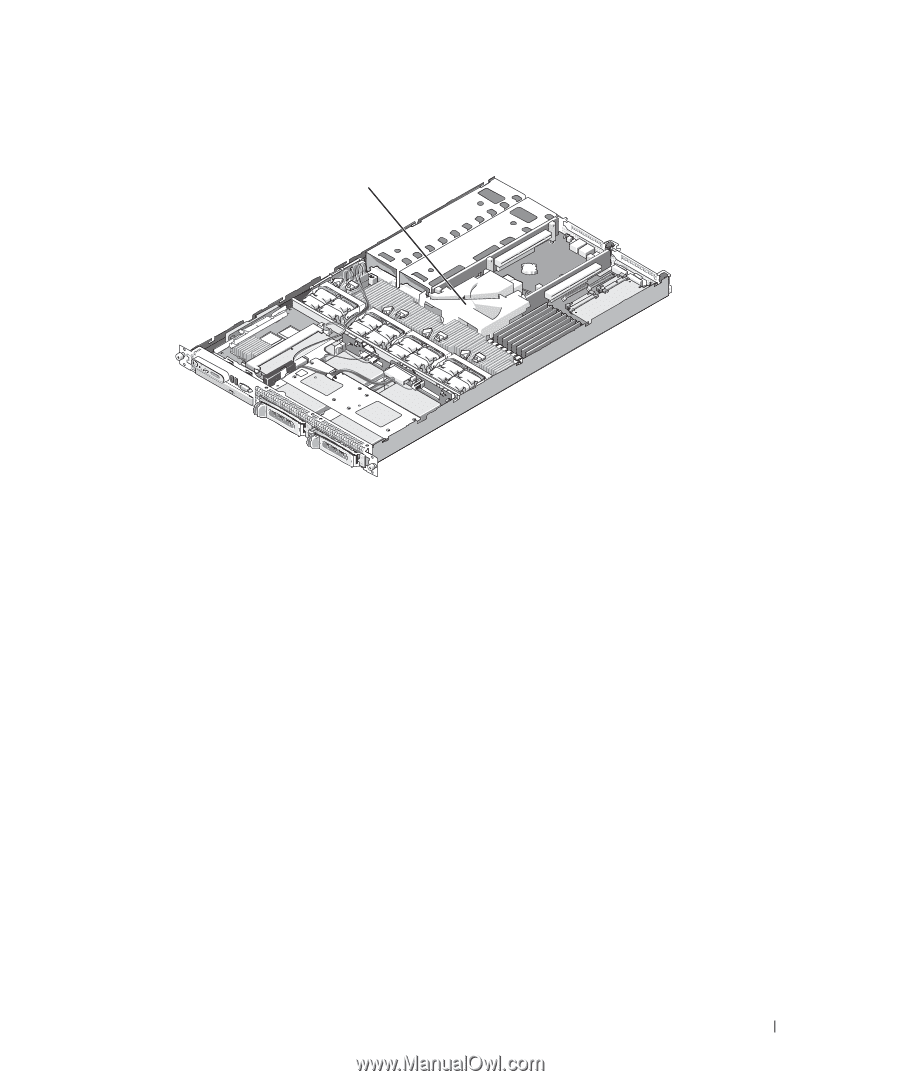
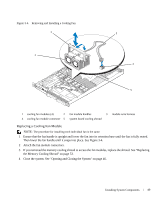
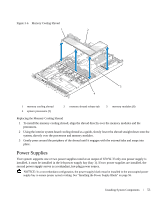
Figure 3-5. System Board Cooling Shroud 1 1 system board cooling shroud Removing the System Board Cooling Shroud 1 If applicable, remove the bezel. See "Removing and Replacing the Front Bezel" on page 45. 2 Turn off the system and attached peripherals, and then disconnect the system from the electrical outlet. 3 Open the system. See "Opening the System" on page 46. 4 Remove the memory cooling shroud. See "Removing the Memory Cooling Shroud" on page 52. 5 Remove both the center and left risers from the system board. See "Removing an Expansion-Card Riser" on page 82. 6 Press the tabs on the front side of the shroud (nearest to the processors), and then lift the shroud up and away from the system. Installing the System Board Cooling Shroud 1 Align the back of the shroud to the front of the posts of the center and rear card risers on the motherboard. 2 Press down gently on the front of the shroud until it engages with the plastic tabs on the motherboard. 3 Place the center and left risers. See "Installing an Expansion-Card Riser" on page 83. 4 Replace the memory cooling shroud. See "Replacing the Memory Cooling Shroud" on page 53. 5 Close the system. See "Closing the System" on page 47. Installing System Components 51
-
 1
1 -
2
-
3
-
4
-
5
-
6
-
7
-
8
-
9
-
10
-
11
-
12
-
13
-
14
-
15
-
16
-
17
-
18
-
19
-
20
-
21
-
22
-
23
-
24
-
25
-
26
-
27
-
28
-
29
-
30
-
31
-
32
-
33
-
34
-
35
-
36
-
37
-
38
-
39
-
40
-
41
-
42
-
43
-
44
-
45
-
 46
46 -
 47
47 -
 48
48 -
 49
49 -
 50
50 -
 51
51 -
 52
52 -
 53
53 -
 54
54 -
 55
55 -
 56
56 -
57
-
58
-
59
-
60
-
61
-
62
-
63
-
64
-
65
-
66
-
67
-
68
-
69
-
70
-
71
-
72
-
73
-
74
-
75
-
76
-
77
-
78
-
79
-
80
-
81
-
82
-
83
-
84
-
85
-
86
-
87
-
88
-
89
-
90
-
91
-
92
-
93
-
94
-
95
-
96
-
97
-
98
-
99
-
100
-
101
-
102
-
103
-
104
-
105
-
106
-
107
-
108
-
109
-
110
-
111
-
112
-
113
-
114
-
115
-
116
-
117
-
118
-
119
-
120
-
121
-
122
-
123
-
124
-
125
-
126
-
127
-
128
-
129
-
130
-
131
-
132
-
133
-
134
-
135
-
136
-
137
-
138
-
139
-
140
-
141
-
142
-
143
-
144
-
145
-
146
-
147
-
148
-
149
-
150
-
151
-
152
-
153
-
154
-
155
-
156
-
157
-
158
-
159
-
160
 |
 |