Epson Stylus COLOR 850N User Manual - Page 149
Windows 3.1 EPSON Net! Instructions, Macintosh Instructions, Troubleshooting, Setup Guide
 |
View all Epson Stylus COLOR 850N manuals
Add to My Manuals
Save this manual to your list of manuals |
Page 149 highlights
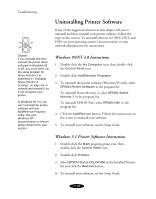
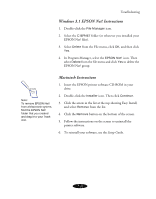
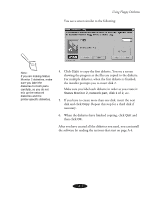
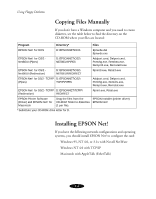
Troubleshooting Windows 3.1 EPSON Net! Instructions 1. Double-click the File Manager icon. 2. Select the C:\EPNET folder (or wherever you installed your EPSON Net! files). 3. Select Delete from the File menu, click OK, and then click Yes. 4. In Program Manager, select the EPSON Net! icon. Then select Delete from the file menu and click Yes to delete the EPSON Net! group. Note: To remove EPSON Net! from a Macintosh system, find the EPSON Net! folder that you created and drag it to your Trash icon. Macintosh Instructions 1. Insert the EPSON printer software CD-ROM in your drive. 2. Double-click the Installer icon. Then click Continue. 3. Click the arrow in the list at the top showing Easy Install, and select Remove from the list. 4. Click the Remove button on the bottom of the screen. 5. Follow the instructions on the screen to uninstall the printer software. 6. To reinstall your software, see the Setup Guide. 7-21
-
 1
1 -
2
-
3
-
4
-
5
-
6
-
7
-
8
-
9
-
10
-
11
-
12
-
13
-
14
-
15
-
16
-
17
-
18
-
19
-
20
-
21
-
22
-
23
-
24
-
25
-
26
-
27
-
28
-
29
-
30
-
31
-
32
-
33
-
34
-
35
-
36
-
37
-
38
-
39
-
40
-
41
-
42
-
43
-
44
-
45
-
46
-
47
-
48
-
49
-
50
-
51
-
52
-
53
-
54
-
55
-
56
-
57
-
58
-
59
-
60
-
61
-
62
-
63
-
64
-
65
-
66
-
67
-
68
-
69
-
70
-
71
-
72
-
73
-
74
-
75
-
76
-
77
-
78
-
79
-
80
-
81
-
82
-
83
-
84
-
85
-
86
-
87
-
88
-
89
-
90
-
91
-
92
-
93
-
94
-
95
-
96
-
97
-
98
-
99
-
100
-
101
-
102
-
103
-
104
-
105
-
106
-
107
-
108
-
109
-
110
-
111
-
112
-
113
-
114
-
115
-
116
-
117
-
118
-
119
-
120
-
121
-
122
-
123
-
124
-
125
-
126
-
127
-
128
-
129
-
130
-
131
-
132
-
133
-
134
-
135
-
136
-
137
-
138
-
139
-
140
-
141
-
142
-
143
-
 144
144 -
 145
145 -
 146
146 -
 147
147 -
 148
148 -
 149
149 -
 150
150 -
 151
151 -
 152
152 -
 153
153 -
 154
154 -
155
-
156
-
157
-
158
-
159
-
160
-
161
-
162
-
163
-
164
-
165
-
166
-
167
-
168
-
169
-
170
-
171
-
172
-
173
-
174
-
175
-
176
-
177
-
178
-
179
 |
 |
