Epson Stylus COLOR 850N User Manual - Page 79
Changing Status Monitor 2 Settings, In Windows Explorer or My Computer, find the folder
 |
View all Epson Stylus COLOR 850N manuals
Add to My Manuals
Save this manual to your list of manuals |
Page 79 highlights
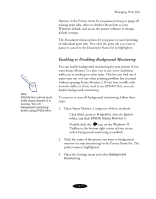
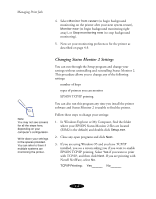
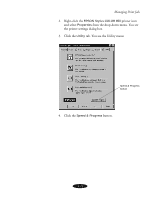
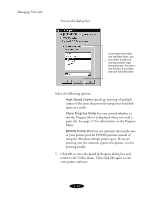
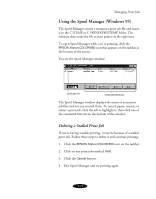
Managing Print Jobs 4. Select Monitor from restart (to begin background monitoring on the printer after your next system restart), Monitor now (to begin background monitoring right away), or Stop monitoring now (to stop background monitoring). 5. Now set your monitoring preferences for the printer as described on page 4-3. Note: You may not see screens for all the steps here, depending on your computer's configuration. Write down your settings in the spaces provided. You can refer to them if multiple systems are monitoring the printer. Changing Status Monitor 2 Settings You can run through the Setup program and change your settings without uninstalling and reinstalling Status Monitor 2. This procedure allows you to change any of the following settings: number of hops types of printers you can monitor EPSON TCP/IP printing You can also run this program any time you install the printer software and Status Monitor 2 is unable to find the printer. Follow these steps to change your settings: 1. In Windows Explorer or My Computer, find the folder where your EPSON Status Monitor 2 files are located (ESM2 is the default) and double-click Setup.exe. 2. Close any open programs and click Next. 3. If you are using Windows 95 and you have TCP/IP installed, you see a screen asking you if you want to enable EPSON TCP/IP printing. Select Yes if you want to print with TCP/IP, and then click Next. If you are printing with Novell NetWare, select No. TCP/IP Printing: Yes_______ No_______ 4-8
-
 1
1 -
2
-
3
-
4
-
5
-
6
-
7
-
8
-
9
-
10
-
11
-
12
-
13
-
14
-
15
-
16
-
17
-
18
-
19
-
20
-
21
-
22
-
23
-
24
-
25
-
26
-
27
-
28
-
29
-
30
-
31
-
32
-
33
-
34
-
35
-
36
-
37
-
38
-
39
-
40
-
41
-
42
-
43
-
44
-
45
-
46
-
47
-
48
-
49
-
50
-
51
-
52
-
53
-
54
-
55
-
56
-
57
-
58
-
59
-
60
-
61
-
62
-
63
-
64
-
65
-
66
-
67
-
68
-
69
-
70
-
71
-
72
-
73
-
 74
74 -
 75
75 -
 76
76 -
 77
77 -
 78
78 -
 79
79 -
 80
80 -
 81
81 -
 82
82 -
 83
83 -
 84
84 -
85
-
86
-
87
-
88
-
89
-
90
-
91
-
92
-
93
-
94
-
95
-
96
-
97
-
98
-
99
-
100
-
101
-
102
-
103
-
104
-
105
-
106
-
107
-
108
-
109
-
110
-
111
-
112
-
113
-
114
-
115
-
116
-
117
-
118
-
119
-
120
-
121
-
122
-
123
-
124
-
125
-
126
-
127
-
128
-
129
-
130
-
131
-
132
-
133
-
134
-
135
-
136
-
137
-
138
-
139
-
140
-
141
-
142
-
143
-
144
-
145
-
146
-
147
-
148
-
149
-
150
-
151
-
152
-
153
-
154
-
155
-
156
-
157
-
158
-
159
-
160
-
161
-
162
-
163
-
164
-
165
-
166
-
167
-
168
-
169
-
170
-
171
-
172
-
173
-
174
-
175
-
176
-
177
-
178
-
179
 |
 |
