Epson Stylus COLOR 850N User Manual - Page 154
Installing EPSON Net! in Windows, Using Floppy Diskettes, Setup Guide, Setup, Guide
 |
View all Epson Stylus COLOR 850N manuals
Add to My Manuals
Save this manual to your list of manuals |
Page 154 highlights
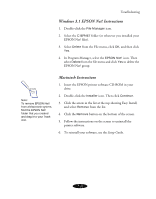
Using Floppy Diskettes Note: For peer-to-peer networks with both Windows NT and Windows 95, use EPSON Net! on a Windows NT system. If you have a peer-to-peer network with only Windows 95, you use TCP/IP and EPSON TCP/IP (included with Status Monitor 2) to configure the Ethernet card and use the printer on the network. See the Setup Guide. Installing EPSON Net! in Windows 1. Insert the EPSON Net! diskette in your drive. 2. In Windows 95 or NT 4.0, click Start, then click Run. In Windows 3.1x, select Run from the File menu in Program Manager. 3. For NetWare, type A:\WINDOWS\INSTALL and click OK. (If your diskette drive is not A, substitute the correct letter.) For NT and TCP/IP, type A:\WNT\INSTALL and click OK. (If your diskette drive is not A, substitute the correct letter.) 4. Follow the instructions on the screen to complete the installation. After you install EPSON Net!, you can use it to configure your printer for NetWare (on page 16 in your Setup Guide) or for NT and TCP/IP (on page 23 in your Setup Guide). Installing EPSON Net! on a Macintosh 1. Create a folder for EPSON Net! on your hard disk. 2. Insert the EPSON Net! diskette in your drive. 3. Double-click the diskette to open it and copy EPSON Net! to the folder you created. After you install EPSON Net!, you use it to configure your printer for AppleTalk, as described on page 23 in your Setup Guide. A-5
-
 1
1 -
2
-
3
-
4
-
5
-
6
-
7
-
8
-
9
-
10
-
11
-
12
-
13
-
14
-
15
-
16
-
17
-
18
-
19
-
20
-
21
-
22
-
23
-
24
-
25
-
26
-
27
-
28
-
29
-
30
-
31
-
32
-
33
-
34
-
35
-
36
-
37
-
38
-
39
-
40
-
41
-
42
-
43
-
44
-
45
-
46
-
47
-
48
-
49
-
50
-
51
-
52
-
53
-
54
-
55
-
56
-
57
-
58
-
59
-
60
-
61
-
62
-
63
-
64
-
65
-
66
-
67
-
68
-
69
-
70
-
71
-
72
-
73
-
74
-
75
-
76
-
77
-
78
-
79
-
80
-
81
-
82
-
83
-
84
-
85
-
86
-
87
-
88
-
89
-
90
-
91
-
92
-
93
-
94
-
95
-
96
-
97
-
98
-
99
-
100
-
101
-
102
-
103
-
104
-
105
-
106
-
107
-
108
-
109
-
110
-
111
-
112
-
113
-
114
-
115
-
116
-
117
-
118
-
119
-
120
-
121
-
122
-
123
-
124
-
125
-
126
-
127
-
128
-
129
-
130
-
131
-
132
-
133
-
134
-
135
-
136
-
137
-
138
-
139
-
140
-
141
-
142
-
143
-
144
-
145
-
146
-
147
-
148
-
 149
149 -
 150
150 -
 151
151 -
 152
152 -
 153
153 -
 154
154 -
 155
155 -
 156
156 -
 157
157 -
 158
158 -
 159
159 -
160
-
161
-
162
-
163
-
164
-
165
-
166
-
167
-
168
-
169
-
170
-
171
-
172
-
173
-
174
-
175
-
176
-
177
-
178
-
179
 |
 |
