Epson Stylus COLOR 850N User Manual - Page 96
Installing the New Cartridge, Don't pull off the white portion or try
 |
View all Epson Stylus COLOR 850N manuals
Add to My Manuals
Save this manual to your list of manuals |
Page 96 highlights
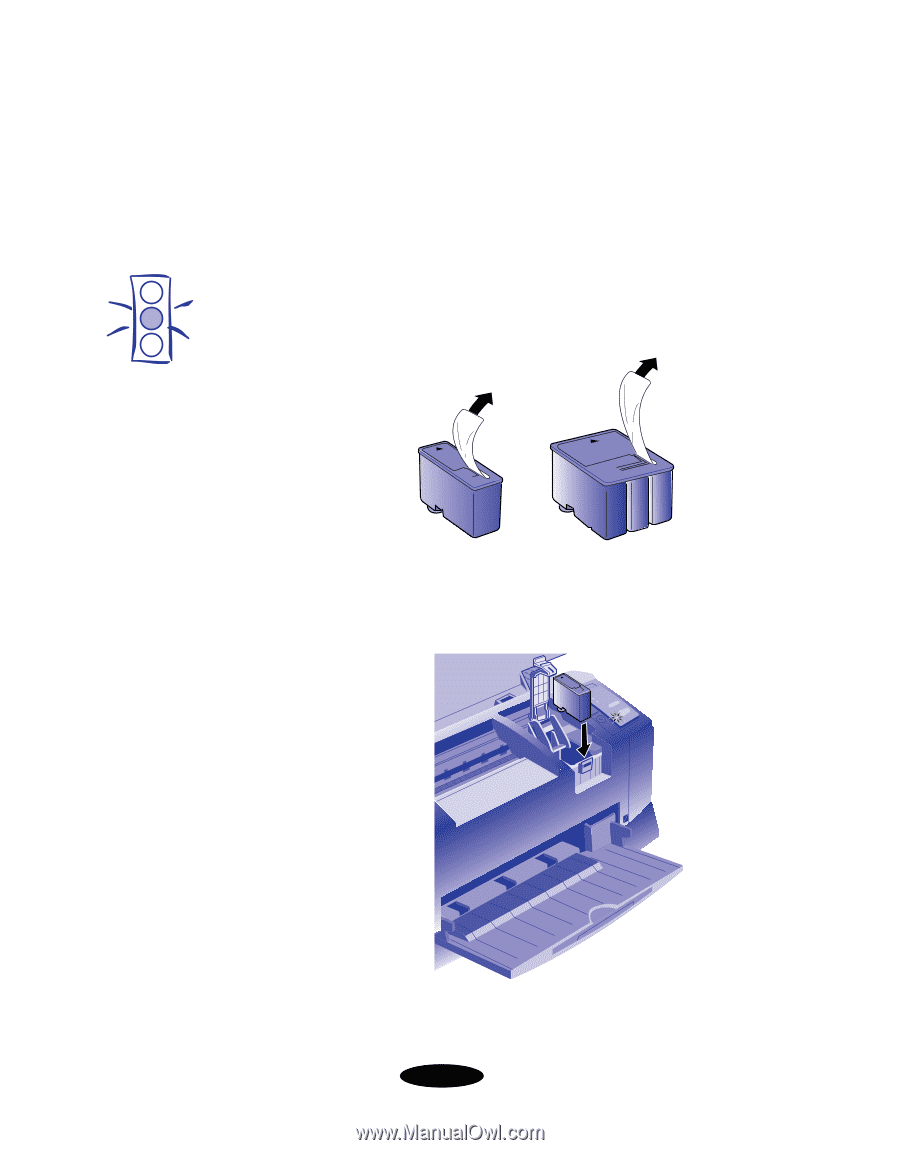
Maintenance and Transportation Installing the New Cartridge Once you have removed the empty cartridge, you're ready to install the new one. Follow these steps: 1. Remove the new ink cartridge from its packaging. 2. Remove only the yellow part of the tape seal on top as shown below. Don't pull off the white portion or try to remove the clear seal underneath the cartridge. Caution: You must remove the yellow tape from the top of the cartridge or you will permanently damage it. It's okay if the tape doesn't tear off completely at the dotted line. Do not remove the clear seal from the bottom of the cartridge; ink will leak out. black cartridge color cartridge 3. Lower the ink cartridge into its holder with the label facing up and the arrow pointing to the back of the printer. 4. Press down the ink cartridge clamp until it locks in place. 5-4
-
 1
1 -
2
-
3
-
4
-
5
-
6
-
7
-
8
-
9
-
10
-
11
-
12
-
13
-
14
-
15
-
16
-
17
-
18
-
19
-
20
-
21
-
22
-
23
-
24
-
25
-
26
-
27
-
28
-
29
-
30
-
31
-
32
-
33
-
34
-
35
-
36
-
37
-
38
-
39
-
40
-
41
-
42
-
43
-
44
-
45
-
46
-
47
-
48
-
49
-
50
-
51
-
52
-
53
-
54
-
55
-
56
-
57
-
58
-
59
-
60
-
61
-
62
-
63
-
64
-
65
-
66
-
67
-
68
-
69
-
70
-
71
-
72
-
73
-
74
-
75
-
76
-
77
-
78
-
79
-
80
-
81
-
82
-
83
-
84
-
85
-
86
-
87
-
88
-
89
-
90
-
 91
91 -
 92
92 -
 93
93 -
 94
94 -
 95
95 -
 96
96 -
 97
97 -
 98
98 -
 99
99 -
 100
100 -
 101
101 -
102
-
103
-
104
-
105
-
106
-
107
-
108
-
109
-
110
-
111
-
112
-
113
-
114
-
115
-
116
-
117
-
118
-
119
-
120
-
121
-
122
-
123
-
124
-
125
-
126
-
127
-
128
-
129
-
130
-
131
-
132
-
133
-
134
-
135
-
136
-
137
-
138
-
139
-
140
-
141
-
142
-
143
-
144
-
145
-
146
-
147
-
148
-
149
-
150
-
151
-
152
-
153
-
154
-
155
-
156
-
157
-
158
-
159
-
160
-
161
-
162
-
163
-
164
-
165
-
166
-
167
-
168
-
169
-
170
-
171
-
172
-
173
-
174
-
175
-
176
-
177
-
178
-
179
 |
 |