Epson Stylus COLOR 850N User Manual - Page 150
APPENDIX A-USING FLOPPY DISKETTES, Using the Disk Creation Utility
 |
View all Epson Stylus COLOR 850N manuals
Add to My Manuals
Save this manual to your list of manuals |
Page 150 highlights
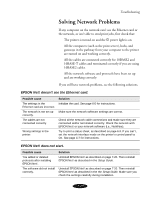
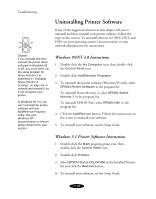
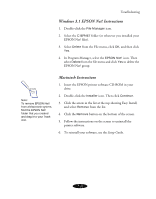
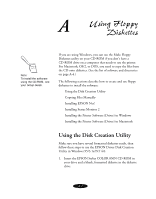
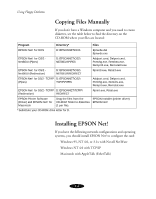
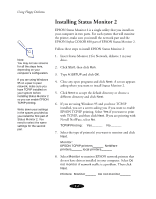
A Using Floppy Diskettes Note: To install the software using the CD-ROM, see your Setup Guide. If you are using Windows, you can use the Make Floppy Diskettes utility on your CD-ROM if you don't have a CD-ROM drive on a computer that needs to use the printer. For Macintosh, OS/2, or DOS, you need to copy the files from the CD onto diskettes. (See the list of software and directories on page A-4.) The following sections describe how to create and use floppy diskettes to install the software: Using the Disk Creation Utility Copying Files Manually Installing EPSON Net! Installing Status Monitor 2 Installing the Printer Software (Driver) in Windows Installing the Printer Software (Driver) in Macintosh Using the Disk Creation Utility Make sure you have several formatted diskettes ready, then follow these steps to use the EPSON Driver Disk Creation Utility in Windows 95/3.1x/NT 4.0: 1. Insert the EPSON Stylus COLOR 850N CD-ROM in your drive and a blank, formatted diskette in the diskette drive. A-1
-
 1
1 -
2
-
3
-
4
-
5
-
6
-
7
-
8
-
9
-
10
-
11
-
12
-
13
-
14
-
15
-
16
-
17
-
18
-
19
-
20
-
21
-
22
-
23
-
24
-
25
-
26
-
27
-
28
-
29
-
30
-
31
-
32
-
33
-
34
-
35
-
36
-
37
-
38
-
39
-
40
-
41
-
42
-
43
-
44
-
45
-
46
-
47
-
48
-
49
-
50
-
51
-
52
-
53
-
54
-
55
-
56
-
57
-
58
-
59
-
60
-
61
-
62
-
63
-
64
-
65
-
66
-
67
-
68
-
69
-
70
-
71
-
72
-
73
-
74
-
75
-
76
-
77
-
78
-
79
-
80
-
81
-
82
-
83
-
84
-
85
-
86
-
87
-
88
-
89
-
90
-
91
-
92
-
93
-
94
-
95
-
96
-
97
-
98
-
99
-
100
-
101
-
102
-
103
-
104
-
105
-
106
-
107
-
108
-
109
-
110
-
111
-
112
-
113
-
114
-
115
-
116
-
117
-
118
-
119
-
120
-
121
-
122
-
123
-
124
-
125
-
126
-
127
-
128
-
129
-
130
-
131
-
132
-
133
-
134
-
135
-
136
-
137
-
138
-
139
-
140
-
141
-
142
-
143
-
144
-
 145
145 -
 146
146 -
 147
147 -
 148
148 -
 149
149 -
 150
150 -
 151
151 -
 152
152 -
 153
153 -
 154
154 -
 155
155 -
156
-
157
-
158
-
159
-
160
-
161
-
162
-
163
-
164
-
165
-
166
-
167
-
168
-
169
-
170
-
171
-
172
-
173
-
174
-
175
-
176
-
177
-
178
-
179
 |
 |