Epson Stylus COLOR 850N User Manual - Page 94
Removing an Empty Ink Cartridge, Maintenance and Transportation
 |
View all Epson Stylus COLOR 850N manuals
Add to My Manuals
Save this manual to your list of manuals |
Page 94 highlights
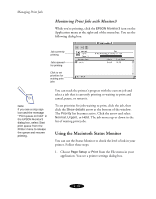
Maintenance and Transportation When the A color ink out light comes on, you can continue to print with black ink. Simply turn the printer off and then back on again. When you print, make sure you choose Black as the Ink setting in your printer software. Caution: To avoid damaging the printer, never move the print heads by hand. Removing an Empty Ink Cartridge You can replace a cartridge when the B black or A color ink out light is either flashing or on. Follow these steps: 1. Make sure the printer is turned on and not printing. 2. Determine which cartridge needs to be replaced. 3. Lower the output tray and raise the printer cover. Then locate the Y black and X color cleaning buttons next to the control panel under the printer's cover. black cleaning button Caution: If you press a cleaning button when its corresponding ink out light is off or not flashing, the printer cleans the print heads, as described on page 5-6. If you need to replace an ink cartridge before the lights flash (because the ink is too old, for example) follow the instructions on page 5-5. color cleaning button 4. Press the Y black or X color cleaning button and hold it for three seconds. The print heads move slightly left and the Ppower light begins flashing. (The print heads return to their home position if you don't proceed to step 5 within 60 seconds.) 5-2
-
 1
1 -
2
-
3
-
4
-
5
-
6
-
7
-
8
-
9
-
10
-
11
-
12
-
13
-
14
-
15
-
16
-
17
-
18
-
19
-
20
-
21
-
22
-
23
-
24
-
25
-
26
-
27
-
28
-
29
-
30
-
31
-
32
-
33
-
34
-
35
-
36
-
37
-
38
-
39
-
40
-
41
-
42
-
43
-
44
-
45
-
46
-
47
-
48
-
49
-
50
-
51
-
52
-
53
-
54
-
55
-
56
-
57
-
58
-
59
-
60
-
61
-
62
-
63
-
64
-
65
-
66
-
67
-
68
-
69
-
70
-
71
-
72
-
73
-
74
-
75
-
76
-
77
-
78
-
79
-
80
-
81
-
82
-
83
-
84
-
85
-
86
-
87
-
88
-
 89
89 -
 90
90 -
 91
91 -
 92
92 -
 93
93 -
 94
94 -
 95
95 -
 96
96 -
 97
97 -
 98
98 -
 99
99 -
100
-
101
-
102
-
103
-
104
-
105
-
106
-
107
-
108
-
109
-
110
-
111
-
112
-
113
-
114
-
115
-
116
-
117
-
118
-
119
-
120
-
121
-
122
-
123
-
124
-
125
-
126
-
127
-
128
-
129
-
130
-
131
-
132
-
133
-
134
-
135
-
136
-
137
-
138
-
139
-
140
-
141
-
142
-
143
-
144
-
145
-
146
-
147
-
148
-
149
-
150
-
151
-
152
-
153
-
154
-
155
-
156
-
157
-
158
-
159
-
160
-
161
-
162
-
163
-
164
-
165
-
166
-
167
-
168
-
169
-
170
-
171
-
172
-
173
-
174
-
175
-
176
-
177
-
178
-
179
 |
 |
