HP 630n HP Jetdirect Print Servers - Administrator's Guide - Page 23
Verify network configuration, Test the configuration, Networking, System Preferences, Print & Fax - jetdirect troubleshooting
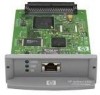 |
UPC - 808736806244
View all HP 630n manuals
Add to My Manuals
Save this manual to your list of manuals |
Page 23 highlights
3. Identify and select your printer. A string of hexadecimal digits is listed, which should match the LAN hardware address (or the last 6 digits of the address) on the HP Jetdirect configuration page for the printer. 4. Double-click the printer to use the embedded Web server on the printer. Configure the network settings using the Networking tab. To add the printer to your system for printing, use the following steps: 1. Open System Preferences, and then open Print & Fax. 2. Click + to add a printer. 3. Using the Default Browser in the Printer Browser window, select the printer, and then click Add. NOTE: If multiple connection types are listed, select the one with a Bonjour connection. 4. In the Print & Fax window, verify the new printer is added. Verify network configuration To verify your current network configuration, print an HP Jetdirect configuration page, or use the embedded Web server and view the Networking tab settings. When printing a configuration page, make sure a READY message appears on the control panel for at least 1 minute before printing the page. For information on the contents of the configuration page, see HP Jetdirect configuration pages on page 129. Test the configuration 1. Open Safari and display a page. 2. Click the Safari File menu and select Print. 3. In the Printer field, select the printer and then click the Print button. If the printer prints the job, you have connected your printer to your network correctly. If your printer does not print, see Troubleshoot the HP Jetdirect print server on page 117. ENWW Mac OS network installation 13
-
 1
1 -
2
-
3
-
4
-
5
-
6
-
7
-
8
-
9
-
10
-
11
-
12
-
13
-
14
-
15
-
16
-
17
-
 18
18 -
 19
19 -
 20
20 -
 21
21 -
 22
22 -
 23
23 -
 24
24 -
 25
25 -
 26
26 -
 27
27 -
 28
28 -
29
-
30
-
31
-
32
-
33
-
34
-
35
-
36
-
37
-
38
-
39
-
40
-
41
-
42
-
43
-
44
-
45
-
46
-
47
-
48
-
49
-
50
-
51
-
52
-
53
-
54
-
55
-
56
-
57
-
58
-
59
-
60
-
61
-
62
-
63
-
64
-
65
-
66
-
67
-
68
-
69
-
70
-
71
-
72
-
73
-
74
-
75
-
76
-
77
-
78
-
79
-
80
-
81
-
82
-
83
-
84
-
85
-
86
-
87
-
88
-
89
-
90
-
91
-
92
-
93
-
94
-
95
-
96
-
97
-
98
-
99
-
100
-
101
-
102
-
103
-
104
-
105
-
106
-
107
-
108
-
109
-
110
-
111
-
112
-
113
-
114
-
115
-
116
-
117
-
118
-
119
-
120
-
121
-
122
-
123
-
124
-
125
-
126
-
127
-
128
-
129
-
130
-
131
-
132
-
133
-
134
-
135
-
136
-
137
-
138
-
139
-
140
-
141
-
142
-
143
-
144
-
145
-
146
-
147
-
148
-
149
-
150
-
151
-
152
-
153
-
154
-
155
-
156
-
157
-
158
-
159
-
160
-
161
-
162
-
163
-
164
-
165
-
166
-
167
-
168
-
169
-
170
-
171
-
172
-
173
-
174
-
175
-
176
-
177
-
178
-
179
-
180
-
181
-
182
-
183
-
184
-
185
-
186
-
187
-
188
-
189
-
190
-
191
-
192
-
193
-
194
-
195
-
196
-
197
-
198
-
199
-
200
-
201
-
202
 |
 |
