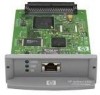
HP 630n HP Jetdirect Print Servers - Administrator's Guide - Page 45
Start, Settings, Control Panel, Administrative Tools, Action, New Scope, Add New Scope, Finish
 |
UPC - 808736806244
View all HP 630n manuals
Add to My Manuals
Save this manual to your list of manuals |
Page 45 highlights
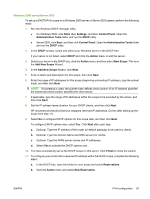
Windows 2000 server/Server 2003 To set up a DHCP(IPv4) scope on a Windows 2000 server or Server 2003 system, perform the following steps: 1. Run the Windows DHCP manager utility. ● On Windows 2000, click Start, then Settings, and then Control Panel. Open the Administrative Tools folder and run the DHCP utility. ● Server 2003, click Start, and then click Control Panel. Open the Administrative Tools folder and run the DHCP utility. 2. In the DHCP window, locate and select your Windows server in the DHCP tree. If your server is not listed, select DHCP and click the Action menu to add the server. 3. Select your server in the DHCP tree, click the Action menu, and then select New Scope. This runs the Add New Scope Wizard. 4. In the Add New Scope Wizard, click Next. 5. Enter a Name and Description for this scope, then click Next. 6. Enter the range of IP addresses for this scope (beginning and ending IP address), type the subnet mask, and then click Next. NOTE: If subnetting is used, the subnet mask defines which portion of an IP address specifies the subnet and which portion specifies the client device. 7. If applicable, type the range of IP addresses within the scope to be excluded by the server, and then click Next. 8. Set the IP address lease duration for your DHCP clients, and then click Next. HP recommends that all printers be assigned reserved IP addresses. Do this after setting up the scope (see step 11). 9. Select No to configure DHCP options for this scope later, and then click Next. To configure DHCP options now, select Yes. Click Next after each step. a. Optional. Type the IP address of the router (or default gateway) to be used by clients. b. Optional. Type the Domain Name and DNS servers for clients. c. Optional. Type the WINS server names and IP addresses. d. Select Yes to activate the DHCP options now. 10. You have successfully set up the DHCP scope on this server. Click Finish to close the wizard. 11. To configure your printer with a reserved IP address within the DHCP scope, complete the following steps: a. In the DHCP tree, open the folder for your scope and select Reservations. b. Click the Action menu and select New Reservation. ENWW IPv4 configuration 35
-
 1
1 -
2
-
3
-
4
-
5
-
6
-
7
-
8
-
9
-
10
-
11
-
12
-
13
-
14
-
15
-
16
-
17
-
18
-
19
-
20
-
21
-
22
-
23
-
24
-
25
-
26
-
27
-
28
-
29
-
30
-
31
-
32
-
33
-
34
-
35
-
36
-
37
-
38
-
39
-
 40
40 -
 41
41 -
 42
42 -
 43
43 -
 44
44 -
 45
45 -
 46
46 -
 47
47 -
 48
48 -
 49
49 -
 50
50 -
51
-
52
-
53
-
54
-
55
-
56
-
57
-
58
-
59
-
60
-
61
-
62
-
63
-
64
-
65
-
66
-
67
-
68
-
69
-
70
-
71
-
72
-
73
-
74
-
75
-
76
-
77
-
78
-
79
-
80
-
81
-
82
-
83
-
84
-
85
-
86
-
87
-
88
-
89
-
90
-
91
-
92
-
93
-
94
-
95
-
96
-
97
-
98
-
99
-
100
-
101
-
102
-
103
-
104
-
105
-
106
-
107
-
108
-
109
-
110
-
111
-
112
-
113
-
114
-
115
-
116
-
117
-
118
-
119
-
120
-
121
-
122
-
123
-
124
-
125
-
126
-
127
-
128
-
129
-
130
-
131
-
132
-
133
-
134
-
135
-
136
-
137
-
138
-
139
-
140
-
141
-
142
-
143
-
144
-
145
-
146
-
147
-
148
-
149
-
150
-
151
-
152
-
153
-
154
-
155
-
156
-
157
-
158
-
159
-
160
-
161
-
162
-
163
-
164
-
165
-
166
-
167
-
168
-
169
-
170
-
171
-
172
-
173
-
174
-
175
-
176
-
177
-
178
-
179
-
180
-
181
-
182
-
183
-
184
-
185
-
186
-
187
-
188
-
189
-
190
-
191
-
192
-
193
-
194
-
195
-
196
-
197
-
198
-
199
-
200
-
201
-
202
 |
 |
