HP Armada 4200 Armada 4200 Family of Personal Computers Reference Guide - Page 93
Adding Memory, Remove the device from the DualBay. See Using
 |
View all HP Armada 4200 manuals
Add to My Manuals
Save this manual to your list of manuals |
Page 93 highlights
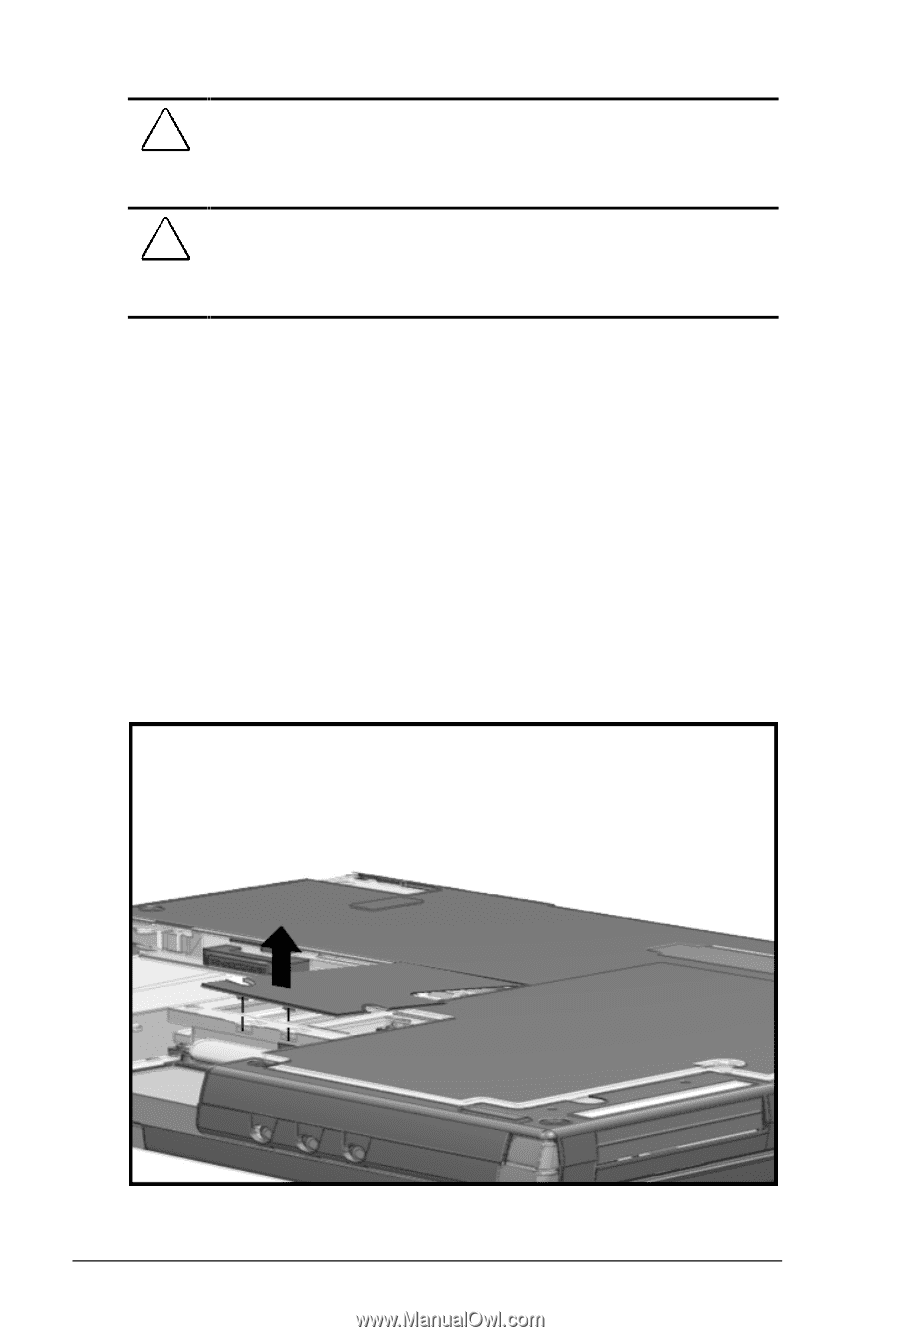
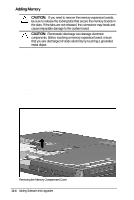
Adding Memory CAUTION: If you need to remove the memory expansion boards, be sure to release the locking tabs that secure the memory boards in the slots. If the tabs are not released, the connectors may break and cause irreparable damage to the system board. CAUTION: Electrostatic discharge can damage electronic components. Before touching a memory expansion board, ensure that you are discharged of static electricity by touching a grounded metal object. To upgrade memory, follow these steps: 1. Save your work. Exit all applications and turn off the computer by clicking Shut Down from the Windows Start menu. Remove all external devices, including battery packs and the AC Adapter. 2. Remove the device from the DualBay. (See Chapter 7, "Using the DualBay," for removal instructions.) 3. Remove the pointing device. (See Chapter 4 for removal instructions.) 4. Close the computer and turn it bottom side up. 5. Pry up the memory compartment cover and gently lift it off. Removing the Memory Compartment Cover 11-4 Adding Software and Upgrades
-
 1
1 -
2
-
3
-
4
-
5
-
6
-
7
-
8
-
9
-
10
-
11
-
12
-
13
-
14
-
15
-
16
-
17
-
18
-
19
-
20
-
21
-
22
-
23
-
24
-
25
-
26
-
27
-
28
-
29
-
30
-
31
-
32
-
33
-
34
-
35
-
36
-
37
-
38
-
39
-
40
-
41
-
42
-
43
-
44
-
45
-
46
-
47
-
48
-
49
-
50
-
51
-
52
-
53
-
54
-
55
-
56
-
57
-
58
-
59
-
60
-
61
-
62
-
63
-
64
-
65
-
66
-
67
-
68
-
69
-
70
-
71
-
72
-
73
-
74
-
75
-
76
-
77
-
78
-
79
-
80
-
81
-
82
-
83
-
84
-
85
-
86
-
87
-
 88
88 -
 89
89 -
 90
90 -
 91
91 -
 92
92 -
 93
93 -
 94
94 -
 95
95 -
 96
96 -
 97
97 -
 98
98 -
99
-
100
-
101
-
102
-
103
-
104
-
105
-
106
-
107
-
108
-
109
-
110
-
111
-
112
-
113
-
114
-
115
-
116
-
117
-
118
-
119
-
120
-
121
-
122
-
123
-
124
-
125
-
126
-
127
-
128
-
129
-
130
-
131
-
132
-
133
-
134
-
135
-
136
-
137
-
138
-
139
-
140
-
141
-
142
-
143
-
144
-
145
-
146
-
147
-
148
-
149
-
150
-
151
-
152
-
153
-
154
-
155
-
156
-
157
-
158
-
159
-
160
-
161
-
162
-
163
-
164
-
165
-
166
-
167
-
168
-
169
-
170
-
171
-
172
-
173
-
174
-
175
-
176
-
177
-
178
 |
 |