HP Armada 4200 Armada 4200 Family of Personal Computers Reference Guide - Page 94
Upgrading the Hard Drive
 |
View all HP Armada 4200 manuals
Add to My Manuals
Save this manual to your list of manuals |
Page 94 highlights
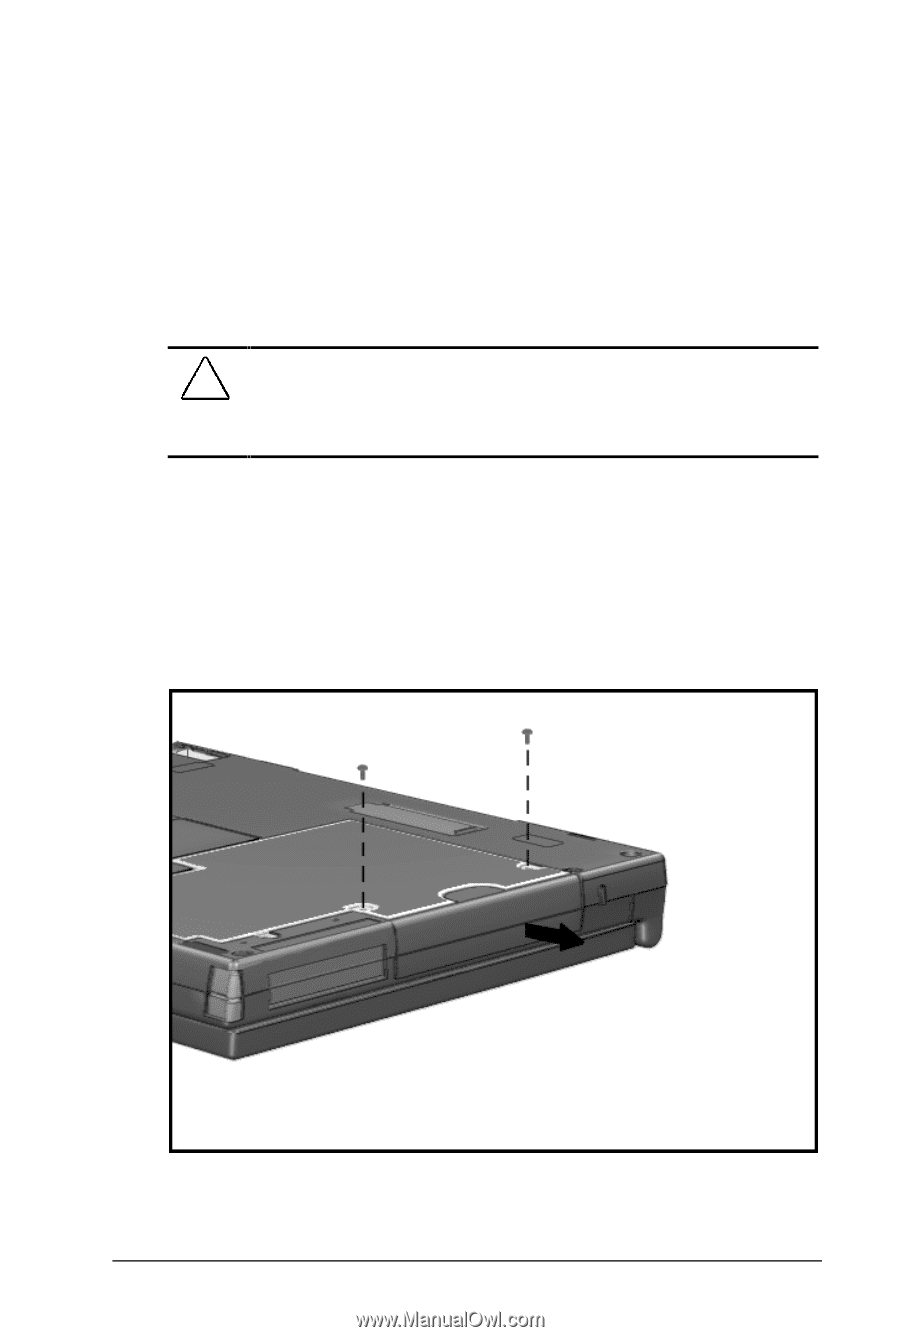
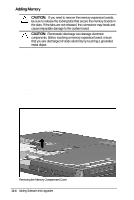
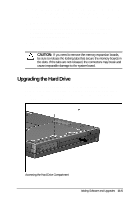
6. Slide the first of two memory boards into the lower memory slot. Then slide the second board into the top slot. The connectors snap into place when boards are correctly seated. 7. Replace the memory compartment cover. 8. Turn the computer over again, right side up. Replace the DualBay device battery pack(s), pointing device, and reconnect external devices. 9. The computer automatically recognizes the new memory and reconfigures the system. CAUTION: If you need to remove the memory expansion boards, be sure to release the locking tabs that secure the memory boards in the slots. If the tabs are not released, the connectors may break and cause irreparable damage to the system board. Upgrading the Hard Drive Depending on your computer model, the hard drive can be upgraded to a larger capacity. Contact your Compaq authorized dealer, reseller, or service provider for the optional hard drives available for your computer. Accessing the Hard Drive Compartment Adding Software and Upgrades 11-5
-
 1
1 -
2
-
3
-
4
-
5
-
6
-
7
-
8
-
9
-
10
-
11
-
12
-
13
-
14
-
15
-
16
-
17
-
18
-
19
-
20
-
21
-
22
-
23
-
24
-
25
-
26
-
27
-
28
-
29
-
30
-
31
-
32
-
33
-
34
-
35
-
36
-
37
-
38
-
39
-
40
-
41
-
42
-
43
-
44
-
45
-
46
-
47
-
48
-
49
-
50
-
51
-
52
-
53
-
54
-
55
-
56
-
57
-
58
-
59
-
60
-
61
-
62
-
63
-
64
-
65
-
66
-
67
-
68
-
69
-
70
-
71
-
72
-
73
-
74
-
75
-
76
-
77
-
78
-
79
-
80
-
81
-
82
-
83
-
84
-
85
-
86
-
87
-
88
-
 89
89 -
 90
90 -
 91
91 -
 92
92 -
 93
93 -
 94
94 -
 95
95 -
 96
96 -
 97
97 -
 98
98 -
 99
99 -
100
-
101
-
102
-
103
-
104
-
105
-
106
-
107
-
108
-
109
-
110
-
111
-
112
-
113
-
114
-
115
-
116
-
117
-
118
-
119
-
120
-
121
-
122
-
123
-
124
-
125
-
126
-
127
-
128
-
129
-
130
-
131
-
132
-
133
-
134
-
135
-
136
-
137
-
138
-
139
-
140
-
141
-
142
-
143
-
144
-
145
-
146
-
147
-
148
-
149
-
150
-
151
-
152
-
153
-
154
-
155
-
156
-
157
-
158
-
159
-
160
-
161
-
162
-
163
-
164
-
165
-
166
-
167
-
168
-
169
-
170
-
171
-
172
-
173
-
174
-
175
-
176
-
177
-
178
 |
 |