HP Designjet 250c Service Manual - Page 105
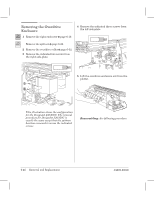
Reinstalling the Overdrive, Enclosure, Replace the indicated screw and tighten
 |
View all HP Designjet 250c manuals
Add to My Manuals
Save this manual to your list of manuals |
Page 105 highlights
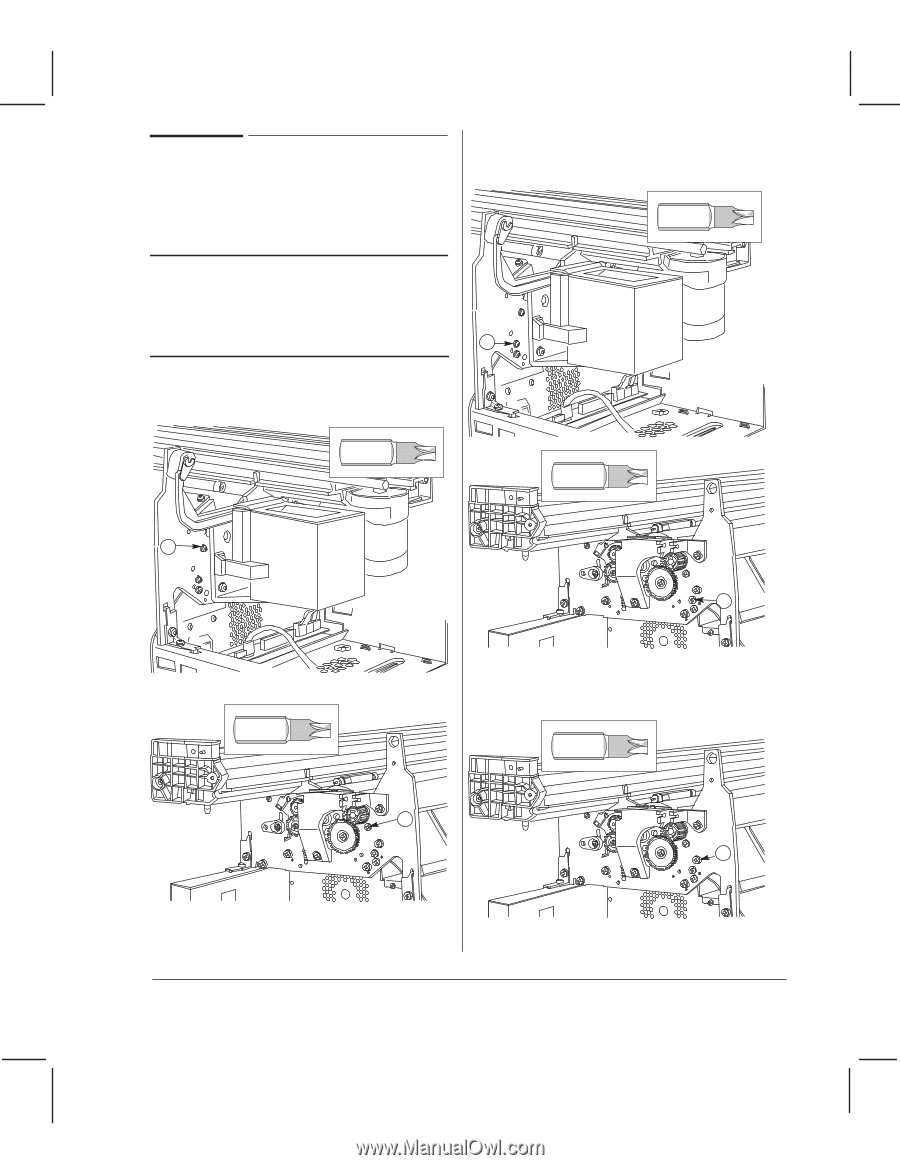
Reinstalling the Overdrive Enclosure The order in which you replace the screws on the overdrive enclosure is important. CAUTION Take care not to damage the mediaĆsensor flags. The overdrive enclosure should not touch them. 2 Insert the two indicated screws, but do not tighten them. (Long dogĆpoint screws.) Torx-15 3 1 Replace the two indicated screws. (Short dogĆpoint screws.) Torx-15 Torx-15 1 Torx-15 4 3 Replace the indicated screw and tighten it, thus aligning the overdrive enclosure with the left sideĆplate. Torx-15 2 5 C4699Ć90000 4 Tighten the screws you inserted in step 2. Removal and Replacement 6Ć47
-
 1
1 -
2
-
3
-
4
-
5
-
6
-
7
-
8
-
9
-
10
-
11
-
12
-
13
-
14
-
15
-
16
-
17
-
18
-
19
-
20
-
21
-
22
-
23
-
24
-
25
-
26
-
27
-
28
-
29
-
30
-
31
-
32
-
33
-
34
-
35
-
36
-
37
-
38
-
39
-
40
-
41
-
42
-
43
-
44
-
45
-
46
-
47
-
48
-
49
-
50
-
51
-
52
-
53
-
54
-
55
-
56
-
57
-
58
-
59
-
60
-
61
-
62
-
63
-
64
-
65
-
66
-
67
-
68
-
69
-
70
-
71
-
72
-
73
-
74
-
75
-
76
-
77
-
78
-
79
-
80
-
81
-
82
-
83
-
84
-
85
-
86
-
87
-
88
-
89
-
90
-
91
-
92
-
93
-
94
-
95
-
96
-
97
-
98
-
99
-
 100
100 -
 101
101 -
 102
102 -
 103
103 -
 104
104 -
 105
105 -
 106
106 -
 107
107 -
 108
108 -
 109
109 -
 110
110 -
111
-
112
-
113
-
114
-
115
-
116
-
117
-
118
-
119
-
120
-
121
-
122
-
123
-
124
-
125
-
126
-
127
-
128
-
129
-
130
-
131
-
132
-
133
-
134
-
135
-
136
-
137
-
138
-
139
-
140
-
141
-
142
-
143
-
144
-
145
-
146
-
147
-
148
-
149
-
150
-
151
-
152
-
153
-
154
-
155
-
156
-
157
-
158
-
159
-
160
-
161
-
162
-
163
-
164
-
165
-
166
-
167
-
168
-
169
-
170
-
171
-
172
-
173
-
174
-
175
-
176
-
177
-
178
-
179
-
180
-
181
-
182
-
183
-
184
-
185
-
186
-
187
-
188
-
189
-
190
-
191
-
192
-
193
-
194
-
195
-
196
-
197
-
198
-
199
-
200
-
201
-
202
-
203
-
204
-
205
-
206
-
207
-
208
-
209
-
210
-
211
-
212
-
213
-
214
-
215
-
216
-
217
-
218
-
219
-
220
-
221
-
222
-
223
-
224
-
225
-
226
-
227
-
228
-
229
-
230
-
231
-
232
-
233
-
234
-
235
-
236
-
237
-
238
-
239
-
240
-
241
-
242
-
243
-
244
-
245
-
246
-
247
-
248
-
249
-
250
-
251
-
252
-
253
-
254
-
255
-
256
-
257
-
258
-
259
-
260
-
261
-
262
-
263
-
264
-
265
-
266
-
267
-
268
 |
 |
6Ć47
Removal and Replacement
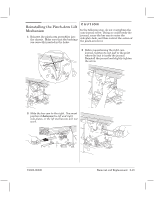
C4699Ć90000
Reinstalling the Overdrive
Enclosure
The order in which you replace the screws on
the overdrive enclosure is important.
CAUTION
Take care not to damage the mediaĆsensor
flags. The overdrive enclosure should not
touch them.
1
Replace the two indicated screws. (
Short
dogĆpoint screws.)
Torx-15
1
Torx-15
2
2
Insert the two indicated screws, but do
not tighten them. (
Long
dogĆpoint
screws.)
Torx-15
3
Torx-15
4
3
Replace the indicated screw and tighten
it, thus aligning the overdrive enclosure
with the left sideĆplate.
Torx-15
5
4
Tighten the screws you inserted in step 2.