Lexmark X6575 User's Guide (Mac) - Page 36
Performing copying and related tasks, Using the automatic paper type sensor, Making a copy
 |
UPC - 734646066440
View all Lexmark X6575 manuals
Add to My Manuals
Save this manual to your list of manuals |
Page 36 highlights
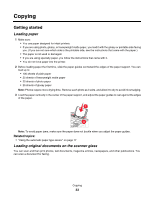
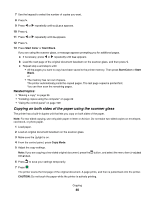
Load up to 25 sheets of: • Custom paper • Pre-punched paper • Reinforced edge copier paper • Preprinted forms • Letterhead paper Make sure • The document is loaded text side up. • The paper guide is against the edge of the paper. • The paper size fits within these dimensions: Width: - 210.0 mm-215.9 mm - 8.27 in.-8.5 in. Length: - 279.4 mm-355.6 mm - 11.0 in.-14.0 in. • You allow preprinted media to dry thoroughly before loading into the Automatic Document Feeder tray. • You do not use media printed with metallic ink particles. • You avoid embossed designs. Related topics: • "Understanding the parts of the printer" on page 106 Performing copying and related tasks Using the automatic paper type sensor The printer is equipped with an automatic paper type sensing device. The Paper Type Sensor automatically detects the type of paper that has been loaded into the printer and adjusts the settings for you. For example, if you want to print a photo, load photo paper into the printer. The printer detects the type of paper and automatically adjusts the settings to give you optimum photo-printing results. Making a copy 1 Load paper. 2 Load an original document facedown on the scanner glass. 3 From the control panel, press Copy Mode. 4 Press Start Color or Start Black. Related topics: • "Using the control panel" on page 109 • "Loading original documents on the scanner glass" on page 33 Copying photos 1 Load photo paper with the glossy or printable side facing you. (If you are not sure which side is the printable side, see the instructions that came with the paper.) 2 Place a photo facedown on the scanner glass in the lower right corner. For more information, see "Loading original documents on the scanner glass" on page 33. 3 From the control panel, press Copy Mode. 4 Press . Copying 36
-
 1
1 -
2
-
3
-
4
-
5
-
6
-
7
-
8
-
9
-
10
-
11
-
12
-
13
-
14
-
15
-
16
-
17
-
18
-
19
-
20
-
21
-
22
-
23
-
24
-
25
-
26
-
27
-
28
-
29
-
30
-
 31
31 -
 32
32 -
 33
33 -
 34
34 -
 35
35 -
 36
36 -
 37
37 -
 38
38 -
 39
39 -
 40
40 -
 41
41 -
42
-
43
-
44
-
45
-
46
-
47
-
48
-
49
-
50
-
51
-
52
-
53
-
54
-
55
-
56
-
57
-
58
-
59
-
60
-
61
-
62
-
63
-
64
-
65
-
66
-
67
-
68
-
69
-
70
-
71
-
72
-
73
-
74
-
75
-
76
-
77
-
78
-
79
-
80
-
81
-
82
-
83
-
84
-
85
-
86
-
87
-
88
-
89
-
90
-
91
-
92
-
93
-
94
-
95
-
96
-
97
-
98
-
99
-
100
-
101
-
102
-
103
-
104
-
105
-
106
-
107
-
108
-
109
-
110
-
111
-
112
-
113
-
114
-
115
-
116
-
117
-
118
-
119
-
120
-
121
-
122
-
123
-
124
-
125
-
126
-
127
-
128
-
129
-
130
-
131
-
132
-
133
-
134
-
135
-
136
-
137
-
138
-
139
-
140
-
141
-
142
-
143
-
144
-
145
-
146
-
147
-
148
-
149
-
150
-
151
-
152
-
153
-
154
-
155
-
156
-
157
-
158
-
159
-
160
-
161
-
162
-
163
-
164
-
165
-
166
-
167
-
168
-
169
-
170
-
171
-
172
-
173
-
174
-
175
-
176
-
177
-
178
-
179
-
180
-
181
-
182
-
183
-
184
-
185
-
186
-
187
-
188
-
189
-
190
-
191
-
192
-
193
-
194
-
195
-
196
-
197
-
198
-
199
-
200
-
201
-
202
-
203
-
204
-
205
-
206
-
207
-
208
-
209
-
210
-
211
-
212
-
213
-
214
-
215
-
216
-
217
 |
 |
