Netgear DGN2200M DGN2200M User Manual (PDF) - Page 45
Setting Your Time Zone, Scheduling Firewall Services, Adjust for Daylight, Savings Time - port forwarding
 |
UPC - 606449072433
View all Netgear DGN2200M manuals
Add to My Manuals
Save this manual to your list of manuals |
Page 45 highlights
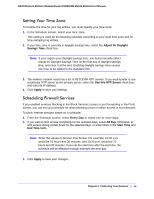
N300 Wireless ADSL2+ Modem Router DGN2200M Mobile Edition User Manual Setting Your Time Zone To localize the time for your log entries, you must specify your time zone: 1. In the Schedule screen, select your time zone. This setting is used for the blocking schedule according to your local time zone and for time-stamping log entries. 2. If your time zone is currently in daylight savings time, select the Adjust for Daylight Savings Time check box. Note: If your region uses daylight savings time, you must manually select Adjust for Daylight Savings Time on the first day of daylight savings time, and clear it at the end. Enabling daylight savings time causes one hour to be added to the standard time. 3. The wireless modem router has a list of NETGEAR NTP servers. If you would prefer to use a particular NTP server as the primary server, select the Use this NTP Server check box, and enter its IP address. 4. Click Apply to save your settings. Scheduling Firewall Services If you enabled services blocking in the Block Services screen or port forwarding in the Ports screen, you can set up a schedule for when blocking occurs or when access is not restricted. To block Internet services based on a schedule: 1. From the Schedule screen, select Every Day or select one or more days. 2. If you want to limit access completely for the selected days, select All Day. Otherwise, to limit access during certain times for the selected days, or enter times in the Start Time and End Time fields. Note: Enter the values in 24-hour time format. For example, 10:30 a.m. would be 10 hours and 30 minutes, and 10:30 p.m. would be 22 hours and 30 minutes. If you set the start time after the end time, the schedule will be effective through midnight the next day. 3. Click Apply to save your changes. Chapter 3. Protecting Your Network | 45
-
 1
1 -
2
-
3
-
4
-
5
-
6
-
7
-
8
-
9
-
10
-
11
-
12
-
13
-
14
-
15
-
16
-
17
-
18
-
19
-
20
-
21
-
22
-
23
-
24
-
25
-
26
-
27
-
28
-
29
-
30
-
31
-
32
-
33
-
34
-
35
-
36
-
37
-
38
-
39
-
 40
40 -
 41
41 -
 42
42 -
 43
43 -
 44
44 -
 45
45 -
 46
46 -
 47
47 -
 48
48 -
 49
49 -
 50
50 -
51
-
52
-
53
-
54
-
55
-
56
-
57
-
58
-
59
-
60
-
61
-
62
-
63
-
64
-
65
-
66
-
67
-
68
-
69
-
70
-
71
-
72
-
73
-
74
-
75
-
76
-
77
-
78
-
79
-
80
-
81
-
82
-
83
-
84
-
85
-
86
-
87
-
88
-
89
-
90
-
91
-
92
-
93
-
94
-
95
-
96
-
97
-
98
-
99
-
100
-
101
-
102
-
103
-
104
-
105
-
106
-
107
-
108
-
109
-
110
-
111
-
112
-
113
-
114
-
115
-
116
-
117
-
118
-
119
-
120
-
121
-
122
-
123
 |
 |
