Netgear R7900P User Manual - Page 12
Ports, Buttons, and Connectors on the Back Panel, Table 2. LED and button descriptions Continued - factory reset
 |
View all Netgear R7900P manuals
Add to My Manuals
Save this manual to your list of manuals |
Page 12 highlights
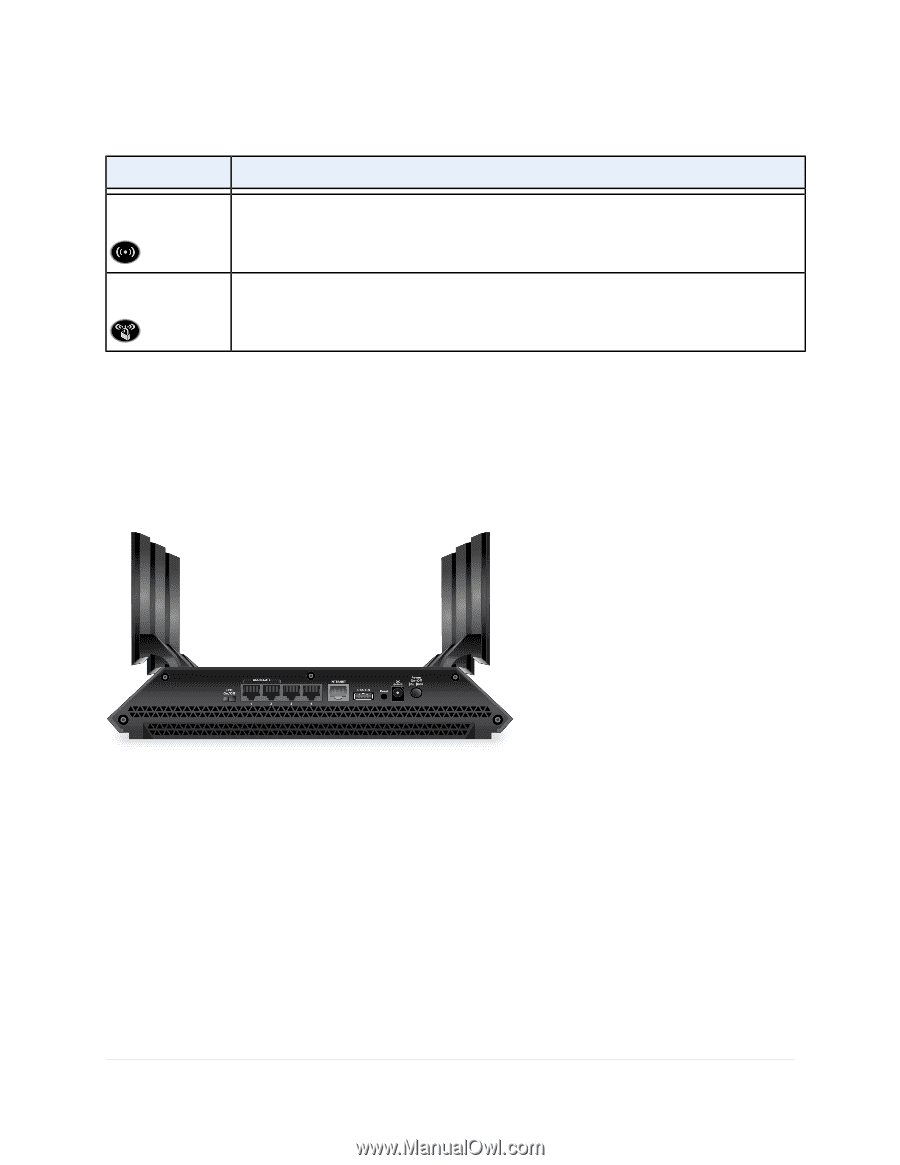
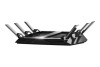
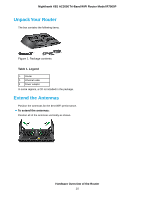
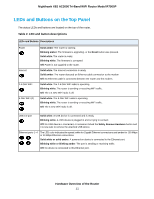
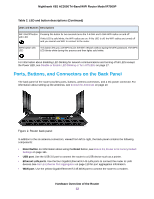
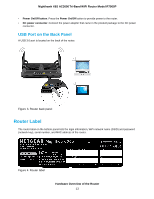
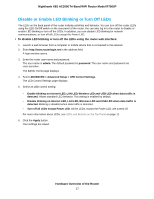
Nighthawk X6S AC3000 Tri-Band WiFi Router Model R7900P Table 2. LED and button descriptions (Continued) LEDs and Buttons Descriptions WiFi On/Off button with LED Pressing this button for two seconds turns the 2.4 GHz and 5 GHz WiFi radios on and off. If this LED is solid white, the WiFi radios are on. If this LED is off, the WiFi radios are turned off and you cannot use WiFi to connect to the router. WPS button with LED This button lets you use WPS to join the WiFi network without typing the WiFi password. The WPS LED blinks white during this process and then lights solid white. For information about disabling LED blinking for network communications and turning off all LEDs except the Power LED, see Disable or Enable LED Blinking or Turn Off LEDs on page 17. Ports, Buttons, and Connectors on the Back Panel The back panel of the router provides ports, buttons, antenna connectors, and a DC power connector. For information about setting up the antennas, see Extend the Antennas on page 10. Figure 2. Router back panel In addition to the six antenna connectors, viewed from left to right, the back panel contains the following components: • Reset button. For information about using the Reset button, see Return the Router to Its Factory Default Settings on page 141. • USB port. Use the USB 3.0 port to connect the router to a USB device such as a printer. • Ethernet LAN ports. Use the four Gigabit Ethernet RJ-45 LAN ports to connect the router to LAN devices.See Set Up Ethernet Port Aggregation on page 119 for port aggregation information. • WAN port. Use the yellow Gigabit Ethernet RJ-45 WAN port to connect the router to a modem. Hardware Overview of the Router 12
-
 1
1 -
2
-
3
-
4
-
5
-
6
-
 7
7 -
 8
8 -
 9
9 -
 10
10 -
 11
11 -
 12
12 -
 13
13 -
 14
14 -
 15
15 -
 16
16 -
 17
17 -
18
-
19
-
20
-
21
-
22
-
23
-
24
-
25
-
26
-
27
-
28
-
29
-
30
-
31
-
32
-
33
-
34
-
35
-
36
-
37
-
38
-
39
-
40
-
41
-
42
-
43
-
44
-
45
-
46
-
47
-
48
-
49
-
50
-
51
-
52
-
53
-
54
-
55
-
56
-
57
-
58
-
59
-
60
-
61
-
62
-
63
-
64
-
65
-
66
-
67
-
68
-
69
-
70
-
71
-
72
-
73
-
74
-
75
-
76
-
77
-
78
-
79
-
80
-
81
-
82
-
83
-
84
-
85
-
86
-
87
-
88
-
89
-
90
-
91
-
92
-
93
-
94
-
95
-
96
-
97
-
98
-
99
-
100
-
101
-
102
-
103
-
104
-
105
-
106
-
107
-
108
-
109
-
110
-
111
-
112
-
113
-
114
-
115
-
116
-
117
-
118
-
119
-
120
-
121
-
122
-
123
-
124
-
125
-
126
-
127
-
128
-
129
-
130
-
131
-
132
-
133
-
134
-
135
-
136
-
137
-
138
-
139
-
140
-
141
-
142
-
143
-
144
-
145
-
146
-
147
-
148
-
149
-
150
-
151
-
152
-
153
-
154
-
155
-
156
-
157
-
158
-
159
-
160
-
161
-
162
-
163
-
164
-
165
-
166
-
167
-
168
-
169
-
170
-
171
-
172
-
173
-
174
-
175
-
176
-
177
-
178
-
179
-
180
-
181
-
182
-
183
-
184
-
185
-
186
-
187
-
188
-
189
 |
 |