Netgear R7900P User Manual - Page 5

Share a Storage Device Attached to the Router, Use the Router as a Media Server
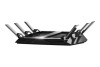
Page 5 highlights

Nighthawk X6S AC3000 Tri-Band WiFi Router Model R7900P Configure WPA and WPA2 Enterprise WiFi Security 77 Use WPS to Add a Device to the WiFi Network 79 Use WPS With the Push Button Method 79 Use WPS With the PIN Method 80 Manage the Basic WiFi Settings and WiFi Security of the Guest Network..........81 Control the WiFi Radios 84 Use the WiFi On/Off Button 84 Enable or Disable the WiFi Radios 84 Chapter 8 Share a Storage Device Attached to the Router USB Device Requirements 87 Connect a USB Device to the Router 87 Access a Storage Device Connected to the Router 88 Access the Storage Device From a Windows-Based Computer 88 Access the Storage Device From a Mac 88 Map a USB Device to a Windows Network Drive 89 Back Up Windows-Based Computers With ReadySHARE Vault 90 Back Up Mac Computers With Time Machine 90 Set Up a Storage Device on a Mac 90 Prepare to Back Up a Large Amount of Data 91 Use Time Machine to Back Up Onto a Storage Device 92 Manage Access to a Storage Device 93 Enable FTP Access Within Your Network 94 View Network Folders on a Device 95 Add a Network Folder on a Storage Device 96 Change a Network Folder, Including Read and Write Access, on a USB Drive....97 Approve USB Devices 97 Safely Remove a USB Device 98 Chapter 9 Use the Router as a Media Server Specify ReadyDLNA Media Server Settings 101 Play Music From a Storage Device With iTunes Server 102 Chapter 10 Share a USB Printer Install the Printer Driver and Cable the Printer 105 Download the ReadySHARE Printer Utility 105 Install the ReadySHARE Printer Utility 105 Use the Shared Printer 106 Manually Connect and Print 106 Print and Release the Printer 106 View or Change the Status of a Printer 107 Use the Scan Feature of a Multifunction USB Printer 108 Manage the NETGEAR USB Control Center Settings 108 Turn Off Automatic Startup of the NETGEAR USB Control Center 108 Change the NETGEAR USB Control Center Language 109 Specify the USB Control Center Time-Out 109 5

  • 1
  • 2
  • 3
  • 4
  • 5
  • 6
  • 7
  • 8
  • 9
  • 10
  • 11
  • 12
  • 13
  • 14
  • 15
  • 16
  • 17
  • 18
  • 19
  • 20
  • 21
  • 22
  • 23
  • 24
  • 25
  • 26
  • 27
  • 28
  • 29
  • 30
  • 31
  • 32
  • 33
  • 34
  • 35
  • 36
  • 37
  • 38
  • 39
  • 40
  • 41
  • 42
  • 43
  • 44
  • 45
  • 46
  • 47
  • 48
  • 49
  • 50
  • 51
  • 52
  • 53
  • 54
  • 55
  • 56
  • 57
  • 58
  • 59
  • 60
  • 61
  • 62
  • 63
  • 64
  • 65
  • 66
  • 67
  • 68
  • 69
  • 70
  • 71
  • 72
  • 73
  • 74
  • 75
  • 76
  • 77
  • 78
  • 79
  • 80
  • 81
  • 82
  • 83
  • 84
  • 85
  • 86
  • 87
  • 88
  • 89
  • 90
  • 91
  • 92
  • 93
  • 94
  • 95
  • 96
  • 97
  • 98
  • 99
  • 100
  • 101
  • 102
  • 103
  • 104
  • 105
  • 106
  • 107
  • 108
  • 109
  • 110
  • 111
  • 112
  • 113
  • 114
  • 115
  • 116
  • 117
  • 118
  • 119
  • 120
  • 121
  • 122
  • 123
  • 124
  • 125
  • 126
  • 127
  • 128
  • 129
  • 130
  • 131
  • 132
  • 133
  • 134
  • 135
  • 136
  • 137
  • 138
  • 139
  • 140
  • 141
  • 142
  • 143
  • 144
  • 145
  • 146
  • 147
  • 148
  • 149
  • 150
  • 151
  • 152
  • 153
  • 154
  • 155
  • 156
  • 157
  • 158
  • 159
  • 160
  • 161
  • 162
  • 163
  • 164
  • 165
  • 166
  • 167
  • 168
  • 169
  • 170
  • 171
  • 172
  • 173
  • 174
  • 175
  • 176
  • 177
  • 178
  • 179
  • 180
  • 181
  • 182
  • 183
  • 184
  • 185
  • 186
  • 187
  • 188
  • 189

Configure WPA and WPA2 Enterprise WiFi Security
.......................................
77
Use WPS to Add a Device to the WiFi Network
...................................................
79
Use WPS With the Push Button Method
.........................................................
79
Use WPS With the PIN Method
.......................................................................
80
Manage the Basic WiFi Settings and WiFi Security of the Guest Network
..........
81
Control the WiFi Radios
.......................................................................................
84
Use the WiFi On/Off Button
.............................................................................
84
Enable or Disable the WiFi Radios
..................................................................
84
Chapter 8 Share a Storage Device Attached to the Router
USB Device Requirements
..................................................................................
87
Connect a USB Device to the Router
...................................................................
87
Access a Storage Device Connected to the Router
.............................................
88
Access the Storage Device From a Windows-Based Computer
.....................
88
Access the Storage Device From a Mac
.........................................................
88
Map a USB Device to a Windows Network Drive
.................................................
89
Back Up Windows-Based Computers With ReadySHARE Vault
.........................
90
Back Up Mac Computers With Time Machine
......................................................
90
Set Up a Storage Device on a Mac
.................................................................
90
Prepare to Back Up a Large Amount of Data
..................................................
91
Use Time Machine to Back Up Onto a Storage Device
...................................
92
Manage Access to a Storage Device
...................................................................
93
Enable FTP Access Within Your Network
.............................................................
94
View Network Folders on a Device
......................................................................
95
Add a Network Folder on a Storage Device
.........................................................
96
Change a Network Folder, Including Read and Write Access, on a USB Drive
....
97
Approve USB Devices
..........................................................................................
97
Safely Remove a USB Device
..............................................................................
98
Chapter 9 Use the Router as a Media Server
Specify ReadyDLNA Media Server Settings
......................................................
101
Play Music From a Storage Device With iTunes Server
.....................................
102
Chapter 10 Share a USB Printer
Install the Printer Driver and Cable the Printer
..................................................
105
Download the ReadySHARE Printer Utility
........................................................
105
Install the ReadySHARE Printer Utility
..............................................................
105
Use the Shared Printer
......................................................................................
106
Manually Connect and Print
..........................................................................
106
Print and Release the Printer
........................................................................
106
View or Change the Status of a Printer
..............................................................
107
Use the Scan Feature of a Multifunction USB Printer
........................................
108
Manage the NETGEAR USB Control Center Settings
.......................................
108
Turn Off Automatic Startup of the NETGEAR USB Control Center
...............
108
Change the NETGEAR USB Control Center Language
................................
109
Specify the USB Control Center Time-Out
....................................................
109
5
Nighthawk X6S AC3000 Tri-Band WiFi Router Model R7900P